• Skip to primary navigation
  • Skip to main content
  • Skip to primary sidebar
  • Skip to footer

GF-Zing! logo

  • Home
  • Coupon Collection
  • GF Foods & Groups
  • Ask Gf-Zing!
    • About the Author
    • About Gf-Zing!
  • Nav Social Menu

    • Email
    • Facebook

Dessert

Butterscotch Tapioca with Toasted Coconut

0 · Feb 12, 2006 ·

This recipe was developed by Gf-Zing! , which celebrates flavor in the gluten free world.

First, prepare the brown sugar:

In a small frying pan, brown 1 Tablespoon butter until light brown, then add 1/2 cup dark brown sugar and melt the sugar into the butter. Do not burn. Set aside.

2 3/4 cups 1 % milk
3 Tablespoons Minute Tapioca
1/8 teaspoon sea salt
1 egg

Mix this in a 2 quart saucepan and let sit for 5 minutes. Then cook over medium heat, stirring constantly, until it comes to a boil.

Add the brown sugar mixture in to the tapioca and stir to mix completely. Add 1 teaspoon GF vanilla and stir again. Pour tapioca in to a serving dish and chill completely.

Serve with toasted coconut sprinkled on each serving. Toasted coconut is obtained by spreading a layer of gluten free baking coconut on a cookie sheet or pie plate and baking at 350 for 10-12 minutes, until lightly browned.

Make sure all your ingredients are gluten free!

  • delicious Bookmark on Delicious
  • digg Digg this post
  • facebook Recommend on Facebook
  • reddit share via Reddit
  • stumble Share with Stumblers
  • twitter Tweet about it
  • rss Subscribe to the comments on this post

Dessert, Fall, Recipes, Winter

Valentine Cookies – raspberry

0 · Jan 29, 2006 · Leave a Comment

Make a recipe of gluten free sugar cookies, and roll and cut 1/4″ thick into valentine heart shapes. Cut a center out of half the cookies (these will be the tops of the sandwich cookies). Bake as directed.

Dust the top cookies (the ones with the center cut-out) with gluten free confectioner’s sugar.

Spread the bottom cookies with raspberry jam (we prefer seedless), and top each with a cookie that has a center cutout – this will allow the jam to show through.

A pretty, gluten free cookie for Valentine’s Day!

  • delicious Bookmark on Delicious
  • digg Digg this post
  • facebook Recommend on Facebook
  • reddit share via Reddit
  • stumble Share with Stumblers
  • twitter Tweet about it
  • rss Subscribe to the comments on this post

Cookies, Dessert, Holidays, Recipes

Carrot Cake – gluten free!

1 · Jan 20, 2006 · Leave a Comment

The cake is dairy free, although the icing contains dairy. The recipe was adapted and made accessible to the gluten free community by Gf-Zing! , which celebrates flavor in the gluten free world.

Dry ingredients:

2 cups gluten free cookie flour
2 teaspoons gluten free baking powder
1/2 teaspoon baking soda
1/2 teaspoon salt
1 teaspoon cinnamon

Other ingredients:

3/4 cup vegetable oil
2 cups white sugar
4 large eggs
2 cups coarsley grated carrots (4-5 carrots needed)
1 cup crushed pineapple (drained before measuring)
2 teaspoons freshly grated ginger
1 teaspoon vanilla (or 1/2 teaspoon Authentic Foods powdered vanilla)
3/4 cup dried sweetened cranberries or raisins (make sure these are gluten free)

Oven temperature is 350.

Grease two 9 inch round cake pans liberally and dust them mochiko flour (sweet rice flour).

Combine dry ingredients in one bowl. Add the berries or raisins and set aside.

In another bowl, or the food processor, cream the oil and sugar with the 4 eggs. Then add the carrots, pineapple, ginger, vanilla.

Add the wet mixture to the dry ingredients and fruit. Do this in the bowl, not the food processor, as the food processor would dice up all the berries and fruit.

Spread the dough evenly between the two prepared pans and bake for 35 or more minutes, until a knife tests clean when inserted near the center of the pans.

Remove the cakes to racks to cool for ten minutes, then remove from the pans.

Frost with Cream Cheese Icing:

Cream together:

8 ounces gluten free cream cheese
1 stick of butter
1 Tablespoon brandy
1/4 teaspoon powdered gluten free vanilla (Authentic Foods brand)
1 box (4 1/2 -5 cups) confectioner’s sugar

Frost the bottom layer of the cake, put the second layer on top. Frost the top and the sides with remaining icing.

This makes a substantial and large cake which will feed 16.

Make sure all your ingredients are gluten free!
  • delicious Bookmark on Delicious
  • digg Digg this post
  • facebook Recommend on Facebook
  • reddit share via Reddit
  • stumble Share with Stumblers
  • twitter Tweet about it
  • rss Subscribe to the comments on this post

Dairy Free, Dessert, Recipes

Key Lime Pie – gluten free and dairy free

0 · Jan 18, 2006 · 5 Comments

This recipe was developed by Gf-Zing! , which celebrates flavor in the gluten free world.

Make a 9 inch gluten free pie crust, and pre-bake it at 350 degrees for 20 minutes or until it is as brown as you like it. Set the pie shell aside to cool.

Filling:

1 cup sugar
1/4 cup gluten free gravy flour (see below)
3 Tablespoons cornstarch
1/4 teaspoon salt
2 cups water
4 egg yolks, beaten
1 tablespoon butter or gluten free vegan margarine
1/4 cup fresh squeezed key lime juice (requires 8-10 tiny key limes or 4 regular limes)
1 teaspoon finely grated lime zest


Meringue:

4 egg whites
1/4 teaspoon cream of tartar (to stabilize the meringue)
6 teaspoons sugar
1 teaspoon vanilla

Combine the sugar, gluten free gravy flour, cornstarch and salt in a 2-quart saucepan. Gradually stir in the 2 cups of water. Cook at medium heat, stirring constantly with a whisk, until thickened. At this point, it will taste bland. Don’t taste it now.

Stir a small amount of the hot mixture in to the egg yolks, then a little more, then a little more, until half the hot mixture has been added to the yolks. Combine the yolk mixture with the rest of the mixture in the saucepan, whisking constantly and cooking for two minutes. Whisk in the butter or margarine. The aim of this process is to mix everything without getting lumps of hard-boiled egg yolk. Stir in the key lime juice and zest. Cool slightly, then pour in to the cooked pie shell.

Preheat the oven to 350 degrees. Beat the egg whites and cream of tartar for the meringue using a hand beater or an electric beater until the whites form soft peaks that hold their shape. Gradually beat in the sugar and the vanilla until the meringue is glossy and holds well. Spread the meringue carefully all over the pie to cover the pie completely. Bake the pie for 6 minutes, or slightly longer, to brown the top of the meringue. Cool the pie completely before serving.


Gluten Free Gravy Flour:

Mix these ingredients together and use what you need:

6 Tablespoons brown rice flour
2 1/4 Tablespoons sweet rice flour (mochiko)
4 1/2 teaspoons tapioca starch
1 teaspoon of xantham gum

Use all gluten-free ingredients!

  • delicious Bookmark on Delicious
  • digg Digg this post
  • facebook Recommend on Facebook
  • reddit share via Reddit
  • stumble Share with Stumblers
  • twitter Tweet about it
  • rss Subscribe to the comments on this post

*Most Popular Recipes*, Dairy Free, Dessert, Pie, Recipes

Double Chocolate Cherry Cookies – gluten free

0 · Jan 18, 2006 · Leave a Comment

This recipe was developed by Gf-Zing! , which celebrates flavor in the gluten free world.

1 cup gluten free butter or vegan margarine
1 cup white sugar
1/2 cup dark brown sugar
1 egg
1 teaspoon vanilla

1 3/4 cups gluten free cookie flour
1/3 cup gluten free unsweetened cocoa powder
1/2 teaspoon gluten free baking powder
1/2 teaspoon salt

2 cups gluten free semi-sweet chocolate chips
3/4 cups chopped dried cherries (Rainier cherries are good)

Oven at 350 degrees.

Cream the butter 0r margarine (or one stick of each) with the two sugars and the vanilla until light and “fluffy.” Beat in the egg. Mix the dry ingredients in a separate bowl and add them to the creamed mixture. Mix thoroughly. Up to this point in the recipe you can use a food processor to do the mixing.

Stir in the chocolate chips and the cherries.

Drop tablespoons of dough on a silpat lined cookie sheet. Flatten them slightly with your hand or with the bottom of a glass that you dip repeatedly in sugar.

Bake the cookies for 11-12 minutes, then remove the cookie sheet from the oven and allow the cookies to cool for 2 minutes on the pan before removing them to a rack to cool completely.

This recipe will make a 3 dozen cookies or so, and they will be eaten so fast you will have to make more right away!

Be sure to use all gluten-free ingredients!

  • delicious Bookmark on Delicious
  • digg Digg this post
  • facebook Recommend on Facebook
  • reddit share via Reddit
  • stumble Share with Stumblers
  • twitter Tweet about it
  • rss Subscribe to the comments on this post

Christmas, Cookies, Dairy Free, Dessert, Holidays, Recipes

Sour Cream Apple Pecan Cake

0 · Dec 31, 2005 ·

Since we can’t have gluten, why not have some vanilla ice cream with our breakfast instead? This cake is good, with or without added vanilla ice cream. It is pretty darned sweet – not so sweet that it makes your teeth hurt, but almost.

Mix in a food processor, and then transfer to a large bowl:

2 cups gluten free cookie flour
1/2 cup (1 stick) unsalted butter
2 cups dark brown sugar
1 cup finely chopped toasted pecans (toast them in a 300 degree oven for 10-15 minutes, cool, then chop)
1/4 teaspoon xantham gum

Remove 2 3/4 cups of this mixture and pat it evenly into an ungreased 9×13 inch baking pan. Set aside.

To the remaining dry ingredients, add the following and combine thoroughly:

2 teaspoons gluten free cinnamon
1 teaspoon baking soda
1/2 teaspoon salt
1 cup gluten free sour cream
1 teaspoon gluten free vanilla
1 egg

Lastly, to this mixture add:

2 cups finely chopped apples (peel first)

Carefully plop spoonfulls of this mixture over the stuff that is in the 9×13 pan that you set aside earlier. Spread the gooey dough carefully over the dry layer.

Bake for 30-35 minutes at 350 degrees until a toothpick comes out clean. Cool in the pan, then cut in large squares and serve it slightly warm with gluten free vanilla ice cream. At the time of this writing, Haagen-Dazs claims gluten free status for its vanilla ice cream, but the consumer must check frequently to see if the company has changed their formulations.

Note: The bottom “crust” improves the structural integrity of this cake, and produces an interesting textural contrast.


Always use all gluten free ingredients!

  • delicious Bookmark on Delicious
  • digg Digg this post
  • facebook Recommend on Facebook
  • reddit share via Reddit
  • stumble Share with Stumblers
  • twitter Tweet about it
  • rss Subscribe to the comments on this post

Breakfast, Dessert, Fall, Recipes, Winter

Ginger Biscuits or Cookies

0 · Dec 28, 2005 · Leave a Comment

All those gluten-free cookies need to have the spice and flavor component enhanced, as spices and flavors tend to disappear into the rice flour…..Here is a good way to obtain a nice, strongly ginger-flavored cookie – a recipe from Gf-Zing!

You will need Miss Roben’s Mock Graham Cracker Cookie mix for this recipe.

Put the contents of 1 package of Miss Roben’s Mock Graham Cracker mix in a large bowl.

Add:

2 teaspoons gluten free ground ginger
1 teaspoon freshly grated lemon zest
3/4 cup minced crystallized ginger

Now, follow the instructions on the Miss Roben’s Graham Cracker mix bag, adding the honey, vanilla, butter, and water. Do not leave out the honey – use a fresh, local honey for extra good flavor.

Roll out the dough between pieces of waxed paper dusted with confectioner’s sugar, until the dough is about 1/4 inch thick. Cut with cookie cutters or a small glass. You can prick the cookies with a fork or press them with a ceramic cookie stamp – both methods will make nice designs on these cookies.

Bake the cookies as per the instructions on the Miss Roben’s bag. If you cook them longer they get darker and crunchier. They will keep for a long time in a cookie jar, and are excellent with coffee or tea.

Your friends in the glutenated world will want this recipe!

Make sure that you use all gluten-free ingredients!

  • delicious Bookmark on Delicious
  • digg Digg this post
  • facebook Recommend on Facebook
  • reddit share via Reddit
  • stumble Share with Stumblers
  • twitter Tweet about it
  • rss Subscribe to the comments on this post

Christmas, Cookies, Dessert, Holidays, Recipes

Sugar Cookies – gluten free

0 · Dec 12, 2005 ·

Here at Gf-Zing!, we decided that sugar cookies are a little bit like pie crust without the pie, so why not use a gluten free pastry flour to make the cookies?

Gluten free baking can produce a pretty bland product. This sugar cookie dough has extra -strong vanilla flavor, due to the addition of Authentic Foods Vanilla Powder. Authentic Foods is located in Gardena, California.

2 1/2 cups gluten free dream pastry flour (see below)
3/4 teaspoon salt
1 1/2 sticks butter
3/4 cup sugar
1 large egg
1 teaspoon liquid GF vanilla extract
1/2 teaspoon powdered GF vanilla (Authentic Foods makes such a product)

confectioner’s sugar for rolling

Cream the butter and sugar with the liquid vanilla extract. Mix the gluten free flour, salt and powdered gluten free vanilla in a separate bowl. Add the egg to the butter mixture. Mix thoroughly. Then add the dry ingredients. Form in to a ball and refrigerate for one hour at least. You can use a food processor for mixing this dough.

Roll out the dough to 1/4″ thickness between two sheets of wax paper. If you need to “flour” the wax paper to keep the dough from sticking, use liberal amounts of confectioner’s sugar. Cut out the cookies, using a cookie cutter and transfer them to a silpat lined cookie sheet.

Bake in a preheated oven 350 degrees for 10-12 minutes or more, until they are as brown as you like them.

“Dream pastry flour” is from Bette Hagman’s cookbooks, and the recipe is also available on the internet. It is meant for use in pie crusts:

2 cups tapioca starch
2 cups cornstarch
1 cup potato starch (not potato flour)
4 cups mochiko (sweet rice flour)
4 teaspoons xantham gum
2 teaspoons sugar
2 teaspoons salt

Mix these ingredients really thoroughly, either in a large bowl, bag or jar, and store in an airtight container.

Gf-Zing! recommends using all gluten free ingredients.

  • delicious Bookmark on Delicious
  • digg Digg this post
  • facebook Recommend on Facebook
  • reddit share via Reddit
  • stumble Share with Stumblers
  • twitter Tweet about it
  • rss Subscribe to the comments on this post

Christmas, Cookies, Dessert, Holidays, Recipes

Apple Pecan Breakfast Cake

0 · Dec 10, 2005 ·

This recipe for a very moist breakfast cake comes from the specific carbohydrate diet. It has been adjusted by Gf-Zing! to include some gluten free flour. It contains no white sugar, using only honey as a sweetener.

In a large bowl, mix up and set aside:

2 cups finely ground pecans
1 cup gluten free cookie flour mix
3 cups coarsely grated baking apples

In a food processor, mix well:

2/3 cup honey
1/3 cup butter
1/2 teaspoon salt
4 large eggs
2 teaspoons cinnamon
1/2 teaspoon ground cloves
1 teaspoon freshly grated nutmeg
1 teaspoon baking soda

Grease a heavy bundt pan extremely well. Mix the contents of the food processor with the apples, ground pecans and gluten free flour. Pour the batter into the prepared bundt pan. Bake for one hour at 350 degrees, until cake tester or toothpick comes out clean. The edges of the cake will be pulled away from the sides of the pan some, and the top will be brown.

Let cool for 10 minutes, then loosen the edges of the cake from the pan if necessary and turn the cake out on a rack to cool.

Use all gluten-free ingredients!

  • delicious Bookmark on Delicious
  • digg Digg this post
  • facebook Recommend on Facebook
  • reddit share via Reddit
  • stumble Share with Stumblers
  • twitter Tweet about it
  • rss Subscribe to the comments on this post

Bread, Breakfast, Dessert, Recipes, Spring, Winter

Lemon Rice Pudding

0 · Dec 10, 2005 · Leave a Comment

In a large bowl, mix the following ingredients:

2 eggs
1/3 cup brown sugar
1/4 teaspoon finely grated fresh lemon zest
2 Tablespoons fresh lemon juice
1/4 teaspoon gluten free vanilla

Cook one cup of dry, long-grain rice with 1/2 teaspoon of salt, until done. You can use a rice cooker, or do it on top of the stove. While the cooked rice is still very hot, stir it quickly and vigorously into the bowl with the eggs and seasonings. Stir quickly so the eggs don’t cook before the mixture is all mixed up. The hot rice will cook the eggs.

Transfer to a serving dish; sprinkle the top with gluten free cinnamon.

Cool the pudding to room temperature or colder before serving.
Make sure all your ingredients are gluten free.

The original version of this recipe is from Still Life With Menu, by Molly Katzen, published in 1988.

  • delicious Bookmark on Delicious
  • digg Digg this post
  • facebook Recommend on Facebook
  • reddit share via Reddit
  • stumble Share with Stumblers
  • twitter Tweet about it
  • rss Subscribe to the comments on this post

Breakfast, Dairy Free, Dessert, Fall, Recipes, Rice, Winter

Almond Paste – homemade and gluten free!

0 · Dec 9, 2005 ·

We don’t know if commercial almond paste is gluten free or not – it is often made with glucose derived from wheat or barley, and some members of the gluten free community avoid commercial almond paste. Here is how to make your own gluten free almond paste for baking cakes and cookies. Almond paste made at home does not have as intense an almond flavor as the commercial product because it does not contain bitter almond. This recipe has been developed and tested for the gluten free community by Gf-Zing!

1 pound shelled, blanched, peeled almonds (simply put, the almonds look whitish in color, with no brown skin on them – it doesn’t matter if they are whole or slivered)
3 1/2 cups gluten free confectioner’s sugar
2-3 egg whites

Grind the nuts in a food processor with a sharp blade until they are almost turning to the consistency of peanut butter. (This is a perfect opportunity to use one of the original Cuisinarts that turned everything to mush and slush.)  After grinding the almonds to a paste, add the sugar and 2 egg whites. Process until the mixture forms a uniform ball. Add the third egg white only if you have to. You will probably need to separate the mixture into two batches to process the paste. If that is the case, mix the almonds and sugar, divide it in half, then add one egg white to each half. That is the best way.

This almond paste will work for baked goods. Do not eat it raw, as it contains raw eggs.

It will keep for less than a week in the refrigerator, so use it quickly. To use it in recipes, weigh out amounts with a kitchen scale.

Make sure all your ingredients are gluten free.

  • delicious Bookmark on Delicious
  • digg Digg this post
  • facebook Recommend on Facebook
  • reddit share via Reddit
  • stumble Share with Stumblers
  • twitter Tweet about it
  • rss Subscribe to the comments on this post

Christmas, Cookies, Dessert, Holidays, Recipes

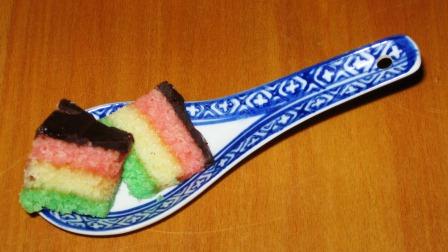
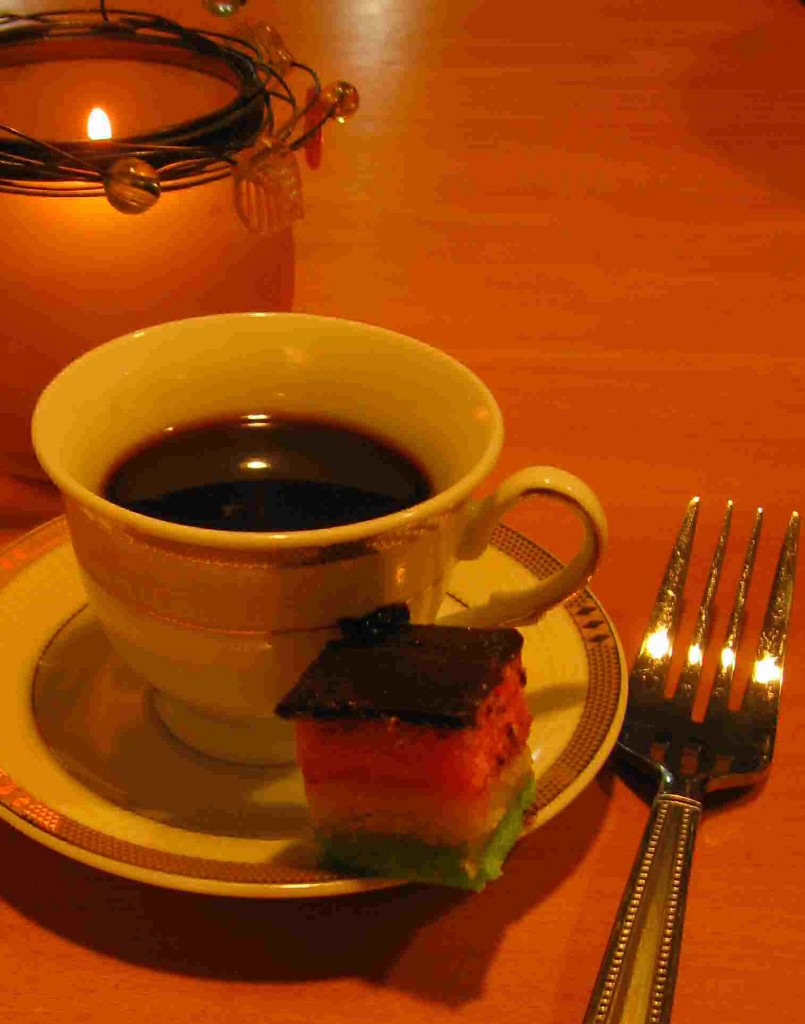
Venetian Christmas Cookie/Neapolitan Three-Colored Cakes

0 · Dec 9, 2005 · Leave a Comment

venetian cake

Three-colored cake - gluten free

One of the greatest gluten-free interests we had was recreating this Christmas cookie. We first encountered it in Better Homes and Gardens magazine in the 1970s. Back then, the recipe called for 10 drops of green food coloring and 8 drops of red (for the different colored layers). Now, in the December issue of Gourmet (2005), the same recipe has appeared under the name of Seven-Layer Cookies, but with 25 drops of each color of food coloring and with chocolate icing on both the top and the bottom. This larger amount of food coloring produces a much more garish cookie. With the bright colors and chocolate icing on top and bottom, it seems like the three-car garage of cookiedom. We prefer the original, smaller amounts of food coloring, and chocolate only on the top. Gf-Zing! presents the recipe here, adapted for gluten free cooking with gf flour and extra almond extract to make up for the flavorless rice flour, and including a link to how to make your own almond paste.

8 ounces gluten free almond paste
3 sticks butter
1 cup sugar
4 eggs, separated
1 1/2 teaspoons almond extract
2 cups gluten free cookie flour mix
1/4 teaspoon salt
10 drops green food coloring
8 drops red food coloring
12 ounces apricot preserves
4 ounces gluten free semisweet chocolate

You need 3 pans, each 9×13″ to make these cookies, or use the same one over and over.

Grease the three pans, line them with wax paper, and grease the wax paper.

In your food processor, mix the almond paste, sugar, egg yolks, butter, almond extract and salt. Beat for 5 minutes, until the mixture is really smooth. Add the gluten free cookie flour and mix well.

In a separate bowl, beat the egg whites until they form stiff peaks. Fold the dough from the food processor into the egg whites.

Remove 1 1/2 cups of the batter and spread it all over the bottom of one of the three prepared pans. Remove another 1 1/2 cups of batter to a separate bowl, add the green food coloring and spread the green batter in a second pan. To the last remaining batter, add the red coloring. Spread this red batter in the third pan. The batter spread in the pans will be very thin – only a quarter of an inch or so.

Bake in a preheated oven 350 degrees for fifteen minutes. The dough will start to pull away from the edges, and start to brown around the edges. The top will be springy to the touch. Remove the pans from the oven and set aside.

Melt the 12 ounces of jam in a pan. Some of the recipes for this cookie call for straining the jam, but this is not necessary. Enjoy the lumps! Turn out the green cake on a flat cookie sheet that is lined with tin foil or some other durable material. Spread half the jam on the green cake. Top with the plain colored cake. Spread the remaining jam on the plain colored cake. Top with the red cake. Put a piece of plastic wrap on the top of the red layer. Put a cookie sheet on top. Place canned goods, or heavy weights, around the cookie sheet to weigh down the cake and glue the layers together. If you have a heavy wooden cutting board, you can use that instead. Set aside in a cool place for several hours or overnight.

Melt the chocolate. If you like bitter chocolate, add an ounce of bitter chocolate to the semisweet chocolate. Remove the cans, cookie sheet and plastic wrap from the top of the cake, and then spread the red cake layer with melted chocolate. Allow to harden (this will take some time – at least 30 minutes). Slice off the edges of the cake and put these scraps on a plate for sampling. Slice the cake into squares, about 1″ on a side, using a sharp knife and a ruler (to mark where to cut). You may have to run hot water over the knife, then dry it with a clean towel, from time to time so that crumbs don’t get onto the chocolate topping.

These can be stored in an airtight container in the freezer, with wax paper between the layers of cookies, and removed as needed. If cut into 1″ squares, over 100 cookies are produced.

Make sure to use all gluten free ingredients.

Serving Venetian cakes
Elegant Gluten Free Cakes

  • delicious Bookmark on Delicious
  • digg Digg this post
  • facebook Recommend on Facebook
  • reddit share via Reddit
  • stumble Share with Stumblers
  • twitter Tweet about it
  • rss Subscribe to the comments on this post

Christmas, Cookies, Dessert, Holidays, Recipes almond paste, cooking, gluten free, recipes, venetian

Cornmeal Almond Cake with Orange Syrup

0 · Dec 4, 2005 ·

The original recipe that this comes from was written in metric weights. It is interesting that 190 grams of corn meal is 1 cup, and the same weight of almond meal is 2 cups (loosely packed). There is not an error in the measurements – this is just how it worked out! This recipe has been modified and tested for the gluten free community by Gf-Zing!

1 1/3 cups sugar
4 large eggs
1/2 teaspoon salt
grated zest and juice from a navel orange
1 cup extra light olive oil
1 cup corn meal (or 190 grams)
2 cups almond meal (or 190 grams)
1 1/2 teaspoons gluten free baking powder

Beat the eggs with the sugar and salt, using an electric mixer, for 3 minutes, until light in color and fluffy. Beat in the zest and orange juice, and then the extra light olive oil. This creates a sort of mayonnaise-like substance, with the eggs acting as an emulsifier.

Mix the corn meal, almond meal and baking powder together and fold into the egg mixture. The batter will look like corn meal mush.

Grease a 9-inch spring-form pan, line it (bottom and sides) with wax paper, then grease the wax paper. Pour the batter in to the lined pan and bake at 350 for 1 hour and five minutes. The cake will be dark brown on the top. Remove it from the oven.

Syrup:

Make a syrup of 1/2 cup sugar, 1/2 cup water, 6 tablespoons fresh orange juice (1 orange). Simmer this syrup for 8 minutes. Skim off any foam. Add 2 Tablespoons of gluten free orange liqueur, if desired. Poke holes all over the top of the cake with a skewer, then pour the hot syrup over the cake, while the cake is still in the pan. The cake will soak up the syrup almost immediately.

As soon as possible after pouring the syrup on the cake, remove the sides of the cake pan and transfer the cake to a plate. Use the wax paper to help you in moving the cake, and make sure to remove the metal bottom of the pan too. If you leave the syrupy cake in contact with the pan for much time at all, the acidic syrup will interact with the metal pan and cause the cake to have a metallic flavor.

Chill the cake completely before serving. When completely finished, the cake will be about 1 1/2 inches tall and will serve 12.

Use all gluten-free ingredients!

  • delicious Bookmark on Delicious
  • digg Digg this post
  • facebook Recommend on Facebook
  • reddit share via Reddit
  • stumble Share with Stumblers
  • twitter Tweet about it
  • rss Subscribe to the comments on this post

Breakfast, Dairy Free, Dessert, Recipes

Mostaccioli – an Italian nut cookie

2 · Nov 30, 2005 ·

1 cup hazelnuts
1 cup walnuts
1 Tablespoon gluten free unsweetened cocoa powder
1/2 teaspoon cinnamon
1/8 teaspoon cloves
a pinch of salt
1/3 cup gluten free flour mix
1/3 cup honey
1 egg white

Grind the nuts finely in a blender of food processor. Mix with the rest of the ingredients and form a sticky ball of dough.

Roll out the dough on a piece of waxed paper covered in a virtual snowfall of powdered sugar. Roll the dough until it is 3/8 inch thick, and make sure to keep a deep coating of powdered sugar so the dough doesn’t stick to the rolling pin or the counter etc.

Cut the dough in to 1 x 1 1/2″ bars. Transfer them to a well-greased cookie sheet. Bake at 275 degrees, about 25-30 minutes or until they appear dry. Transfer to drying racks and cool completely. Place the cooled cookies on waxed paper and drizzle them with icing.

Icing:

Mix 1 Tablespoon of egg white, 1/2 cup powdered sugar, and 1-2 Tablespoons of gluten free orange liqueur to make a thick but drizzly icing. Not too thin. Add more liqueur or more sugar as needed to achieve the right consistency. Drizzle attractively on the cookies. Allow to dry completely before storing the cookies in an airtight container with waxed paper between the layers of cookies.

Note: Make sure the nuts are fresh, as the freshness of the nuts makes the flavor of these cookies. Rancid nuts are not good.

Make sure all of your ingredients, including spices, are gluten free!

  • delicious Bookmark on Delicious
  • digg Digg this post
  • facebook Recommend on Facebook
  • reddit share via Reddit
  • stumble Share with Stumblers
  • twitter Tweet about it
  • rss Subscribe to the comments on this post

Christmas, Cookies, Dairy Free, Dessert, Holidays, Recipes

Peanut Butter Rice treats – crispy style

0 · Nov 20, 2005 ·

Gf-Zing! has developed and tested this recipe for krispy-style treats, gluten free and made with peanut butter for extra flavor.

3 cups crispy gluten free rice cereal
1 cup shredded coconut

1/3 cup light corn syrup (or part corn syrup, part honey)
1/2 cup brown sugar
3/4 cup gluten free peanut butter
1 teaspoon gluten free vanilla

Mix the rice cereal and coconut in a large bowl.

Mix the rest of the ingredients in a large, heavy pot. Bring just to a boil while stirring.

Remove the pot from the heat. Stir the hot mixture into the cereal and coconut. Dump this mixture into a greased 9×13 inch pan and spread out, using greased hands or a piece of wax paper so it won’t stick to your hands. Cool completely and then cut into bars.

Alternatively, when the mixture has cooled enough to touch, form it into balls or make little bird nests and fill each one with 3 gluten free jelly beans. Cool completely.

Make sure all your ingredients are gluten free.

  • delicious Bookmark on Delicious
  • digg Digg this post
  • facebook Recommend on Facebook
  • reddit share via Reddit
  • stumble Share with Stumblers
  • twitter Tweet about it
  • rss Subscribe to the comments on this post

Cookies, Dairy Free, Dessert, Recipes

Chocolate Pudding – dairy free also

0 · Nov 20, 2005 · Leave a Comment

This recipe has been developed and tested for the gluten free community by Gf-Zing!

2 1/4 cups chocolate almond milk or gf rice milk
1/2 cup sugar
2 Tablespoons cornstarch
2/3 cups unsweetened gluten free cocoa or 3 ounces of unsweetened gluten free chocolate
1 large egg
1 teaspoon gluten free vanilla extract
1/4 teaspoon salt

Pour 2 cups of the almond or rice milk, 1/4 cup of sugar and the 1/4 teaspoon of salt into a large heavy pot. Bring to a boil and remove this from the heat. If using the unsweetened chocolate squares, break them up and add them to the hot milk mixture, to melt. If you are using the powdered cocoa, and want a more intense chocolate flavor, add 1 ounce of unsweetened chocolate here.

In a bowl, mix the remaining 1/4 cup sugar, the cornstarch and the cocoa. Whisk the remaining 1/4 cup of almond or rice milk into this mixture to make a smooth soupy substance. Whisk the mixture into the hot milk mixture and bring the combination back to a boil, whisking constantly so that lumps are not formed! Cook this for 2 minutes, stirring constantly, then remove from the heat.

In the same bowl where you mixed the cornstarch and cocoa up, whisk the egg until well beaten. Whisking constantly, add a ladle full of the hot mixture. Then pour the egg mixture into the hot mixture, whisking constantly. Cook the entire mixture over low heat, whisking constantly for 1 to 2 minutes, until it thickens. Do not boil. (If you are not confident about cooking homemade custard, you can do this part in a double-boiler, which will ensure that the mixture does not boil.) Add the vanilla last. Pour the pudding into a serving dish and chill. If you do not want a skin to form on the top of the pudding, place a piece of wax paper on the top and press it down to touch the surface of the pudding while it chills. Serve cold.

Kids like this pudding served with honey, believe it or not.

Use all gluten free ingredients!

  • delicious Bookmark on Delicious
  • digg Digg this post
  • facebook Recommend on Facebook
  • reddit share via Reddit
  • stumble Share with Stumblers
  • twitter Tweet about it
  • rss Subscribe to the comments on this post

Dairy Free, Dessert, Recipes

Pumpkin Pie – dairy and gluten free

0 · Nov 15, 2005 · 7 Comments

This recipe has been developed and tested for the gluten free community by Gf-Zing!

A one-crust unbaked gluten free pie shell (9-inch deep-dish glass pie plate is perfect)

Filling:

1 can pure pumpkin (1 pound size – the “one-pie” size)
4 large eggs
2/3 cup sugar
1/2 teaspoon salt
1 1/2 teaspoons cinnamon
1/2 teaspoon ground ginger
1/2 teaspoon freshly grated nutmeg
1/4 teaspoon allspice
1/4 teaspoon ground cloves
1 1/2 cups almond milk

For a standard pumpkin pie, made with evaporated milk or heavy cream, the recipe would use fewer eggs. For this pie, which uses almond milk instead, more eggs are required to set the filling. This pie also includes less sugar than standard recipes.

Mix all the ingredients for the pie filling together with a whisk, electric mixer or food processor until thorouhly mixed. You can mix the pie filling in the same food processor that you mixed the pie crust in, and any left-over crust ingredients will just get mixed in to the filling with no ill effects on the pie.

Anyway, after the filling is thoroughly mixed, pour it in to the unbaked pie shell set in a glass pie plate. The filling will be quite thick and there will be enough for a deep dish pie. Bake in a preheated 425 degree oven for 10 minutes, then reduce the heat to 350 and bake for another 35 minutes or more, until the filling is set. If the pie is 9-inches and deep dish, it may take as much as an additional 20 minutes before the filling is set. To test the pie, dip a clean, dry, knife-blade in to the center of the pie. The knife should come out nearly clean, but little bits of filling clinging to the knife are ok. The top of the pie will start to crack.

Remove the pie from the oven. Cool completely. Pumpkin pie is an egg-based custard pie, so it should be kept chilled when not being served, and then brought to serving temperature.

If you prefer, you can use a one-pie can of squash, or 1 1/2 cups of home-cooked, mashed, drained pumpkin or winter squash (butternut, buttercup etc.). To use winter squash or sugar pumpkin, halve them and seed them, then bake or microwave until tender.  Finally, remove it from the skin, allow it to sit overnight, then strain it thoroughly to remove excess liquid.

If you don’t care about using dairy but want to use less fat, you can substitute 1 2/3 cups of 1% skim milk or gluten-free fat-free evaporated milk for the almond milk, and use 2 eggs plus 1/2 cup of gluten-free eggbeaters product for the eggs. Make sure the product is gluten free.
Make sure all the ingredients, including the spices, are guaranteed gluten free by the manufacturer. Certain manufacturers guarantee the gluten-free quality and accurate labeling of their spices. Read the internet gluten-free lists to find out which manufacturers are currently maintaining this level of quality.

The original concept of this recipe is from the Victory Garden Cookbook by Morash.  There, the recipe was a an old-fashioned winter squash pie, and called for milk or cream.

  • delicious Bookmark on Delicious
  • digg Digg this post
  • facebook Recommend on Facebook
  • reddit share via Reddit
  • stumble Share with Stumblers
  • twitter Tweet about it
  • rss Subscribe to the comments on this post

*Most Popular Recipes*, Breakfast, Dairy Free, Dessert, Fall, Holidays, Pie, Recipes, Thanksgiving, Winter

Gluten Free or GF Pie Crust

1 · Nov 10, 2005 · 2 Comments

We tried mixes, and recipes, and had almost given up on ever having a decent pie again, when we discovered this method for making gluten free pie crust. Let’s just mention that pie was one of the most important foods in our repertoire, and we used to be very proud of our pie crust, and then we entered the parallel universe of gluten free cooking, for medical reasons. We went in to pie withdrawal – depression, cold shakes, somber mood…..after all, what were we going to have for breakfast, if we couldn’t eat left-over pie?

Well, the news is good – you can have your pie and eat it too!

Use the Dream Pastry Recipe from Bette Hagman’s More From the Gluten-Free Gourmet. A very similar recipe is also called “Donna Jo’s pie crust” and is available on the internet. (Be careful about the recipes on the internet, which are sometimes missing key ingredients in the list of flours, such as the sweet rice flour, for example!) Of course, we don’t exactly follow the recipe anyway, so we have printed here the method we are using at the moment…..

We prefer the flavor of lemon juice to the flavor of vinegar, so we use fresh lemon juice in the recipe. Also, we use one stick of gluten free margarine and one of butter (we don’t like Crisco so much). Lastly, we sprinkle the top of a two crust fruit pie liberally with sugar.

To save time and aggravation when hand-mixing the pie dough, we use a large cheese grater to grate the butter into the dry ingredients. This makes it much easier to get the “lima bean” sized pieces of butter called for in the recipe. We have also used a Braun food processor to make this crust, and it was acceptable, you just have to be careful not to overmix the butter.

Here are the ingredients for one two-crust pie shell:

Dry ingredients:

1/2 cup tapioca flour (tapioca starch) – make sure this is the flavorless kind, not the fermented find
1/2 cup cornstarch
1/4 cup potato starch (katakuriko in Japanese stores – this is NOT the same as potato flour)
1 cup sweet rice flour (mochiko flour – not the same as white rice flour)
1 teaspoon xanthan gum
1/2 tsp salt
1/2 teaspoon sugar

Shortening:
1/2 cup gluten free margarine or butter
1/2 cup butter

(we use all butter)

Liquid ingredients:

1 egg
1 Tablespoon fresh lemon juice
1 Tablespoon ice water

wax paper
sweet rice flour to sprinkle on the wax paper
lots of sugar for sprinkling on the top of the pie

Put the dry ingredients in a bowl and mix them thoroughly with a fork. If you own a sifter, you could sift them together, but it is not necessary. Grate in the butter and margarine using a large cheese grater. Mix the dry ingredients and the shortenings up with a fork until the pieces of butter are distributed evenly – you don’t need to get the pieces of butter as small as they would be in a wheat crust. The size of “lima beans” may be a little large, but don’t go smaller than kidney beans! Anyway, mix up the liquid ingredients until well combined, then pour them in to the dry ingredients and mix together. Squish the dough into a ball and wrap it up to store in the refrigerator for one hour. (For the record, we have made this crust in the winter and gone straight to rolling it out, without refrigerating it. You wouldn’t do this when the air is warm in the summer, but it is ok to do this in the winter when it is cold.)

Divide the dough in half.

To roll out this crust, spread out a piece of wax paper, dust it with sweet rice flour or GF flour mix, or whatever comes handy, put one piece of the dough on top, sprinkle with more flour, spread another piece of wax paper on top of the dough, and roll out with a rolling pin. * The dough is now contained between two sheets of wax paper. Peel off the top piece of wax paper, flip the crust on top of the pie plate, adjust it to fit the dish and remove the other piece of wax paper. Your counter is clean, and your pie crust did not fall to pieces when you tried to put it in the pie dish! You rock!

Fill your pie, then repeat the pie crust rolling maneuver for the top crust. Cut pretty holes in the top crust before transferring it to the pie, if you wish. After putting the top crust on the pie, sprinkle the top crust liberally with sugar – maybe 2 – 4 Tablespoons! Cut steam vent holes in the crust, if you forgot to do it before, and then bake the pie. This crust gets nice and brown and crispy, and it has a delicious buttery flavor! You bake it as you would any other pie crust (about 50 minutes at 400 degrees, for a filled two-crust fruit pie.)

*Note about the rolling pin: We use a piece of dowel from the hardware store – makes a perfect rolling pin, and costs very little. The piece we purchased was being sold as “closet pole” and is 1″ in diameter and 18 inches long.

Some Pies to Try:

  • Blueberry Pie Sweetened with Maple Syrup
  • Gluten Free Quiche
  • Key Lime Pie – Gluten and Dairy Free
  • Pumpkin Pie – Gluten and Dairy Free
  • New England Apple Pie
  • Coconut Cream Pie – no cream!
  • Pumpkin Pie with Coconut Milk
  • Plum Pie

See this post for yet more thoughts on gluten free pie crust: Click here.

Make sure to use all gluten free ingredients!

  • delicious Bookmark on Delicious
  • digg Digg this post
  • facebook Recommend on Facebook
  • reddit share via Reddit
  • stumble Share with Stumblers
  • twitter Tweet about it
  • rss Subscribe to the comments on this post

*Most Popular Recipes*, Breakfast, Dessert, Fall, Holidays, Pie, Recipes, Spring, Summer, Thanksgiving, Winter dessert, pastry, pie, pie crust

New England Apple Pie

0 · Nov 5, 2005 · 1 Comment

Use the Dream Pastry Recipe from Bette Hagman’s More From the Gluten-Free Gourmet. We use one stick of gluten free margarine and one of butter. We use 1 Tablespoon lemon juice in place of the vinegar, for the flavor.

2-crust unbaked pie shell

8 apples – Use a mix of varieties like Northern Spy, a few Russet, Baldwin, Golden Delicious, a few Granny Smith and peel, core and slice them. Don’t use MacIntosh or Macoun varieties unless you use maybe only one of each – they don’t hold their shape when cooked and are better for making apple sauce.

1/2 cup dark brown sugar
1/2 cup white sugar
2 Tablespoons tapioca starch (available at health food or asian groceries)
1/2 teaspoon gluten free ground cinnamon

Line a glass pie dish with one piece of the pastry. Mix the apples with all the other ingredients until thoroughly mixed. Load up the pie shell with the apple mixture. Put the other crust on top, and cut several steam holes in the top crust.

Now, sprinkle the top crust with at least 2 Tablespoons of additional white sugar. Preheat the oven to 400 degrees. Place a cookie sheet as a drip tray in the oven to catch any overflowing juices.

Place the pie in the oven, above the drip tray. Bake for 50 minutes, and then check to see if the top is getting golden. The pie is done when the crust is becoming golden and the juices are starting to bubble up in a thickened sort of way. Some of the juices may be dripping over on the drip tray, and that is at is should be.

You can serve a slice of apple pie with cheddar cheese on the side, or melted on the top. That is always good. Also, you can serve pie for breakfast and it will be better for you than a sugary breakfast cereal – also, you will be happier.

  • delicious Bookmark on Delicious
  • digg Digg this post
  • facebook Recommend on Facebook
  • reddit share via Reddit
  • stumble Share with Stumblers
  • twitter Tweet about it
  • rss Subscribe to the comments on this post

Breakfast, Dessert, Fall, Holidays, Pie, Recipes, Thanksgiving

Jelly Roll – a cake

0 · Nov 5, 2005 · Leave a Comment

Jelly Roll is very popular with children, and adults who used to be children. It’s a little tricky to make, because if you overcook the cake it will not roll up!

3/8 cup cornstarch
3/8 cup GF cookie flour mix
1/4 teaspoon powdered gluten free vanilla
1/2 teaspoon gluten free baking powder
pinch of salt
3 eggs
1 cup sugar
1 Tablespoon water
1/2 cup seedless raspberry jam, melted
waxed paper

Preheat the oven to 400 degrees. Grease a 13×9 inch baking pan (the kind you use for brownies).

Sift together the cornstarch, GF flour, GF vanilla powder, baking powder and salt.

In a large bowl, whisk or beat the 3 eggs and half of the sugar until the mixture is very thick, and light in color – it should be thick and form ribbons off the beater or whisk. Gently fold in the dry ingredients, and then stir in the tablespoon of water. Pour the batter into the greased pan and smooth it out gently to fill the pan. Bake for 10 minutes – not any longer. The cake will spring back when touched briefly with your finger (don’t burn yourself.)

Spread out a sheet of waxed paper on the counter, and sprinkle it with the remaining 1/2 cup of sugar. Now comes the critical part. Switch into emergency cooking mode: Turn the cake out on to this sugar coated waxed paper immediately after you take it from the oven. Don’t answer the phone. Tell the kids they have to wait. Now, trim off the edges of the cake with a sharp knife. Spread the cake with the jam. Roll the cake up firmly, starting at the short end of the cake. Allow the cake to cool and slice it in 8 or more pieces.

This cake is great with a cup of first-quality Darjeeling tea. Serve the cake on a nice china plate, and enjoy a moment of peace, and the civility and pleasures of bygone days.

  • delicious Bookmark on Delicious
  • digg Digg this post
  • facebook Recommend on Facebook
  • reddit share via Reddit
  • stumble Share with Stumblers
  • twitter Tweet about it
  • rss Subscribe to the comments on this post

Dessert, Recipes

Coconut Cream Pie – gluten free, with no cream!

0 · Nov 1, 2005 · Leave a Comment

9″ pie gluten free shell – baked

Coconut Filling:
1 cup gluten free coconut milk (canned, reconstituted or frozen)
2 cups gluten free almond milk
1/2 cup sugar
1 Tablespoon butter or margarine
pinch of salt
1/4 cup fresh grated or sweetened dried coconut
5 Tablespoons cornstarch and enough water to make a thin mixture
4 egg yolks
1/2 teaspoon gluten free vanilla

Meringue Topping:
4 egg whites
1/8 teaspoon cream of tartar
1/4 teaspoon salt
1/4 cup sugar
1/2 teaspoon gluten free vanilla

To make the filling:

Mix the coconut and almond milks, sugar, butter, salt and coconut in the top of a double-boiler over hot water. Stir constantly until the mixture is very hot. Mix the cornstarch with enough water just to thin it to pouring consistency, then add this to the hot mixture, stirring constantly and continue to stir until thickened.

Beat the egg yolks in a bowl just until mixed. Stir a little of the hot mixture into the egg yolks, beating constantly so as not to cook the egg yolks. Add the rest of the hot mixture and the vanilla, again stirring constantly. Put the mixture back over the hot water (double boiler) and cook for 2 more minutes and don’t forget to keep stirring! Cool this coconut custard, and then pour it into the prepared pie shell. Set it aside while you make the meringue.

To make the meringue:

Beat the egg whites, cream of tartar and salt tuntil they form soft peaks. Beat in the sugar and beat until the meringue makes smooth peaks. Add vanilla and spread the meringue on the filling in the pie shell.

Bake the pie at 400 degrees for 10 minutes, until the meringue is nicely browned. Chill the pie completely before serving.

Make sure all your ingredients are gluten free!
  • delicious Bookmark on Delicious
  • digg Digg this post
  • facebook Recommend on Facebook
  • reddit share via Reddit
  • stumble Share with Stumblers
  • twitter Tweet about it
  • rss Subscribe to the comments on this post

*Most Popular Recipes*, Dairy Free, Dessert, Holidays, Pie, Recipes, Thanksgiving coconut, gluten free, pie

Cinnamon Honey Ice Cream with Rum Raisins

0 · Oct 31, 2005 · Leave a Comment

For the ice cream:

2 cups heavy cream
2 cups light cream
2 eggs
2 egg yolks
3/4 cup sugar
1/2 cup local honey
1 Tablespoon cinnamon
2 teaspoons powdered ginger
1/2 teaspoon freshly grated nutmeg
1 1/2 teaspoons powdered GF vanilla
1/4 teaspoon salt
An ice cream freezer with instructions

For the raisins:
1 cup mixed raisins
1/3 cup sugar
2/3 cup water

For the ice cream:

Scald the heavy cream and light cream with 1/2 cup of sugar in a saucepan. Transfer to the top of a double boiler over hot water.

In a bowl, beat the eggs and egg yolks with the remaining 1/4 cup sugar until the mixture forms thick pale yellow ribbons dripping from the beater.

Gradually add a little of the cream mixture to the egg mixture, a half cup at a time, beating constantly until you have added about half the cream to the egg mixture. Then add the resulting mixture to the remaining cream mixture in the double boiler. Stirring gently and constantly, heat the custard mixture until it thickens and coats the back of a spoon. Remove the double boiler from the heat, and stir in the spices and the honey.

Pour the mixture into a shallow pan and chill in the refrigerator for 3 hours until cold. Transfer the mixture to the ice cream freezer and freeze. Serve with rum raisins.

For the raisins:

Boil the raisins, sugar and water for about 4 minutes until slightly thickened. Transfer the raisins to a Mason jar and add an equal quantity of GF rum. Let stand until the raisins are fattened – a few hours. Serve the raisins with the ice cream, but not to minors.

Make sure all your ingredients are gluten free!

  • delicious Bookmark on Delicious
  • digg Digg this post
  • facebook Recommend on Facebook
  • reddit share via Reddit
  • stumble Share with Stumblers
  • twitter Tweet about it
  • rss Subscribe to the comments on this post

Dessert, Fall, Holidays, Recipes, Thanksgiving

Pumpkin Pie with Coconut Milk

0 · Oct 24, 2005 · 2 Comments

The recipe is adapted from one at www.Celiac.com. Here, the pie has additional spices and coconut milk instead of cream.

Make an uncooked one-crust gluten-free pie crust and use it to line a glass pie dish.

Bottom of pie:
1/3 cup finely chopped pecans
1/3 cup dark brown sugar
3 Tablespoons gluten free margarine (for dairy, use butter)

Filling:

3 large eggs, stirred
1/3 cup dark brown sugar
1/3 cup white or turbinado sugar
2 Tablespoons cornstarch
1 1/2 teaspoons GF cinnamon
1/2 teaspoon GF ginger
1/2 teaspoon freshly grated nutmeg
1/4 teaspoon GF allspice
1/4 teaspoon GF cloves
1/2 teaspoon salt
16 ounces GF canned pumpkin, or freshly cooked pumpkin, blended and strained to remove excess water
1 cup coconut milk

Mix pecans, sugar and butter and distribute in the bottom of the uncooked pie shell. Prick the part of the pie shell that goes up the side of the pie plate with a fork in several places so it won’t balloon out while cooking. Bake at 450 for 10 minutes and then allow to cool for another 5 minutes.

Mix the filling ingredients in a food processor or blender. Pour the mixture into the partially cooked pie shell, on top of the nut layer. Bake for 45-50 minutes at 350 degrees. A knife inserted into the center of the pie should come out nearly clean. Cool completely before cutting, although we often end up eating pie when it is warm because we can’t wait.

This is a custard pie, and should be refrigerated because of the eggs.

Try this pie for breakfast – it is sure to be more healthy than any breakfast cereal!

Make sure all of your ingredients, including the spices, are gluten free.

  • delicious Bookmark on Delicious
  • digg Digg this post
  • facebook Recommend on Facebook
  • reddit share via Reddit
  • stumble Share with Stumblers
  • twitter Tweet about it
  • rss Subscribe to the comments on this post

*Most Popular Recipes*, Breakfast, Dairy Free, Dessert, Holidays, Pie, Recipes, Thanksgiving coconut, pie, pumpkin

Cornmeal Coconut Maple Cake

0 · Oct 24, 2005 ·

2 sticks butter or margarine
1 cup grade B pure maple syrup (this is the darker maple syrup)
3 eggs
2 teaspoons gluten free vanilla extract
zest of one orange, grated
1 1/4 cups GF cookie flour mix
3/4 cornmeal
1 Tablespoon gluten free baking powder
1/2 teaspoon salt
1 1/2 cups shredded sweet coconut
3/4 cup of almond milk mixed with the juice of 1/2 a lime
1 cup raisins

Grease a large 10-inch bundt pan. Preheat oven to 350 degrees.

Cream butter and maple syrup in food processor. Gradually add the eggs, vanilla and orange zest.

Sift dry ingredients in another bowl, and then add the coconut. Add the dry ingredient/coconut mixture to the food processor alternately with the almond milk/lime juice mixture and process just until mixed. Remove the dough to a bowl and mix in the raisins. Transfer the dough to the prepared pan, and bake for 50-60 minutes until a toothpick comes out clean. Cool for ten minutes in the pan, then turn out on to a cooling rack and cool.

  • delicious Bookmark on Delicious
  • digg Digg this post
  • facebook Recommend on Facebook
  • reddit share via Reddit
  • stumble Share with Stumblers
  • twitter Tweet about it
  • rss Subscribe to the comments on this post

Breakfast, Dairy Free, Dessert, Recipes

  • « Go to Previous Page
  • Go to page 1
  • Go to page 2
  • Go to page 3
  • Go to Next Page »

Primary Sidebar

Check out our Coupon Collection

Click Here to go directly to the Coupon page

  • Become a Fan Become a Fan
  • RSS feed RSS feed

Read more at The Rambling Epicure:

Click Here: The Rambling Epicure

QR code for your phone

qrcode for gfzing
NFCA logo

Blogroll

  • Aloha World Ono Recipes
  • Book of Yum
  • Dulce Cocina sin Gluten
  • Gluten Free Beer Association
  • Glutenfreie Rezepte | kaMehl
  • Hawai'ian Electric
  • Laylita's – Ecuador
  • Nombudsman
  • Papilles et Pupilles
  • Sea Salt with Food
  • The Rambling Epicure The Rambling Epicure is a daily international food chronicle, and the first online newspaper to follow global food trends and news.
  • Triumph Dining

Monthly Archive

Proud member of FoodBlogs

Load up on new recipes, exclusive goodies, + more!

Get the exclusive content you crave straight to your inbox.

Things to Read

Find by keyword

bacon baked baking beans beef berries blueberry cake cheese chicken chocolate coconut cooking curry dessert DIY dried beans easy fish food fruit GF ghee gluten free gourmet homemade lamb maple syrup meat microwave New England Hard Cider pie pork pumpkin recipe recipes rice salad sauce soup stewed strawberries sweet potato thai red curry vegetarian

Footer

Instagram

Instagram did not return a 200.

Copyright © 2023 GF-Zing! on the Cravings Pro Theme

  • follow:follow:
  • Become my Facebook friend Become my Facebook friend
  • RSS RSS