• Skip to primary navigation
  • Skip to main content
  • Skip to primary sidebar
  • Skip to footer

GF-Zing! logo

  • Home
  • Coupon Collection
  • GF Foods & Groups
  • Ask Gf-Zing!
    • About the Author
    • About Gf-Zing!
  • Nav Social Menu

    • Email
    • Facebook

Pie

Sealed With A Quiche

0 · Dec 28, 2011 · Leave a Comment

Including a food trend prediction for 2012…


By Alice DeLuca


When first married, I received lots of advice on how to stay married which is of course so much more complicated than “getting” married. For example, Sally told me that both a happy marriage and a career had been possible for her because she created and froze 4 quiches at a time.  I immediately pictured 4 quiches in the deepfreeze, carefully labeled for rotation of the stock so as to avoid freezer-burn and waste. The quiches would keep.


Sally said she could just run home, pop a frozen quiche in the oven, and make a salad and – presto – dinner was on the table.  That was the clue to a happy marriage for a woman who began her career in the late 1960s and lived through the advent of non-stick cookware and the 1970s food processor revolution.  She soldiered on with frozen pie shells to make all things possible.[i] Sally’s husband enjoyed both a fabulous career and his hot meals without ever giving a thought to the benefits of compulsive quiche stockpiling. Sally did remain married and retained her career right through to retirement, so perhaps the quiche did the trick and the best wedding present for the new couple today would be a sturdy porcelain pie plate.


American quiche from the 1980s bears little resemblance to the quiches that graced the window of every charcuterie in Paris in the 1970s.  The French Quiche Lorraine was a tart made with poitrine fumée, diced in to tiny delicious fatty cubes, just a hint of smoke barely held in suspension by a creamy egg custard.  The total thickness of the quiche was just a matter of a few centimeters.  The crust was buttery and flaky.


American artisanal quiche of the 1970s and 80s was really more of a pie, and a close relative of the casserole.  Its deep-dish heart and soul was convenient sustenance with no hint of subtlety, yet it was delicious in its own right.  Almost anything that could be considered main-course fare was served up in a quiche. It seemed like every restaurant served quiche[ii] and salad, and there were whole restaurants in the West that were entirely devoted to pie of all types and served up quiche in quarters.  A quarter of a quiche was a serving.  Up until at least the 1990s, it was still possible to waltz in to a Frontier Pies in Wyoming and buy a hearty slab of quiche for a quick dinner.  Pioneer Pies was another such restaurant.  In the early 2000s these pie-themed restaurants fell on hard times, but now that we are hearing that “pie is the new cupcake” perhaps these wonderful pie restaurants will make a comeback?  They have a web presence again, although their menus show pie only as an afterthought, but we can perhaps hope and dream.


If you want to stock-pile frozen American downhome quiches as a hedge against late meetings and bad traffic, there is no better place to start looking for recipes than the cookbooks put out by local women’s groups during the height of the quiche rush[iii].  I use a deep dish 9-inch Pyrex pie plate, recalling however that as a marriage-saving device my friend used frozen pie shells.  (Why not compromise and stockpile your own frozen pie shells?)  The general rule that I follow is based on the Colorado Cache Cookbook:


For the custard that holds things together in the 9 inch Pyrex plate, beat together:


4 large chicken eggs

1 ½ cups of cream or other milk-based products

Seasoning such as salt and pepper, dried marjoram, fresh parsley, chives, a grating of nutmeg etc.


The flavoring and savory ingredients are up to the artisan.  As a thoroughly mundane but delicious example of the filling, you could prepare the following ingredients and sprinkle them evenly in to an unbaked gluten-free pastry shell.


Hickory-smoked bacon fried until crisp (omit for vegetarian)

Spanish onions fried in butter until golden

½ pound of Gruyere or other hard cheese loitering in the refrigerator, coarsely grated to yield 2 cups


Pour the beaten custard over all of these and bake at 400 degrees F for 40 minutes, more or less, until a knife inserted in the center comes out barely clean.  Serve warm.  Or, freeze for later to save your marriage.


Other savory filling choices might be spinach and feta, ratatouille, wild mushroom with thyme (vegetarian), duck and preserved lemon (for meat-eaters), boneless Buffalo wings and gluten free blue cheese (for meat-eaters), five onion varieties (onion, garlic, shallot, leek, and scallion).  The choices for savory fillings are certainly not limited to the tastes of the 1970s.  Latin American, Cambodian, Thai, what sorts of quiche innovations await us now?


An American quiche renaissance is predicted – you heard it here first – and this will come as a great relief to the increasing number of people keeping “home flocks” of hens and consequently holding a surplus of eggs.  The future of so many fledgling marriages and careers could depend upon a happy wedding of eggs and cheese.


[i] “Food Timeline: History Notes-pie & Pastry.” Food Timeline: Food History & Vintage Recipes. Web. 28 Dec. 2011. <http://www.foodtimeline.org/foodpies.html>.

David, Elizabeth, and Juliet Renny. French Provincial Cooking. Harmondsworth: Penguin, 1984. Print.

[ii] Kalter, Suzy. “Jaye Tishman’s Business Is Serving Quiche to the Stars, and That’s Not Just Pie in the Sky: People.com.” People.com: The #1 Celebrity Site for Breaking News, Celebrity Pictures and Star Style. 30 Nov. 1981. Web. 28 Dec. 2011. http://www.people.com/people/archive/article/0,,20080809,00.html.

“When it comes to quiche, John Travolta prefers chicken-and-corn, Barbra Streisand orders broccoli-and-mushroom and Suzanne Pleshette likes Roquefort. So confides Jaye Tishman, 43, proprietor-chef of Ms. Tish’s Quiche Co. in Los Angeles, whose clientele reads like the Bel Air phone book. Her egg-and-cheese pies, which come in more than 100 varieties (from apple to zucchini), have themselves become celebrities of a sort. “Ms. Tish’s quiche boggles the senses,” raves food critic Merrill Shindler of the Los Angeles Herald Examiner. “It’s as close to perfect as I could want.”…”

[iii] Colorado Cache Cookbook. Denver, CO: Junior League of Denver, 1978. Print.

Gillies, Linda, Anita Muller, and Pamela Patterson. A Culinary Collection; Recipes from Members of the Board of Trustees and Staff of the Metropolitan Museum of Art. New York: Metropolitan Museum of Art, 1973. Print. (including a recipe for lettuce and bacon quiche)

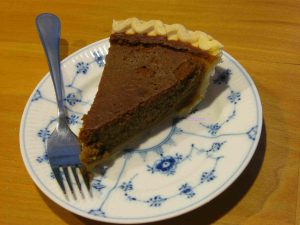
Quiche – gluten free!

Fall, Lunch, Meat-eater, Pie, Recipes, Summer, Vegetarian, Winter cheese, gluten free, meat, quiche, vegetarian

A Simple Brown Rice Flour Pie Crust

2 · Feb 18, 2011 · Leave a Comment

If you are trying to make a gluten free pie crust and find yourself with few ingredients, or want to make a gluten free pie crust with a whole grain flour and no xantham gum, try this one.  It does contain some cream cheese, so be certain your guests can eat dairy products.

For a one-crust pie:

1 cup finely ground brown rice flour

1/3 cup corn starch

1 Tablespoon sugar

1/2 teaspoon salt

1/4 teaspoon baking powder

8 Tablespoons unsalted cold butter (1 “stick”)

2 Tablespoons gluten free cream cheese (cold)

1 teaspoon fresh lemon or lime juice

1 Tablespoon beaten egg white

Using a food processor, mix the dry ingredients (brown rice flour, cornstarch, sugar, salt and baking powder) just until mixed.  Add the butter, cream cheese and lemon juice and mix until the mixture is crumbly.  Dribble in the egg white while mixing, just until everything comes together in to a ball.  A tiny bit more egg white may be required to get it to come together.  Adjust the egg white as necessary.

Roll the dough out between two sheets of wax paper.  There is no need to chill before rolling.

To make a pre-baked shell, line a 9-10″ glass pie plate with the rolled out pastry, then bake in a pre-heated 400 degree oven for 10-15 minutes until browned slightly but remove it from the oven if it starts to crack.  Unlike wheat crusts, this crust does not need to be filled with pie weights when baking a pre-cooked shell.

Make sure to use all gluten free ingredients, and, if you are cooking for a gluten free friend and you don’t keep a gluten free kitchen, make sure the ingredients are not contaminated with wheat flour from your other cooking adventures.

Ask Gf-Zing! - Responses, Dessert, Fall, Holidays, Pie, Recipes, Vegetarian, Winter brown rice, gluten free, pie, pie crust, vegetarian

Maple Pumpkin Pie, no dairy, from fresh pumpkin

0 · Jan 14, 2011 · Leave a Comment

small pumpkin pie
Non Dairy, Gluten-Free Pumpkin Pie

This interesting recipe from gfzing.com has no milk, cream, rice milk or any other type of milk, is gluten free and uses fresh rather than canned pumpkin. The type of pumpkin used is the small “pie” or “sugar” pumpkin – they are sold at farm stands for the purpose of making pies. The natural liquid in the freshly cooked pumpkin is sufficient liquid and no added milk products are needed.  Do not use canned pumpkin for this recipe.

The pie is quite light, and since the only sweeteners are maple syrup and molasses the pie is not too sweet.

Ingredients:

  • 1 “pie” or “sugar” pumpkin
  • 1/2 cup dark maple syrup
  • 1/4 cup molasses
  • 3 eggs
  • 1/2 teaspoon salt
  • 1 teaspoon cinnamon
  • 1/2 teaspoon ginger
  • 3/4 teaspoon freshly grated nutmeg
  • 1 unbaked Whole Foods gluten free (gf) pie shell, thawed and cracks repaired

Preheat the oven to 450 degrees F.

Defrost the gluten free pie shell and repair any cracks.  Sometimes frozen pie crusts get broken, but you can smush the crust back together along the breaks to make a whole crust.

Next, remove the stem (just break it off) from the pumpkin and stab the pumpkin through the shell to the center in 4 or 5 places with a pairing knife – to let out steam.  You don’t need to cut the pumpkin up or remove the seeds before cooking.  Set the prepared pumpkin in the microwave oven and cook it as for baked potato (use the setting on the microwave).

Remove the very hot pumpkin from the oven using potholders and let cool completely.   Now cut the cooked pumpkin in half, use a large spoon to scoop out and discard the seeds. Then, scoop out the cooked flesh, set it aside for use and finally discard the peel.  You should have about 24 ounces cooked pumpkin (weigh the cooked flesh.)  You do not need to mash or strain the pumpkin flesh.

In a food processor, combine about 24 ounces ( one and a half pounds) of cooked fresh pumpkin (not canned) with all the rest ingredients except the pie shell.  Process until the mixture is completely smooth. Pour most of the pumpkin mixture in to the uncooked pie shell until the pie shell is filled almost to the top.  Depending on the size of the pumpkin, there may be a cup or so of extra filling.  If so, grease a small oven-proof dish and pour the excess in there.

Put the pie in to a 450 degree oven for 10 minutes, then reduce the heat to 350 and cook for another 45 minutes.  Check the pie – if the filling is set, the pie is done.  Cool and serve with your favorite pie topping.

For the extra filling, bake that along with the pie but it will be done and ready to take out of  the oven well before the pie. You can use this cooked pumpkin pie filling to make a nice pumpkin parfait, layering the cooked chilled filling with your favorite gluten free pie topping (whipped cream if you use it).

Breakfast, Dairy Free, Dessert, Fall, Microwave Cooking, Pie, Recipes, Thanksgiving, Vegetarian, Winter dairy free, gluten free, pie, pumpkin, vegetarian

Gluten Free Deep Dish Pizza

0 · Jan 7, 2011 · Leave a Comment

We were addicted to the deep dish pizza made by Edwardo’s on the South Side of Chicago in the 1980s, and after leaving that part of the country we went to great lengths to learn how to make deep dish pizza at home.  We even purchased an enormous specialized pan purposed for making stuffed pizzas. Fast forward a few decades and sadly a gluten free deep dish pizza seemed like an impossible dream.  But continue on, dear reader, because you can have a reasonable deep-dish pizza, gluten free, if you have a cast iron or Le Creuset skillet available to you.  The crust will be little chewy, somewhat denser than an ideal crust, but flavorful because of the potato flour in the dough.  It will have unique characteristics which make it worth eating, even though it is gf.

Crust:

Cut a 12″ diameter circle of parchment paper to line a 10 inch heavy cast iron skillet (ours is the enameled Le Creuset designed for use in a hot oven – some of the Le Creuset skillets are not meant for very hot ovens, so make sure yours is – the enamel on the inside of the pan should be black). A flat circle must be creased a few times to line a 3 dimensional pan, so flatten the paper against the bottom of the pan, and pleate and crease it up the sides to make it “fit”.  Make one recipe of the pizza base dough from Darina Allen and Rosemary Kearney’s Healthy Gluten-Free Cooking.  This is a rice flour, potato flour and tapioca flour dough that contains dried milk and an egg as well – but no bean flour. Note that the recipe calls for potato flour, not potato starch.  Weigh the ingredients using a kitchen scale because the book is written using Irish measurement units. I encourage you to purchase the cookbooks mentioned in my articles, to support the work of fellow recipe writers in the hope that they will produce more useful books for us!

Preheat your oven to 400 degrees.  When the oven is hot, roll out the dough between two sheets of waxed paper dusted with sweet rice flour (mochiko), and line the pan with the dough (the entire recipe’s worth of dough). Prick the dough all over with a fork and bake it (unfilled) for 10 minutes, remove the very heavy pan from the oven using two hands and oven mitts to grab the handle and edge of the pan.  Set the hot pan aside and prepare the filling.  I always leave an oven mitt on the handle to remind me that the handle of the pan is hot, hot, hot! That handle is 400 degrees, and you don’t want to grab it without an oven mitt!

Filling:

1/2 pound of mushrooms

1/2 pound gluten free italian sausage – spicy is nice – omit for vegetarians

1 large spanish onion, sliced (don’t use “sweet onions” as they don’t brown nicely)

1-2 bell peppers, sliced

6 cloves garlic, minced

Fry the mushrooms in olive oil for 4 minutes without stirring.  Remove the mushrooms from pan and set aside. Season with salt and pepper.

To the same pan, add the gluten free sausage, onions, peppers and garlic and fry for 10-12 minutes until cooked through.

Mix the sausage mixture with the mushrooms and add a 1/2 pound of full-fat mozzarella, hand grated, a half cup of canned diced tomatoes (fresh if you have them), 1/2 cup of chopped basil or 1-2 Tablespoons of gluten free homemade pesto sauce.  Test the filling to see if it needs additional salt and pepper.

Spread the filling in the prepared pre-baked crust, Sprinkle with another 1/2 pound of grated mozzarella, sprinkle with grated parmesan cheese, raise the temperature of the oven to 450 and bake the pizza for 30-35 minutes. Remove the very very hot pan from the oven using oven mitts. Serve immediately or cool slightly first.

Make sure all your ingredients are gluten free!

The filling is based on one in the October 2005 issue of Cuisine at Home.  Ham and pepperoni have been eliminated, and the option of using prepared pesto in place of basil is added. You can tinker infinitely with the ingredients in the filling.  Use what you have available – spinach, other types of cheese, omit the peppers and double the onions, whatever you like!

Ask Gf-Zing! - Responses, Bread, Fall, Lunch, Meat Dishes, Meat-eater, Pie, Recipes, Spring, Summer, Vegetarian, Winter gluten free, pizza

Crustless Custard Apple Pie

1 · Dec 5, 2010 · Leave a Comment

In the mood for pie, but don’t want to roll out a crust?  You can use the new gluten free Bisquick to make a pie that creates its own crust.  This pie is like a gluten free French Clafoutis, but more economical because it uses cranberries instead of cherries.  The large amount of cinnamon and vanilla balances out the deeply flavorless gluten free Bisquick.

Fruit mixture ingredients:

3 large flavorful apples that hold their shape (use types like Northern Spy, Winter Banana and Roxbury Russet – do not use Macintosh) – pared, cored and cut in to pie-type slices

1/2 cup (or more) gluten free dried sweetened cranberries

1 Tablespoon fresh lemon juice

2 Tablespoons gluten free Bisquick (and you will need more later)

Custard Ingredients:

14 ounces fat-free gluten free sweetened condensed milk

1 1/2 cups water

3 large eggs

1/2 cup gluten free Bisquick

4 Tablespoons butter, melted

2 teaspoons vanilla

1 teaspoon cinnamon

1/2 teaspoon grated nutmeg

In a large deep bowl, mix the apples, cranberries and lemon juice and then stir in the 2 tablespoons of gluten free Bisquick to coat the fruit.

Preheat the oven to 350 F.

Butter a glass pie plate (10 inches, or marked 25 cm on the bottom), then spread the apple-cranberry mixture evenly in the dish.

In the now-empty bowl, mix the rest of the ingredients: condensed milk, water, eggs, 1/2 cup gluten free Bisquick, butter, vanilla, cinnamon and nutmeg. Use an immersion blender to mix these custard ingredients until smooth – about 3 minutes.  Pour this custard mixture over the apples and cranberries in the pie plate.  The dish will be very full, so take care not to spill.

Bake for45-50 minutes until the custard is cooked through and the top is browning a little.  Remove from the oven, set aside to cool. Serve cool or cold.

There will be a kind of crust that has settled out on the bottom of the pie – the texture of the “crust” will be the texture of a mochi, slightly chewy and quite intriguing.

Be sure to use all gluten free ingredients.

Breakfast, Dessert, Fall, Pie, Vegetarian apple, custard, dessert, gluten free, pie, vegetarian

More thoughts on Gluten Free Pie

1 · Nov 18, 2010 · Leave a Comment

Some of the most popular posts on this website have to do with pie!

How to make gluten free pie crust (see this link for the recipe)  is a key interest for the gluten free community.  It turns out that the type of flour you use for pie crust really does matter, so here is some advice on finding good gluten free flours:

Where to find those flours for the pie crust mix? We buy them from Authentic Foods (you can use Amazon.com.)  Not even a trip to the grocery store is required;  they grind the flour really fine (so it does not have that gritty quality, sticking in your back teeth like dental amalgam ), and their tapioca flour does not taste like boiled lobster.

When you do buy the flours, consider storing them in the freezer – those pantry moths like to eat gluten free too, but they don’t seem to be able to squirm in to the freezer yet.

I’ll sign out with some lyrics from the great Bob Dylan song, “Country Pie”:

“Raspberry, strawberry, lemon and lime
What do I care ?
Blueberry, apple, cherry, pumpkin and plum
Call me for dinner, honey, I’ll be there.
…Oh me, oh my
Love that country pie.”

Gf-Zing! does not guarantee the gluten-free status of products;  we rely on the manufacturer to do that.  Check the labels, and make sure all your ingredients are gluten free!

Food products, Pie, Product Reviews, Recipes baking, crust, food, gluten free, pie, recipes

Banana Cream Chocolate Pie – gluten free

0 · Oct 24, 2010 · Leave a Comment

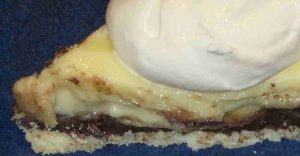
Banana Cream Chocolate Pie Close up
Close up of an actual slice of gluten free Banana Cream Chocolate Pie

This delicious pie is based on one from The Best of Cooking Light (2000).  We have changed a few things and made it gluten free.  As cream pies go, it is relatively light.  For those of you who eat pie for breakfast, we maintain that a slice of this pie is nutritionally not very different from a bowl of sugary cereal with milk and sliced bananas.  So, by all means, eat pie for breakfast!

It is possible to make this pie and serve it in 4 hours – you have to work quickly and chill at each stage.  Chill the pie crust immediately after it is baked, add the chocolate layer and chill, add the bananas and custard and chill again.  In winter, we take advantage of a table on a screened-in porch for these chilling stages. The screens on the porch are necessary to keep squirrels out of the pie.

First, you will need a one-crust gluten free pie shell.  You can make your own using 1/2 of this recipe: Pie Crust Recipe. Roll out a crust and line a 9 inch Pyrex pie plate.

Prick the crust all over with a fork and pre-bake the pie crust for 10-12 minutes at 450 degrees (for this crust you don’t need to use pie weights or dried beans to keep the crust from collapsing.)  In the event of a true pie emergency, you could use a Whole Foods gluten free pie crust from their freezer section.

Gather these ingredients:

For the chocolate part:

  • 1 TB cornstarch
  • 2 TB sugar
  • 2 TB unsweetened gluten free cocoa powder
  • 1/3 cup low-fat milk or gluten free rice milk
  • 2 ounces semi-sweet or bittersweet gluten free chocolate (chopped coarsely)
  • Dash of salt

For cooking the custard:

  • 2 TB cornstarch
  • 1 cup of low fat milk or gluten free rice milk
  • 1/2 cup sugar
  • 1/4 tsp salt
  • 2 large eggs
  • 1 TB butter

After cooking the custard, mix these in:

  • 2 tsp gluten free vanilla
  • 1/4 cup (2 ounces) gluten free cream cheese (for dairy-free, omit this)

Other:

  • 2 cups sliced ripe bananas (2 bananas)
  • Whipped cream, lightly sweetened and flavored with vanilla

You are going to layer up some thick chocolate paste which goes in to the baked pie crust first, then sliced bananas on top of the chocolate, then custard.  Chill for 2 hours or more, then serve with whipped cream!

For the chocolate part: Mix the cornstarch, sugar, cocoa, milk and salt  in a saucepan and cook, stirring constantly until the mixture thickens.  Add the chocolate and stir until it melts.  Spread this mixture over the bottom of the baked pie crust.

For the custard, get your immersion blender ready at your side in case you need it to correct custard disasters.  You basically have two choices.  You can mix the custard materials and cook over a boiling water bath, which takes more time and assures a lump-free custard, or you can mix the custard materials in a sturdy pot, cook over low heat, stirring constantly with a whisk, and if the custard curdles or looks at all lumpy give it a good blast with the immersion blender (taking care not to hurt yourself), adding a little heavy cream if necessary to loosen things up.  Either way works fine.

After you cook the custard mixture, while the mixture is still hot, stir in the vanilla and the cream cheese and mix thoroughly.  If you are making a dairy-free version, leave out the cream cheese.

Slice the bananas and put the slices on the chocolate layer, then spread the finished custard over the bananas.  Chill completely, slice and serve with whipped cream. There won’t be a lot of left-overs.

Make sure all your ingredients are gluten free!

Dairy Free, Dessert, Fall, Holidays, Pie, Recipes, Vegetarian dessert, gluten free, pie, vegetarian

Blueberry Pie sweetened with Maple Syrup

1 · Apr 19, 2010 · Leave a Comment

You can make a fine blueberry pie using dark maple syrup as a sweetener instead of granulated sugar.  This pie is refreshingly fruity and not as sweet as the more common sugar-sweetened pie.

Here are the general rules:

for 5-6 cups of Maine wild blueberries, add the following in a large bowl:

1 cup of pure maple syrup

2 Tablespoons of cornstarch

3 Tablespoons of flavorless tapioca starch (Authentic Foods offers a tapioca starch) or 1/4 cup instant granulated tapioca.  If you use instant granulated tapioca, let the whole mixture sit for 15 minutes before constructing the pie.

1/8 teaspoon salt

3-4 Tablespoons of fresh lemon juice to offset the maple syrup

1/4 teaspoon of ground cinnamon

Use a 2-crust recipe for pie crust, and use a 9 or 10 inch glass pie dish. If you use a larger pie dish, the pie will have less depth, and if you use a smaller pie dish then the pie will be more “heaped up.”  Line the pie dish with 1 piece of crust pastry, fill with the blueberry mixture, top with the second crust. Sprinkle the top crust with 1/4 cup of granulated sugar.

Bake in preheated 375 degree oven for 1 hour.  If the blueberries are frozen, the pie may need a few extra minutes.  Cool the pie on a rack before cutting.

Use all gluten-free ingredients!

Dessert, Pie, Recipes baking, blueberry, cooking, dessert, food, fruit, GF, gluten free, gourmet, maple syrup, pie, recipe

Gluten Free Thanksgiving, pies, sides

0 · Nov 6, 2006 · Leave a Comment

There is a good collection of gluten free recipes for Thanksgiving dishes to grace your table this year – click on the Thanksgiving link in the index on the right hand side of this page, and enjoy!

Holidays, Pie, Recipes, Thanksgiving pie, sides, Thanksgiving

Quiche – gluten free!

0 · Feb 13, 2006 · 1 Comment

This recipe was developed by Gf-Zing! , which celebrates flavor in the gluten free world.

For this quiche, you will need an unbaked pie shell – use 1/2 recipe GF Pastry Crust. Save the extra 1/2 egg from making the pie crust for the filling. Roll out the crust between two sheets of waxed paper until it fits the pie plate. Then remove the top sheet of waxed paper, flip the dough over in to a 9″ deep-dish glass pie plate, then carefully remove the other sheet of waxed paper. Repair any tears in the dough and set this unbaked crust aside.

2 onions, minced and fried in 1 Tablespoon gf butter (you can use leeks, shallots, some garlic, whatever oniony root vegetable you prefer, or a combination)
6 strips bacon, chopped, fried until crisp and drained of fat (you can chop the bacon with kitchen scissors before frying it. )
2 Tablespoons chopped fresh flat leaf Italian parsley
Cooked spinach, broccoli, asparagus, mushrooms (fry and drain) – choose one of these, or none of them, as you like
1 teaspoon dried marjoram
1/2 pound grated gruyere cheese (about 2 cups grated, and you can substitute other cheeses that are lurking around the cheese drawer)
4 eggs plus the leftover egg from making the pie crust
1 1/2 cups liquid (you can use any combination of milk, almond milk, rice milk, sour cream, yogurt, cream cheese, heavy cream, light cream, gf chicken stock etc. for the liquid, and if you use chicken stock use no more than 1/2 cup of that)
3/4 teaspoon salt
1/4 to 1/2 teaspoon pepper

Preheat the oven to 400 degrees.

Into the bottom of the unbaked pie shell, sprinkle and evenly distribute the fried onions, bacon pieces, marjoram, parsley, vegetables (if you are using them), and finally the cheese.

In the food processor, combine the eggs and the 1 1/2 cups of liquid, salt and pepper. Whir this mixture to combine, then pour on top of the things in the unbaked pie shell.

Bake at 400 for 40 minutes, until puffed and browned on the top. Remove from the oven and allow to rest for 5 – 15 minutes before serving. Keep any leftovers in the refrigerator.

Note: Vegetarians can substitute a small amount of gluten free chipotle chilis in adobo for the bacon – this will make the quiche spicy.

Remember to use only gluten free ingredients!

Fall, Pie, Recipes, Spring, Winter baking, gluten free, pie

Key Lime Pie – gluten free and dairy free

0 · Jan 18, 2006 · 5 Comments

This recipe was developed by Gf-Zing! , which celebrates flavor in the gluten free world.

Make a 9 inch gluten free pie crust, and pre-bake it at 350 degrees for 20 minutes or until it is as brown as you like it. Set the pie shell aside to cool.

Filling:

1 cup sugar
1/4 cup gluten free gravy flour (see below)
3 Tablespoons cornstarch
1/4 teaspoon salt
2 cups water
4 egg yolks, beaten
1 tablespoon butter or gluten free vegan margarine
1/4 cup fresh squeezed key lime juice (requires 8-10 tiny key limes or 4 regular limes)
1 teaspoon finely grated lime zest


Meringue:

4 egg whites
1/4 teaspoon cream of tartar (to stabilize the meringue)
6 teaspoons sugar
1 teaspoon vanilla

Combine the sugar, gluten free gravy flour, cornstarch and salt in a 2-quart saucepan. Gradually stir in the 2 cups of water. Cook at medium heat, stirring constantly with a whisk, until thickened. At this point, it will taste bland. Don’t taste it now.

Stir a small amount of the hot mixture in to the egg yolks, then a little more, then a little more, until half the hot mixture has been added to the yolks. Combine the yolk mixture with the rest of the mixture in the saucepan, whisking constantly and cooking for two minutes. Whisk in the butter or margarine. The aim of this process is to mix everything without getting lumps of hard-boiled egg yolk. Stir in the key lime juice and zest. Cool slightly, then pour in to the cooked pie shell.

Preheat the oven to 350 degrees. Beat the egg whites and cream of tartar for the meringue using a hand beater or an electric beater until the whites form soft peaks that hold their shape. Gradually beat in the sugar and the vanilla until the meringue is glossy and holds well. Spread the meringue carefully all over the pie to cover the pie completely. Bake the pie for 6 minutes, or slightly longer, to brown the top of the meringue. Cool the pie completely before serving.


Gluten Free Gravy Flour:

Mix these ingredients together and use what you need:

6 Tablespoons brown rice flour
2 1/4 Tablespoons sweet rice flour (mochiko)
4 1/2 teaspoons tapioca starch
1 teaspoon of xantham gum

Use all gluten-free ingredients!

*Most Popular Recipes*, Dairy Free, Dessert, Pie, Recipes

Pumpkin Pie – dairy and gluten free

0 · Nov 15, 2005 · 7 Comments

This recipe has been developed and tested for the gluten free community by Gf-Zing!

A one-crust unbaked gluten free pie shell (9-inch deep-dish glass pie plate is perfect)

Filling:

1 can pure pumpkin (1 pound size – the “one-pie” size)
4 large eggs
2/3 cup sugar
1/2 teaspoon salt
1 1/2 teaspoons cinnamon
1/2 teaspoon ground ginger
1/2 teaspoon freshly grated nutmeg
1/4 teaspoon allspice
1/4 teaspoon ground cloves
1 1/2 cups almond milk

For a standard pumpkin pie, made with evaporated milk or heavy cream, the recipe would use fewer eggs. For this pie, which uses almond milk instead, more eggs are required to set the filling. This pie also includes less sugar than standard recipes.

Mix all the ingredients for the pie filling together with a whisk, electric mixer or food processor until thorouhly mixed. You can mix the pie filling in the same food processor that you mixed the pie crust in, and any left-over crust ingredients will just get mixed in to the filling with no ill effects on the pie.

Anyway, after the filling is thoroughly mixed, pour it in to the unbaked pie shell set in a glass pie plate. The filling will be quite thick and there will be enough for a deep dish pie. Bake in a preheated 425 degree oven for 10 minutes, then reduce the heat to 350 and bake for another 35 minutes or more, until the filling is set. If the pie is 9-inches and deep dish, it may take as much as an additional 20 minutes before the filling is set. To test the pie, dip a clean, dry, knife-blade in to the center of the pie. The knife should come out nearly clean, but little bits of filling clinging to the knife are ok. The top of the pie will start to crack.

Remove the pie from the oven. Cool completely. Pumpkin pie is an egg-based custard pie, so it should be kept chilled when not being served, and then brought to serving temperature.

If you prefer, you can use a one-pie can of squash, or 1 1/2 cups of home-cooked, mashed, drained pumpkin or winter squash (butternut, buttercup etc.). To use winter squash or sugar pumpkin, halve them and seed them, then bake or microwave until tender.  Finally, remove it from the skin, allow it to sit overnight, then strain it thoroughly to remove excess liquid.

If you don’t care about using dairy but want to use less fat, you can substitute 1 2/3 cups of 1% skim milk or gluten-free fat-free evaporated milk for the almond milk, and use 2 eggs plus 1/2 cup of gluten-free eggbeaters product for the eggs. Make sure the product is gluten free.
Make sure all the ingredients, including the spices, are guaranteed gluten free by the manufacturer. Certain manufacturers guarantee the gluten-free quality and accurate labeling of their spices. Read the internet gluten-free lists to find out which manufacturers are currently maintaining this level of quality.

The original concept of this recipe is from the Victory Garden Cookbook by Morash.  There, the recipe was a an old-fashioned winter squash pie, and called for milk or cream.

*Most Popular Recipes*, Breakfast, Dairy Free, Dessert, Fall, Holidays, Pie, Recipes, Thanksgiving, Winter

Gluten Free or GF Pie Crust

1 · Nov 10, 2005 · 2 Comments

We tried mixes, and recipes, and had almost given up on ever having a decent pie again, when we discovered this method for making gluten free pie crust. Let’s just mention that pie was one of the most important foods in our repertoire, and we used to be very proud of our pie crust, and then we entered the parallel universe of gluten free cooking, for medical reasons. We went in to pie withdrawal – depression, cold shakes, somber mood…..after all, what were we going to have for breakfast, if we couldn’t eat left-over pie?

Well, the news is good – you can have your pie and eat it too!

Use the Dream Pastry Recipe from Bette Hagman’s More From the Gluten-Free Gourmet. A very similar recipe is also called “Donna Jo’s pie crust” and is available on the internet. (Be careful about the recipes on the internet, which are sometimes missing key ingredients in the list of flours, such as the sweet rice flour, for example!) Of course, we don’t exactly follow the recipe anyway, so we have printed here the method we are using at the moment…..

We prefer the flavor of lemon juice to the flavor of vinegar, so we use fresh lemon juice in the recipe. Also, we use one stick of gluten free margarine and one of butter (we don’t like Crisco so much). Lastly, we sprinkle the top of a two crust fruit pie liberally with sugar.

To save time and aggravation when hand-mixing the pie dough, we use a large cheese grater to grate the butter into the dry ingredients. This makes it much easier to get the “lima bean” sized pieces of butter called for in the recipe. We have also used a Braun food processor to make this crust, and it was acceptable, you just have to be careful not to overmix the butter.

Here are the ingredients for one two-crust pie shell:

Dry ingredients:

1/2 cup tapioca flour (tapioca starch) – make sure this is the flavorless kind, not the fermented find
1/2 cup cornstarch
1/4 cup potato starch (katakuriko in Japanese stores – this is NOT the same as potato flour)
1 cup sweet rice flour (mochiko flour – not the same as white rice flour)
1 teaspoon xanthan gum
1/2 tsp salt
1/2 teaspoon sugar

Shortening:
1/2 cup gluten free margarine or butter
1/2 cup butter

(we use all butter)

Liquid ingredients:

1 egg
1 Tablespoon fresh lemon juice
1 Tablespoon ice water

wax paper
sweet rice flour to sprinkle on the wax paper
lots of sugar for sprinkling on the top of the pie

Put the dry ingredients in a bowl and mix them thoroughly with a fork. If you own a sifter, you could sift them together, but it is not necessary. Grate in the butter and margarine using a large cheese grater. Mix the dry ingredients and the shortenings up with a fork until the pieces of butter are distributed evenly – you don’t need to get the pieces of butter as small as they would be in a wheat crust. The size of “lima beans” may be a little large, but don’t go smaller than kidney beans! Anyway, mix up the liquid ingredients until well combined, then pour them in to the dry ingredients and mix together. Squish the dough into a ball and wrap it up to store in the refrigerator for one hour. (For the record, we have made this crust in the winter and gone straight to rolling it out, without refrigerating it. You wouldn’t do this when the air is warm in the summer, but it is ok to do this in the winter when it is cold.)

Divide the dough in half.

To roll out this crust, spread out a piece of wax paper, dust it with sweet rice flour or GF flour mix, or whatever comes handy, put one piece of the dough on top, sprinkle with more flour, spread another piece of wax paper on top of the dough, and roll out with a rolling pin. * The dough is now contained between two sheets of wax paper. Peel off the top piece of wax paper, flip the crust on top of the pie plate, adjust it to fit the dish and remove the other piece of wax paper. Your counter is clean, and your pie crust did not fall to pieces when you tried to put it in the pie dish! You rock!

Fill your pie, then repeat the pie crust rolling maneuver for the top crust. Cut pretty holes in the top crust before transferring it to the pie, if you wish. After putting the top crust on the pie, sprinkle the top crust liberally with sugar – maybe 2 – 4 Tablespoons! Cut steam vent holes in the crust, if you forgot to do it before, and then bake the pie. This crust gets nice and brown and crispy, and it has a delicious buttery flavor! You bake it as you would any other pie crust (about 50 minutes at 400 degrees, for a filled two-crust fruit pie.)

*Note about the rolling pin: We use a piece of dowel from the hardware store – makes a perfect rolling pin, and costs very little. The piece we purchased was being sold as “closet pole” and is 1″ in diameter and 18 inches long.

Some Pies to Try:

  • Blueberry Pie Sweetened with Maple Syrup
  • Gluten Free Quiche
  • Key Lime Pie – Gluten and Dairy Free
  • Pumpkin Pie – Gluten and Dairy Free
  • New England Apple Pie
  • Coconut Cream Pie – no cream!
  • Pumpkin Pie with Coconut Milk
  • Plum Pie

See this post for yet more thoughts on gluten free pie crust: Click here.

Make sure to use all gluten free ingredients!

*Most Popular Recipes*, Breakfast, Dessert, Fall, Holidays, Pie, Recipes, Spring, Summer, Thanksgiving, Winter dessert, pastry, pie, pie crust

New England Apple Pie

0 · Nov 5, 2005 · 1 Comment

Use the Dream Pastry Recipe from Bette Hagman’s More From the Gluten-Free Gourmet. We use one stick of gluten free margarine and one of butter. We use 1 Tablespoon lemon juice in place of the vinegar, for the flavor.

2-crust unbaked pie shell

8 apples – Use a mix of varieties like Northern Spy, a few Russet, Baldwin, Golden Delicious, a few Granny Smith and peel, core and slice them. Don’t use MacIntosh or Macoun varieties unless you use maybe only one of each – they don’t hold their shape when cooked and are better for making apple sauce.

1/2 cup dark brown sugar
1/2 cup white sugar
2 Tablespoons tapioca starch (available at health food or asian groceries)
1/2 teaspoon gluten free ground cinnamon

Line a glass pie dish with one piece of the pastry. Mix the apples with all the other ingredients until thoroughly mixed. Load up the pie shell with the apple mixture. Put the other crust on top, and cut several steam holes in the top crust.

Now, sprinkle the top crust with at least 2 Tablespoons of additional white sugar. Preheat the oven to 400 degrees. Place a cookie sheet as a drip tray in the oven to catch any overflowing juices.

Place the pie in the oven, above the drip tray. Bake for 50 minutes, and then check to see if the top is getting golden. The pie is done when the crust is becoming golden and the juices are starting to bubble up in a thickened sort of way. Some of the juices may be dripping over on the drip tray, and that is at is should be.

You can serve a slice of apple pie with cheddar cheese on the side, or melted on the top. That is always good. Also, you can serve pie for breakfast and it will be better for you than a sugary breakfast cereal – also, you will be happier.

Breakfast, Dessert, Fall, Holidays, Pie, Recipes, Thanksgiving

Coconut Cream Pie – gluten free, with no cream!

0 · Nov 1, 2005 · Leave a Comment

9″ pie gluten free shell – baked

Coconut Filling:
1 cup gluten free coconut milk (canned, reconstituted or frozen)
2 cups gluten free almond milk
1/2 cup sugar
1 Tablespoon butter or margarine
pinch of salt
1/4 cup fresh grated or sweetened dried coconut
5 Tablespoons cornstarch and enough water to make a thin mixture
4 egg yolks
1/2 teaspoon gluten free vanilla

Meringue Topping:
4 egg whites
1/8 teaspoon cream of tartar
1/4 teaspoon salt
1/4 cup sugar
1/2 teaspoon gluten free vanilla

To make the filling:

Mix the coconut and almond milks, sugar, butter, salt and coconut in the top of a double-boiler over hot water. Stir constantly until the mixture is very hot. Mix the cornstarch with enough water just to thin it to pouring consistency, then add this to the hot mixture, stirring constantly and continue to stir until thickened.

Beat the egg yolks in a bowl just until mixed. Stir a little of the hot mixture into the egg yolks, beating constantly so as not to cook the egg yolks. Add the rest of the hot mixture and the vanilla, again stirring constantly. Put the mixture back over the hot water (double boiler) and cook for 2 more minutes and don’t forget to keep stirring! Cool this coconut custard, and then pour it into the prepared pie shell. Set it aside while you make the meringue.

To make the meringue:

Beat the egg whites, cream of tartar and salt tuntil they form soft peaks. Beat in the sugar and beat until the meringue makes smooth peaks. Add vanilla and spread the meringue on the filling in the pie shell.

Bake the pie at 400 degrees for 10 minutes, until the meringue is nicely browned. Chill the pie completely before serving.

Make sure all your ingredients are gluten free!

*Most Popular Recipes*, Dairy Free, Dessert, Holidays, Pie, Recipes, Thanksgiving coconut, gluten free, pie

Pumpkin Pie with Coconut Milk

0 · Oct 24, 2005 · 2 Comments

The recipe is adapted from one at www.Celiac.com. Here, the pie has additional spices and coconut milk instead of cream.

Make an uncooked one-crust gluten-free pie crust and use it to line a glass pie dish.

Bottom of pie:
1/3 cup finely chopped pecans
1/3 cup dark brown sugar
3 Tablespoons gluten free margarine (for dairy, use butter)

Filling:

3 large eggs, stirred
1/3 cup dark brown sugar
1/3 cup white or turbinado sugar
2 Tablespoons cornstarch
1 1/2 teaspoons GF cinnamon
1/2 teaspoon GF ginger
1/2 teaspoon freshly grated nutmeg
1/4 teaspoon GF allspice
1/4 teaspoon GF cloves
1/2 teaspoon salt
16 ounces GF canned pumpkin, or freshly cooked pumpkin, blended and strained to remove excess water
1 cup coconut milk

Mix pecans, sugar and butter and distribute in the bottom of the uncooked pie shell. Prick the part of the pie shell that goes up the side of the pie plate with a fork in several places so it won’t balloon out while cooking. Bake at 450 for 10 minutes and then allow to cool for another 5 minutes.

Mix the filling ingredients in a food processor or blender. Pour the mixture into the partially cooked pie shell, on top of the nut layer. Bake for 45-50 minutes at 350 degrees. A knife inserted into the center of the pie should come out nearly clean. Cool completely before cutting, although we often end up eating pie when it is warm because we can’t wait.

This is a custard pie, and should be refrigerated because of the eggs.

Try this pie for breakfast – it is sure to be more healthy than any breakfast cereal!

Make sure all of your ingredients, including the spices, are gluten free.

*Most Popular Recipes*, Breakfast, Dairy Free, Dessert, Holidays, Pie, Recipes, Thanksgiving coconut, pie, pumpkin

Plum Pie

0 · Sep 24, 2005 ·

Plum Pie

Filling:
2 pounds ripe Italian prune plums, stoned and cut in quarters (you don’t have to peel these plums)
1/4 cup white sugar
2 tablespoons gluten free orange liquer
1 tablespoon tapioca starch
1 teaspoon of cinnamon
1/4 teaspoon of freshly grated nutmeg
1/4 sugar for the top of the pie

uncooked two-crust pie crust

In a large bowl, mix all of the filling ingredients except for the sugar that goes on top.

Make a 2-crust pie crust such as the Dream Pie Crust from Bette Hagman’s cookbook The Gluten-Free Gourmet Makes Dessert. Line a 9″ glass pie plate with a single crust, fill with the plum filling, place the top crust on top. Cut holes in the top to allow steam to escape. Sprinkle with the remaining 1/4 cup of sugar. Bake at 375 degrees for 45 minutes to 1 hour, until done. The juices that are bubbling out of the sides of the pie and through the steam holes should be slightly thickened, and the top should be golden.

You can also make a crostata, placing one crust flat on a parchment lined baking sheet, loading it up with the fruit mixture (not quite to the edges of the dough), roll the edges up to cover some of the filling; sugar on top and bake!

Note: you can obtain tapioca starch at health food stores or Asian food stores.

Serve warm.

Dairy Free, Dessert, Fall, Pie, Recipes, Vegetarian fruit, pie, plums, vegetarian

Primary Sidebar

Check out our Coupon Collection

Click Here to go directly to the Coupon page

Read more at The Rambling Epicure:

Click Here: The Rambling Epicure

QR code for your phone

qrcode for gfzing
NFCA logo

Blogroll

  • Aloha World Ono Recipes
  • Book of Yum
  • Dulce Cocina sin Gluten
  • Gluten Free Beer Association
  • Glutenfreie Rezepte | kaMehl
  • Hawai'ian Electric
  • Laylita's – Ecuador
  • Nombudsman
  • Papilles et Pupilles
  • Sea Salt with Food
  • The Rambling Epicure The Rambling Epicure is a daily international food chronicle, and the first online newspaper to follow global food trends and news.
  • Triumph Dining

Monthly Archive

Proud member of FoodBlogs

Load up on new recipes, exclusive goodies, + more!

Get the exclusive content you crave straight to your inbox.

Things to Read

Find by keyword

bacon baked baking beans beef berries blueberry cake cheese chicken chocolate coconut cooking curry dessert DIY dried beans easy fish food fruit GF ghee gluten free gourmet homemade lamb maple syrup meat microwave New England Hard Cider pie pork pumpkin recipe recipes rice salad sauce soup stewed strawberries sweet potato thai red curry vegetarian

Copyright © 2023 GF-Zing! on the Cravings Pro Theme