• Skip to primary navigation
  • Skip to main content
  • Skip to primary sidebar
  • Skip to footer

GF-Zing! logo

  • Home
  • Coupon Collection
  • GF Foods & Groups
  • Ask Gf-Zing!
    • About the Author
    • About Gf-Zing!
  • Nav Social Menu

    • Email
    • Facebook

Dairy Free

Sesame-Crusted Tofu with Quick Microwave Curried Carrot Soup

0 · May 14, 2012 · 1 Comment

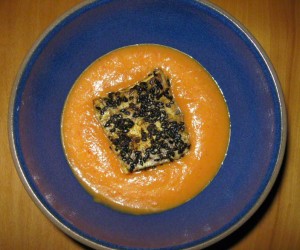
Curried Carrot Soup with Sesame Crusted Tofu - Alice DeLuca 2012 digimarc
Curried Carrot Soup with Sesame Crusted Tofu in a blue Heathware bowl

The inspiration for this dish from www.gfzing.com was a trip to the Garden Grille in Providence, Rhode Island.  They make truly delish vegetarian food, much of which they will also prepare gluten free.  This is recipe is NOT one of theirs, it is just inspired by their cooking.  I did not have a chance to try their sesame-crusted tofu, unfortunately.

The soup here is done in the microwave oven, for quick, efficient dinner preparation.

It is easily adapted for vegetarians and vegans – just omit the fish sauce and adjust the salt.

For the Soup:

5 ounces peeled Spanish onion, diced

1/2 ounce (2 cloves) garlic, peeled and diced

1 TB olive oil

3 ounces red bell pepper, diced

3 carrots (about 6 ounces), peeled and chunked

3/4 cup rich coconut milk

1 cup water

2-3 teaspoons gluten free fish sauce (omit for vegetarians)

2 teaspoons gluten free Thai Red Curry paste

1 TB currant jelly

salt to taste (1/4-1/2 teaspoon)

To Fry the Tofu:

1 package of extra-firm tofu, drained and slice the short way in to four slices, then cut the other way to make 8 squares about 3/4 inch thick.

1 teaspoon homemade curry powder (see recipe on this site)

2 TB black sesame seeds

2 TB peanut oil

1 teaspoon sesame oil

To make the soup:

In a 1 1/2-2 quart microwavable casserole dish (such as Corningware), place the chopped onions, chopped garlic and 1 TB of oil. Cover and microwave on high for 5 minutes.  Allow to cool for a few minutes before removing the cover (to avoid steam burns).

To the cooked onions and garlic in the casserole dish add the rest of the soup ingredients from the red bell pepper through the currant jelly.  Cover and microwave until the carrots are tender, about 10 minutes.  Allow to rest a few minutes before you remove the cover, to avoid steam burns.

Use a stick or immersion blender to puree the soup. Season with just a little bit of salt to taste. Adjust the sweetness. Set aside.

For the Tofu:

Mix the curry powder and sesame seeds and pat the mixture on to one side of each of the squares of tofu.  Heat the oil and sesame oil in a large, heavy frying pan.  When hot, add the tofu squares, seed side up. Fry over medium heat, undisturbed for 4 minutes.  Salt the tofu squares.  Use a spatula to turn the tofu squares and fry the other side undisturbed for 3 minutes. Salt the other side.  The frying will crisp the tofu, rendering it golden brown.

Remove the fried tofu from the pan.

To Serve:

Reheat the soup briefly and serve 2 squares of fried tofu, seed side up, on each serving of the hot soup.
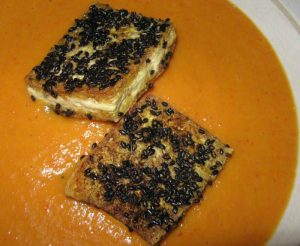
Curried Carrot Soup with Sesame Crusted Tofu in a Heathware bowl - Alice DeLuca 2012 digimarc
Curried Carrot Soup with Sesame Crusted Tofu in a white Heathware bowl

Serve with lime wedges, and a salad made from chopped arugula, fresh mint, orange juice, olive oil, gluten-free mustard, salt and pepper.


Appetizers, Dairy Free, Fall, Lunch, Meat-eater, Microwave Cooking, Recipes, Soups, Spring, Summer, Vegetables, Vegetarian, Winter carrots, curry, gluten free, microwave, soup

A Sausage Walks in to a Bar…

1 · May 3, 2012 · Leave a Comment

By Alice DeLuca

A story for carnivores

Assador - Alice DeLuca 2012 digimarc
Assador - for roasting sausages

This whole adventure started with a search for the perfect sausage to use in a recipe for pork with clams, which led to a little ceramic pig, and ended up with a truly excellent party. This cute little piece of specialty cookware, which looks like footwear for some impossible outer-space monster, is in fact designed for brazing sausages over flaming, hi-octane Portuguese liquor.  As we learned the purpose and the method for using this device, we became completely distracted from our original mission and found ourselves planning a sausage-roast.

Linguica roasting - Alice DeLuca 2012 digimarc
Linguiça roasting over flaming aguardente

First, we had to obtain the little pig dishes from Portugal – that was easy and took only a few weeks. As soon as the dishes arrived we set about making home-smoked sausages and invited some guests to come over and roast them with us – RSVPs were instantaneous and none declined the invitation.

The sausages that are required – linguiça or chourico – are not easily found freshly made in the grocery store; the smoked sausages you do find are often laminated in plastic, oozing a creepy slime when opened, delivering a texture of rubber bands with what seem like bits of potato thrown in – the bits are the fat but for some reason completely unlike the fat in a homemade sausage.  If these laminated sausages are the only smoked sausage you have ever known, then you must find some real, home-smoked sausages, or make your own.  With pork shoulder and a few other ingredients, a good old-fashioned meat grinder, and some type of smoker, you can have a plate of these sausages to set fire to with your friends.

Linguica on Heathware plate - Alice DeLuca 2012 digimarc
Vermillion Linguica looks stunning on blue Heathware plates!

People have been making sausages and brazing them since the dawn of time.  You can follow the accurate but brief instructions provided in the Ancient Roman De Re Coquinaria of Apicius (published by Walter M. Hill, 1936). Here, the proper color of smoked sausages is described perfectly – vermillion – a nearly forgotten word and color that deserves to make a comeback.  Vermillion is the color of notoriously poisonous cinnabar, which is a substance with an interesting history of its own.  Take a look at cinnabar on dolomite and you will see that the Romans have described the color of smoked sausage precisely in the recipe for Cirellos isiciatos, Round Sausage.

“Fill the casings with the best material [forcemeat]. Shape the sausage in to small circles, smoke. When they have taken on vermillion color, fry them lightly.”

The Recipe

To make linguiça, we chose “the best material” – a simple formulation with garlic, paprika and sweet rosé wine because pork is so often excellent with sweet, fruity flavors.  Sausages of this type sometimes include oregano and vinegar, but this recipe “LINGUICA PORTUGUESA A’LA ANA“ is more delicious than those, perhaps because of the sweet rosé.  The sausage ingredients are posted here with permission from AnaCatarina Louro Ferreira Alves, who generously provides the recipe to the world on her blog: http://anydaysoiree.com/

5 lbs. ground pork butt
3 Tb. paprika (not smoked)
2 Tb. fine minced garlic
3 Tb. salt
1 cup sweet rosé wine
1 tsp. sugar
1 Tb. black pepper

A sliced lemon for soaking the hog casings

Apple wood for smoking

Hog Casings – for stuffing – about 2 or 3 feet of casing per pound of meat


Concerning the Meat and its Preparation

Start out a day or two before you want to eat the sausage, to complete the marinating phase.

In an agrarian economy, the seasonal time for making sausage was in the fall when a hog was slaughtered; everyone hurrying to preserve the large quantities of meat for the long winter. Smoked sausage was a hedge against starvation.  In the modern, refrigerated world, sausage can be made year-round and is a reason for a party! When making sausage at home, be careful to use safe food-handling techniques, clean equipment and clean hands at all times.  Note that the Latin root of the word “botulism” is the word for sausage – botulus.  That is not a coincidence. Study the conditions under which food pathogens can replicate and then avoid those conditions.

To obtain several pounds of ground pork for sausage, purchase a “pork shoulder” weighing over 9 pounds. Very carefully remove the skin from the pork shoulder (not used in the sausage), slice the meat from the bone with a boning knife, and cut the meat in to large chunks. The foundation of the pork shoulder is a complex articulated joint, so extreme care must be exercised when wielding the boning knife.  How do orthopedic surgeons ever actually manage a functioning joint replacement?

Save the bone to cook with dried beans.

After cutting the meat from the bone, modern cooks might be tempted to eliminate and discard all the fat, but the fat and connective tissue are the keys to great flavor.  Remove the fat and you surely will create disappointing, dry sausage like the last bit of an overcooked turkey breast that’s been loitering on the platter way too long after the Thanksgiving dinner. To make a good sausage, fat is required.

Marinating

Weigh the boned meat and season it with proportional amounts of the paprika, fresh garlic, salt, Portuguese rosé wine, sugar and pepper called for in the recipe.  We had 6 pounds of meat, so we increased the seasonings proportionally.

Stir together the spices and wine, then mix in the chunks of meat – and commune with the ancestors who were marinating meat for millennia. Judging from 18th century engravings, the ancestors seemed to have had cats, chickens and dogs running around under the table during the sausage-making process, not the ideal situation for food preparation.  Perhaps it is wise to banish the cats, dogs and chickens to the yard, before proceeding.

Unlike ancient peoples, we refrigerate the marinating meat and keep it cold during the remainder of the 1-2 day process.

Grinding

After marinating the meat under refrigeration, grind or chop it in to small pieces.  There are many different types of grinding devices available.  Whichever method you use, your goal is to produce small bits but not a paste – one of the principle differences between a sausage and a lowly hot dog is the consistency.

The mechanism of the old-fashioned meat grinder is an Archimedes screw.  Archimedes of Syracuse, c. 287 BC – c. 212 BC, is credited with the invention of the screw conveyor which has been used since antiquity to move water uphill from one place to another. In a meat grinder, the screw is carrying the meat from one place to another (from the hopper to the blade.)

We use a Magimix food processor for chopping meat, working with a small amount of the meat at a time (maybe a half pound) and using the “pulse” feature – intermittent chopping – as noted in the directions that came with the machine.  This works very well. Many older-model food processors would grind the meat too finely.

If you have an old fashioned meat grinder, use the blade and the coarsest disk.  Again, a great opportunity for living the life of the ancestors presents itself.  The sinews can clog up the disk, requiring frequent cleaning, We use our old-fashioned grinder mostly for stuffing the sausage casings. The grinder clamps to the table and can be easily removed, cleaned and stored.

Another style of meat grinder is screwed permanently to the table.  We can’t see how this would be practical unless you grind things every day or perhaps enjoy the aesthetic and conversation-piece value of the thing – “Let us show you our newly renovated kitchen with built-in meat grinder….”

The other meat grinder that makes no sense is the kind that suctions to a smooth surface. This seems impractical because of the amount of force required to grind meat, and because suction devices usually cease to function correctly despite being adhered to a glass-smooth surface.  How many times has the suctioned soap dish fallen in the shower, or the GPS device toppled in to the automobile?

One way or another, chop the marinated meat in to small bits, then chill it while you prepare the casings.

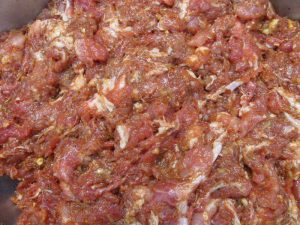
Linguica chopped and seasoned  -Alice DeLuca 2012 digimarc
Marinated meat, chopped and ready for stuffing

Preparing the Casings

The next step will be preparation of the hog casings.  For unknown reasons, hog casings, if you are lucky enough to find any, are usually on the top right hand corner of the supermarket shelf that houses ham and pork products.  In a plastic tub or sometimes a plastic bag, the “casings,” which are really cleaned intestines, are packed in salt.  Years ago, hog casings had a distinctive funky odor but recently purchased hog casings have had no odor whatsoever.  We were surprised to find that packages of hog casings come from all over the world – it is interesting to read the label on the package.

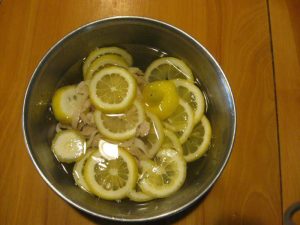
Soak the hog casings (3 feet for every pound of meat) in warm water with a sliced lemon for 30 minutes to soften and desalinate the casings, then run water through them to ensure they are clean (discard the lemon slices).

Soaking Hog Casings - Alice DeLuca 2012 digimarc
Sausage casings soaking with aromatic lemon slices

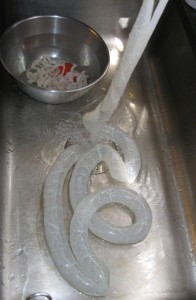
As the water runs through, marvel at the structure and strength of this wonderful material.


Cleaning Sausage Casings - Alice DeLuca 2012 digimarc
Rinsing the sausage casings

One of the many remarkable things about sausage casings, or intestines in general, is how terrifically strong they are.  They have been used for millennia as string and thread, and as strings for musical instruments.  The 120 foot intestine of a cow is formed in to harp strings and then, under enormous tension the strings are plucked to produce musical notes; Gut is used by surgeons to sew up wounds, and by tennis players to string their rackets so they can slam balls in to the ground at upwards of 70 mph.


Stuffing


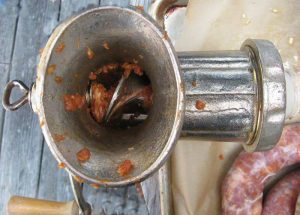
Archimedes Screw - sausage grinder - Alice DeLuca 2012 digimarc
An Archimedes screw moves meat through a grinder

It is much easier and more fun to stuff sausage with two people working than all by yourself.

Use a meat grinder to stuff the sausages.  You need 3 feet of hog casing per pound of sausage, allowing for a little extra at each end of the sausage.  Remove the blade and grinder disk and attach a sausage stuffing funnel. Slide a length of hog casing on to the funnel.  Now put the seasoned sausage meat through the grinder, turning the handle slowly and steadily with one hand and easing the meat in to the casings with your other hand. The meat goes in to the hopper and comes out in to the casing.  When the casing is nearly full (with 6 inches of empty casing remaining) remove the sausage from the funnel and start on the next sausage. Don’t complicate your life by trying to tie knots in this sausage.  Just set the filled sausages aside to chill in the refrigerator until it is time to smoke them.


Linguica stuffing - Alice DeLuca 2012 digimarc
The sausage stuffing funnel is efficient!

Smoking

Part of the reward for making your own smoked sausage is aromatic.  The scent of smoked sausage would tame the wild wolf and bring him to your doorstep; it would make the wolf volunteer to be the captive family dog if only he could have some of this delicious meat.[i]  (As expected, both our tame dog and cat became increasingly animated while the sausage was smoking, and eventually they were invited to retire indoors.)

Follow the instructions on a smoker, and use apple wood for the smoke.  Check the internal temperature of the smoker to insure that it is hot enough to do the job safely.  We used a Primo ceramic grill to smoke the sausage, paying careful and regular attention to adjusting the vents, and maintaining a higher temperature than recommended in the original recipe – just below 200° F.  We chose to smoke the sausage until the internal temperature of the sausage was 170° F, which took approximately 3 hours.  We recommend that any home cook do their own research to determine a safe process.  The FDA provides some guidance on this.  When completely smoked, the color of the sausages will be a deep red vermillion. The sausages are not preserved by this smoking – they are merely cooked through.  From this point on, they should be preserved like any other meat – in cold storage for a few days or in the freezer for a longer period of time.

Do the homemade sausages look dry to you?  That is the miraculous thing about real smoked sausage – although the exterior of the sausage is dry, the interior is just right – juicy and delicious.  As a reward for your labor, taste a few slices before you put them away to chill.


Setting Things on Fire

Roasting sausages over flaming cheap brandy is a social form of cooking, an adventure to be shared with brave and hearty friends who enjoy hazardous adventure and are willing to take responsibility for their own actions. Perhaps you could have your guests agree to a “Safe Sausage Disclaimer”:

“I recognize that consuming homemade sausage is fraught with danger and I am willing to fully assume all the risk and untold horrors so I may experience real food.”

We used a little parade of two “assadors” to roast our sausages.  For fuel, we used inexpensive aguardente, lighting the flame under the sausages with foot-long matches and keeping a fire extinguisher available nearby. (Incidentally, we are intrigued to learn more about the high-walled linguiceira shown at the Borderless Cooking blog. It appears immune to the windy conditions that prevailed during our party.)

Place the assador on a heat-proof surface, preferably in a location that is not windy. Pour a pool of aguardente in to the assador.  Using a long match, set the aguardente ablaze without setting anything else on fire. Cut off pieces of sausage to fit the assador and place them on the racks over the flames. As the sausage cooks, some of the fat melts in to the cooking device and fuels the alcohol-based fire, and as this happens the flame goes from blue to yellow and the sound of sizzling fills the air.  The blue flame from burning alcohol is cooler than the ensuing yellow flame from the burning fat. The cooking process speeds up as the flame turns yellow and gets hotter. Turn the sausages carefully with tongs, and make sure to cook them until they are blackened.  Remove them from the flames too soon and the interior will be dry and hard.  Keep cooking the smoked sausages until they are crisped up on the outside, and the fat is melting on the inside.  One of our assadors acquired a small crack during the roasting party, so again, take precautions and take good care.

Video:

Linguica roasting over aguardente

We poured a rosé with the linguiça, to match the flavoring component of the sausage.  A dry, hard cider and beer were also fine accompaniments, along with a Colombian bean dish, a selection of cheeses including the outstanding Winnimere cheese from Jasper Hill Farm in Vermont, and a fine green salad supplied by some excellent cooks among the company at the table.  We ate, as the Hawaiians say, until we were tired.

Notes for further study: There are other versions of this type of sausage brazing grill – This one uses skewers, for example.  This one shows a much deeper, sturdier cooker  which we are interested in acquiring, in case anyone knows where to get one. Here is a video recipe that shows grilled linguiça as a garnish for a small soup.


[i] Read: The Cat That Walked by Himself, by Rudyard Kipling: http://www.gutenberg.org/files/2781/2781-h/2781-h.htm#2H_4_0011

Dairy Free, Fall, Holidays, Meat Dishes, Meat-eater, Recipes, Spring, Summer, Winter, with New England Hard Cider aguardente, assador, DIY, homemade, linguica, pork, sausage

Alice’s Excellent Gluten Free Pancakes or Waffles with Wild Blueberries

1 · Apr 19, 2012 · 2 Comments

Alice's Excellent Pancakes and Waffles gfzing dot com 2012
Pancakes and Waffles - gluten free from gfzing dot com

In October of 2005 I shared excellent pancake and waffle recipe with you all. Buy some frozen blueberries and real dark maple syrup before you read any further.  In 2012 it is updated to include information about our favorite waffle iron – we have no commercial affiliation with Nordic Ware by the way, we just like their stove-top waffle iron better than any of the electric models we have tried over the years..

This recipe works with buttermilk as well – for the pancakes.  It makes the best waffles if you stick with almond milk as the liquid.

Mix in bowl:
1 cup brown rice flour
1/2 cup potato starch flour
1/4 cup tapioca flour
1/4 cup cornstarch
1 Tablespoon GF baking powder
1 Tablespoon sugar
1/2 teaspoon salt

In another bowl:
1 1/2 cups almond milk
3 eggs
4 Tablespoons vegetable oil

Stir the two mixtures together. Heat a non-stick pan on medium, add
butter or margarine. When pan is hot, pour batter to form pancakes (1/2
cup makes a beautiful big pancake), sprinkle with frozen blueberries.
Wait until the bubbles that form in the pancake start turning into holes
(if you don’t wait long enough the pancake will be hard to turn) but not
so long that the pancake burns, then flip. When other side is cooked,
transfer to plate and serve with real maple syrup – use the Grade B syrup which has the most flavor…

To use this recipe for waffles, use only 2 eggs and add another
tablespoon of oil. Omit the blueberries. Waffles take 4-6 minutes to cook.

Update in 2012 For best waffle results, try a Nordic Ware stovetop waffle iron – the belgian waffle type – and brush it lightly with vegetable oil before heating.  You have to practice with these waffle irons a few times to get it right. On our stove you heat it on medium high for three minutes, then flip it and heat the other side for 3 minutes. Then, you open it, pour in one and a half cups of batter, close it and cook for 1 minute, then flip and cook for 2 minutes.  That makes the perfect waffle in the photograph.

If you are serving food to gluten-free friends, check carefully with the manufacturers, or on the reputable internet-based gluten free food lists, to make sure that all ingredients are gluten free. Or, ask your friends which brands are safe for them to eat.


Breakfast, Dairy Free, Equipment, Product Reviews, Recipes blueberry, dairy free, pancake, waffle

Homemade Seasoned Rice Vinegar

34 · Jun 24, 2011 · 4 Comments

Gfzing.com is once again bringing you the DIY recipe you have been looking for – how to make your own seasoned rice vinegar – the kind of vinegar that is used to make sushi.

The proportions for making Japanese seasoned rice vinegar are as follows – as described in the interesting Japanese cookbook Japanese Cooking for the American Table (by Karen Green, 1986, ISBN 0-87477-376-8).

Mix:

  • 4 TB rice vinegar
  • 2 TB sugar
  • 1 1/2 teaspoons salt

That’s it!  In any recipe that calls for seasoned rice vinegar you can use this mixture.  If you include your own homemade vinegar, even better! You can be sure that your seasoned rice vinegar is gluten free!


Condiments and Sauces, Dairy Free, Recipes, Salads and Dressings, Vegetarian DIY, homemade, vinegar

Sangria with strawberries

0 · Jun 8, 2011 · 1 Comment

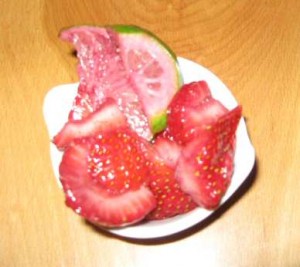
gfzing dot com sangria fruit
It is nearly 100 degrees outside, and humid, so what better use of some dry red table wine than a tasty cold sangria to drink with a leisurely dinner of potato salad?  The cinnamon in this recipe lends a certain richness and depth to an otherwise light-hearted drink.

We followed along with and embellished upon the ideas expressed at the interesting Spanish website La Receta de La Felicidad that lists Webos Fritos among its ancestors.  These folks add salt and pepper to their sangria – brilliant!  We added lime and triple sec.

Combine and chill:

1 liter (1 wine bottle) of red wine – sangiovese is a dry red

1 fresh lime, washed carefully and finely sliced (peel and all)

12 ounces of fresh strawberries, washed carefully and sliced

3 TB of gluten free orange liqueur (a gluten free triple sec) or 3 TB sugar

1/2 – 1 teaspoon ground cinnamon

1/4 – 1/2 teaspoon black pepper (depending on how spicy you like)

1 pinch of salt

1 Tablespoon vanilla (we make our own by soaking split vanilla beans in potato vodka for months and months)

Mix together fruit and wine and chill completely (about 2-4 hours).  Add the spices and vanilla. Serve in wine glasses with plenty of the berry slices in each glass.  The limes are there for flavor – you don’t necessarily eat the slices of lime.

We would have taken a photo of the glass of sangria, but all that was left was the fruit! Eat the fruit with a spoon.

According to the new food pyramid (which is now a plate), the combination of a potato salad made with grated carrots and hard-boiled eggs, and a glass of this sangria with fruit, would satisfy most of the requirements except for the mysterious “dairy” circle.  That dairy circle could be taken care of with a simple slice of manchego cheese.  And done! – a balanced meal.


Dairy Free, Drinks, Recipes, Summer, Vegetarian cinnamon, drink, lime, sangria, strawberry, vegetarian

Gluten Free Miso Soup

0 · Feb 24, 2011 · Leave a Comment

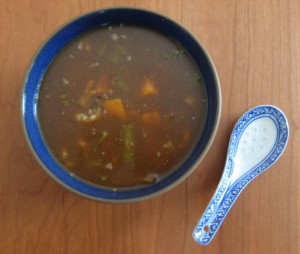
Miso Soup gfzing dot com

Loaded with vegetables, this simple, easy gluten free soup can be put together in under a half hour. Use other vegetables in place of the ones specified in this recipe – whatever you have available. Cruciferous vegetables (Brassicaceae family) like cabbage, broccoli, cauliflower, turnip, watercress etc. or quick-cooking greens like spinach are ideally suited to this type of soup.

Ingredients:

2 Tablespoons toasted sesame oil

3 cloves garlic, minced

1 Tablespoon fresh ginger, minced

5 scallions, cleaned and minced

2 quarts water

1/2 cup dried sliced shitake mushrooms

1/2 head of cauliflower, in flowerets

1 bunch (1 pound) asparagus, washed, tough end removed, sliced in 1/2 inch slices

1 large yam or sweet potato (about 1 pound), peeled and cubed

8 Tablespoons gluten free miso (we used South River 3-year Hearty Brown Rice Miso – check with the manufacturer’s website for gluten free status)

black pepper

Simply heat the sesame oil, stir fry the garlic, ginger and scallions or onion for 30 seconds, then add the water.  Bring to a simmer, then add the dried shitake mushrooms, cauliflower, asparagus and yam or sweet potato. Simmer for 10 minutes until the yams are tender.  Stir in the gluten free miso paste, season with pepper and serve hot.

A surprisingly rich and satisfying vegan soup.

Double-check to make sure the miso paste you choose is gluten free.

Dairy Free, Fall, Recipes, Soups, Spring, Vegetables, Vegetarian, Winter gluten free, miso, soup, vegetarian

Homemade Vinegar

0 · Feb 3, 2011 · 1 Comment

Homemade vinegar is easy to make – it kind of makes itself under the right conditions – and we have been making our own for 25 years.  The vinegar you buy in the grocery store (white, cider, wine) is sharp tasting and thin in flavor compared to the rich complexity of a homemade vinegar.  Make your own vinegar and you will become a fan!  Also, with your own homemade vinegar there is no need to read labels looking for gluten-containing items. The test of a delicious vinegar is this: sip up a teaspoon of the vinegar and you should want more! You will not want to waste this homemade vinegar making those baking soda and vinegar volcanoes that are so popular in elementary and middle school classes.

You will need:

  • Leftover Wine diluted with unchlorinated water
  • Vinegar culture (a bacterial culture, check with the manufacturer and do NOT use malt vinegar culture)
  • a wide-mouthed glass or stoneware container
  • Cheesecloth to keep fruit flies out of the vinegar while allowing air to enter the container
  • Room temperature (68-96 degrees)
  • surgical hemostat clamp (a ten dollar item) for easily removing old vinegar mother

If you really get in to making homemade vinegar, you may want to invest in a handy vinegar crock with a spigot, or an oak vinegar barrel.  Bear in mind that it is not safe to use homemade vinegar in home canning or pickling,  unless you are a talented chemist who can accurately test the acidity of your finished product.  For pickling, you need 5% acidity.

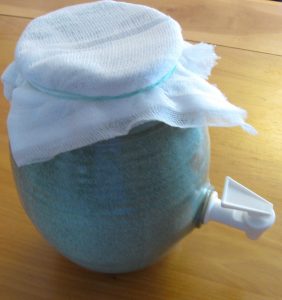
Coyote Vinegar Crock gfzing.com square
Gfzing.com uses a vinegar crock with spigot - made by Clay Coyote Gallery

To make Vinegar:

Choose what kind of vinegar you are making: red, white, cider.  Dilute leftover wine or hard cider with unchlorinated water, about 2 parts of wine to one part of water.  Put about a quart of diluted wine in to a cleaned large mouth jar or bowl, or vinegar crock.  We use C-brite to clean the container.  Add the starter culture. Stir with a clean spoon; cover the container with cheesecloth secured with a rubber band (keeps out fruit flies while allowing air to enter).  Store the crock at the back of the counter in your kitchen, where the vinegar will remain largely in the dark and at 68-96 degrees.  In about 4 weeks the first vinegar should be ready to use in salad dressings and sauces. Pour off some of the vinegar,  taste it and dilute it with additional water if it tastes too strong, then bottle it in sterilized bottles and cork the bottles.

Now add more diluted wine to your crock – this is called “feeding” your vinegar and let it go.    Each time you get ready to bottle some vinegar, taste the finished product to see if it is ready for bottling, and add water if the flavor is too strong.  Since this is a trial-and-error, imprecise method for achieving the final product, you will not know the final Ph of the homemade vinegar and cannot use this vinegar to make pickles or preserves that are not refrigerated.

Vinegar Culture:

To make vinegar, you add a starter culture of acetic acid bacteria to an alcohol base (like wine or hard cider).  For the starter culture, you can use some vinegar from a friend’s vinegar crock, or you can buy a culture. For gluten free vinegar, do not use malt vinegar culture.

Vinegar Mother:

Vinegar mother is a thick cellulose material created by the vinegar bacteria.  People who have never handled vinegar mother call it “slimy” but that is not a good description.  The material is strong, thick and fibrous, stretchy, slippery and somewhat leathery – like the covering on a papaya seed, or a sort of fibrous jelly. It can break cleanly in to clumps when you pull on it. The mother accumulates in your crock or barrel, and eventually some of it needs to be removed to make room for more wine.  The mother is not necessary to the formation of new vinegar – what you need is the bacteria.  So, if you have a friend who makes good vinegar and does not pasteurize it, ask for a sample of their vinegar and you are ready to go.

Vinegar Barrels:

A word about vinegar barrels – the oak vinegar barrel adds a strong oak flavor to a red wine vinegar, and we use one for this purpose.  However, the home vinegar maker should be forewarned about a couple of things. 1) The vinegar barrel should be soaked before using, to prevent leaking.  2) Unless the barrel has a large opening at one end, removing old vinegar mother from your vinegar barrel requires two people, because most of these barrels only have small holes through which to remove the mother.  One person holds the barrel so that a hole is facing downwards (the largest hole is the air hole at the top) and the other person uses a surgical hemostat clamp to grab bits of the mother and pull them through the hole. This is a messy process.

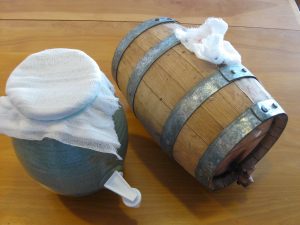
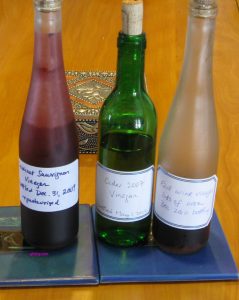
Vinegar Crock and Barrel from GFZINGdotcom
Gfzing.com uses the Vinegar Crock for cider vinegar and an Oak Vinegar Barrel for red wine vinegar

Bottling:

We bottle the vinegar without pasteurizing it.

Homemade Vinegar and Pickling:

  • Do not use homemade vinegar for making pickles. Vinegar used in pickling must be of a certain Ph, or you can have spoilage and dangerous bacteria can grow in the pickles.

More Instructions:

Further instructions for making your own vinegar are available here: http://www.claycoyote.com/blog//SunsetMagazine_Vinegar.pdf

homemade vinegar gfzing dotcom

Condiments and Sauces, Dairy Free, Pickles and Preserves, Recipes, Vegetarian DIY, gluten free, homemade, vegetarian, vinegar

Thai Cucumber Salad Dressing

1 · Feb 3, 2011 · Leave a Comment

Salad is the BFF (best friend forever) of seasoned gluten free eaters. Here is another simple, inexpensive gluten free dressing that can be used on many different kinds of fresh vegetable.  In this case, we used English cucumbers – those long, long cucumbers that are often sold mysteriously laminated but have the advantage of holding few seeds.

To make attractive edges on the cucumber, increase the fiber in the finished dish, and avoid peeling, we use a fork to deeply score a cucumber from end to end, on all sides.  Scoring the cucumber in this way breaks up the peel so the diner does not have to masticate like a herbivore.  Then we cut the cucumber in half lengthwise, then sliced it crosswise into moon shapes. If you use a standard American cucumber, after halving it remove the seeds by scooping them out with a spoon.

Put the cucumber slices (or grated carrot, daikon radish or whatever vegetable you want to lightly pickle) in to a glass bowl.  A fancy bowl is not required – any glass bowl will do.

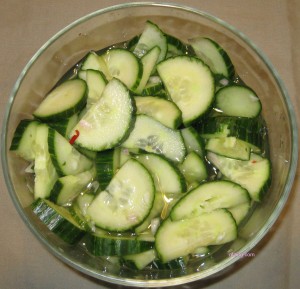
Thai Cucumber Salad gfzing.com birdseyeview

Mix up the following dressing, pour it over the cucumber slices, stir and chill:

  • 1/2 cup cider vinegar (homemade is best)
  • 1/4 cup sugar
  • 1/4 water
  • 1 teaspoon salt
  • 1 medium shallot, peeled and minced
  • 1 dried cayenne pepper, minced (or 1/4 – 1/2 teaspoon red pepper flakes)
  • fresh ground black pepper (optional)

You can add more cucumbers to the leftover dressing and serve the same salad again the next day.

A note for the wheat-eater who is serving a gluten free diner: be cautious with the sugar container.  Sometimes a tired baker scoops up some flour from the flour container and then uses the same measuring cup to scoop up some sugar.  If that’s something you tend to do, use a fresh container of sugar to make this dressing for your gluten free friend.

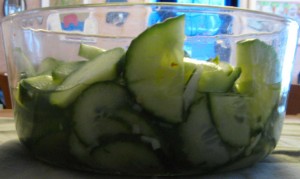
Thai Cucumber Salad gfzing.com web

Condiments and Sauces, Dairy Free, Pickles and Preserves, Recipes, Salads and Dressings, Vegetables, Vegetarian cucumber, dressing, gluten free, salad, vegetarian

Gluten Free German Torte Cake base

1 · Jan 24, 2011 · Leave a Comment

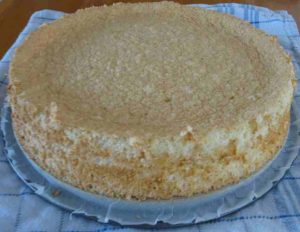
german torte base baked

German tortes can have a cake base with a cream filling, and maybe fresh fruit on top.  Here is how to make a gluten free German sponge cake (this one is made with almonds and cornstarch) that will work well as the base for a torte with a cream filling.

Preheat oven to 300 degrees.  Line the bottom of a 9 inch spring-form pan with parchment paper, then grease the sides of the pan with butter. Set this prepared pan aside.

You need 3 bowls – like Goldilocks and the Three Bears! One great big bowl, one medium sized bowl, and one little bowl.

You need a kitchen scale to weigh the ingredients.  Be sure to zero out the scale each time you measure something.

  • 3 eggs, separated
  • 3 Tablespoons cold water
  • 75 grams Sugar
  • 50 grams Cornstarch
  • 65 grams Almond meal (Bob’s Red Mill makes the one we used)
  • 1/2 teaspoon gluten free baking powder (measurement is for American baking powder.  If using German baking powder, use slightly more.)

Beat the egg whites with the cold water in a large bowl until stiff.  In the medium sized bowl, beat the egg yolks until light lemon colored and fluffy.

Beat the sugar in to the beaten egg whites, then fold in the beaten yolks.

In a third little bowl (capacity 2 cups), mix the cornstarch, almond meal and baking powder. (The volume of cornstarch and almond meal will be about one cup combined).

Fold the cornstarch/nut  mixture in to the egg mixture.  The mixture will be light and fluffy.

Carefully distribute the batter in to the prepared spring-form pan.

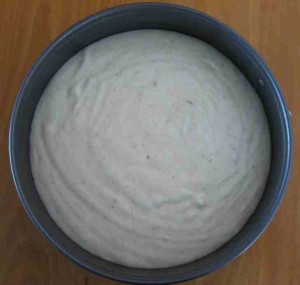
German sponge cake before cooking

Bake for 35 minutes at 300 degrees until the cake springs back to the touch. Remove from the oven, slide a knife around the sides to loosen the cake, then remove the sides.  Allow the cake to cool completely. Remove the cake from the pan.  You can cut it horizontally in to two layers using a bread knife, if you need 2 layers.

Make sure your ingredients are all gluten free!

Dairy Free, Dessert, Recipes, Vegetarian almond meal, baking, cake, German, gluten free, sponge cake, torte, vegetarian

Braised Lamb Shanks with pepper and Green Peas

0 · Jan 18, 2011 · Leave a Comment

This rich, delicious dish is based on one for North African-Influenced Lamb Shanks with Couscous by Emeril.  We have added more vegetables, and removed all the gluten.

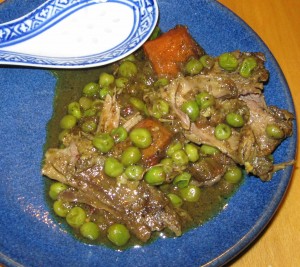
Braised spicy lambs shanks gluten free

  • 2 1/2 pounds lamb shanks (if these are American hind quarter shanks you will have 2 shanks)
  • 1 teaspoon salt
  • 2 teaspoons ground black pepper
  • 1 teaspoon turmeric

Sprinkle the spices over the shanks and fry them in 3 Tb of olive oil until browned on all sides.  Remove the shanks to a large covered casserole that can go in the oven.

In the same pan where you fried the shanks, add:

  • 1/2 teaspoon ground cinnamon
  • 1 teaspoon ground cumin
  • 1/2 teaspoon ground ginger
  • 1/2 a dried cayenne pepper, minced, or 1/4-1/2 teaspoon cayenne pepper, ground

Stir fry the spices for 30 seconds, then add:

  • 1 1/2 cups coarsely chopped spanish onion
  • 2 large carrots, peeled and cut in 1 inch chunks
  • 1 sweet potato, peeled and cut in half

Stir fry the vegetables until the onion is a little bit golden, then add:

  • 1 Tablespoon chopped fresh garlic (about 4 cloves)

Stir fry until the garlic is fragrant only – about 30 seconds. (Emeril’s recipe called for stirring the garlic for 30 minutes, which must be a typo)

Add:

  • 2 cups rose wine
  • 1 cup chopped tomatoes (about 1 large tomato)
  • 4 cups chicken stock – if you are reconstituting this from bouillon mix, make sure the mix is gluten free and use less than is called for on the package – to avoid over-salting)
  • Juice of one orange
  • 2 strips of orange zest (you can remove the pieces when the braising is complete)

Bring to a boil, then add the vegetable-wine-tomato mixture to the lamb shanks in the other pan.  Cover the pan. Place in a 350 degree oven for 2-2 1/2 hours until the meat is falling off the bone.  Check occasionally to see if more liquid is required. Remove from the oven, and remove the pieces of orange peel.

Add:

  • 1/2 pound frozen green peas

Cook on top of the stove until the peas are just barely cooked.

Gfzing.com likes to serve with steamed artichokes for dipping up the delicious sauce.

If you want a gluten free substitute for the “couscous” in the original recipe, substitute 1 cup pre-rinsed quinoa and 2 cups water for the couscous.  Microwave the quinoa and water, covered, for 8 minutes on high, then add the rest of the seasoning ingredients in Emeril’s recipe and set aside, covered for about 10 minutes until the water is completely absorbed by the quinoa.

Dairy Free, Fall, Meat Dishes, Meat-eater, Recipes, Winter GF, gluten free, lamb, spicy, stew

Lime and Agave Salad Dressing

0 · Jan 15, 2011 · Leave a Comment

Here is a delicious gluten free dressing of agave nectar and lime juice, based on a “thai-style” dressing that can be found all over the internet.  (The standard “thai-style” dressing contains the now evil corn syrup, once sooooo trendy and now hiding shamefully in the back of many American cupboards, waiting to be used in pecan pie.)

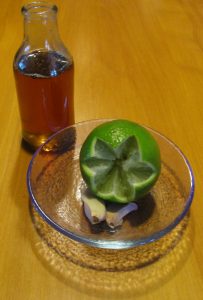
Lime and Agave dressing from Gfzing.com

We had a bottle of agave nectar sitting on the shelf, and apart from wondering why that agave was not made in to tequila we hadn’t given it another thought.   As usual, we are entering the new year with a load of greens on our plates, hoping to reverse the effects of holiday indulgences.   The problem with all that salad?  It can be boring!  The only hope is an arsenal of interesting sauces to “dress” up the greens.  Here’s one:

  • 1/4 cup amber agave nectar or other sweetener or your choice
  • 1 1/2 tablespoons gluten free soy sauce (check the label)
  • 1 1/2 tablespoons fresh lime juice (about 1/2 of a large lime, or one whole small lime)
  • 1 tablespoon oil (not from olives)
  • 1/2 teaspoon dried basil (or 1 tablespoon snipped fresh basil
  • 1 tablespoon snipped fresh mint leaves
  • 1/4 teaspoon ground chili (cayenne or red pepper)
  • 1 tiny clove of garlic, peeled and grated or minced

Mix all ingredients together and serve with a salad of mixed greens, sliced boneless chicken seasoned and pan-fried, sweet cherry tomatoes, nuts etc.

Chianti goes well with this dressing.

Condiments and Sauces, Dairy Free, Recipes, Salads and Dressings, Vegetarian agave, dressing, gluten free, lime juice, salad, soy sauce, vegetarian

Maple Pumpkin Pie, no dairy, from fresh pumpkin

0 · Jan 14, 2011 · Leave a Comment

small pumpkin pie
Non Dairy, Gluten-Free Pumpkin Pie

This interesting recipe from gfzing.com has no milk, cream, rice milk or any other type of milk, is gluten free and uses fresh rather than canned pumpkin. The type of pumpkin used is the small “pie” or “sugar” pumpkin – they are sold at farm stands for the purpose of making pies. The natural liquid in the freshly cooked pumpkin is sufficient liquid and no added milk products are needed.  Do not use canned pumpkin for this recipe.

The pie is quite light, and since the only sweeteners are maple syrup and molasses the pie is not too sweet.

Ingredients:

  • 1 “pie” or “sugar” pumpkin
  • 1/2 cup dark maple syrup
  • 1/4 cup molasses
  • 3 eggs
  • 1/2 teaspoon salt
  • 1 teaspoon cinnamon
  • 1/2 teaspoon ginger
  • 3/4 teaspoon freshly grated nutmeg
  • 1 unbaked Whole Foods gluten free (gf) pie shell, thawed and cracks repaired

Preheat the oven to 450 degrees F.

Defrost the gluten free pie shell and repair any cracks.  Sometimes frozen pie crusts get broken, but you can smush the crust back together along the breaks to make a whole crust.

Next, remove the stem (just break it off) from the pumpkin and stab the pumpkin through the shell to the center in 4 or 5 places with a pairing knife – to let out steam.  You don’t need to cut the pumpkin up or remove the seeds before cooking.  Set the prepared pumpkin in the microwave oven and cook it as for baked potato (use the setting on the microwave).

Remove the very hot pumpkin from the oven using potholders and let cool completely.   Now cut the cooked pumpkin in half, use a large spoon to scoop out and discard the seeds. Then, scoop out the cooked flesh, set it aside for use and finally discard the peel.  You should have about 24 ounces cooked pumpkin (weigh the cooked flesh.)  You do not need to mash or strain the pumpkin flesh.

In a food processor, combine about 24 ounces ( one and a half pounds) of cooked fresh pumpkin (not canned) with all the rest ingredients except the pie shell.  Process until the mixture is completely smooth. Pour most of the pumpkin mixture in to the uncooked pie shell until the pie shell is filled almost to the top.  Depending on the size of the pumpkin, there may be a cup or so of extra filling.  If so, grease a small oven-proof dish and pour the excess in there.

Put the pie in to a 450 degree oven for 10 minutes, then reduce the heat to 350 and cook for another 45 minutes.  Check the pie – if the filling is set, the pie is done.  Cool and serve with your favorite pie topping.

For the extra filling, bake that along with the pie but it will be done and ready to take out of  the oven well before the pie. You can use this cooked pumpkin pie filling to make a nice pumpkin parfait, layering the cooked chilled filling with your favorite gluten free pie topping (whipped cream if you use it).

Breakfast, Dairy Free, Dessert, Fall, Microwave Cooking, Pie, Recipes, Thanksgiving, Vegetarian, Winter dairy free, gluten free, pie, pumpkin, vegetarian

Mare Salad (Italian Seafood Salad)

3 · Dec 20, 2010 · Leave a Comment

This is a delicious Italian seafood salad with chickpeas. Divine!

  • 1/2 pound of fresh, small scallops, parboiled for a very short time – just until done – in a 50/50 mixture of white wine and
    water – use Cape or bay scallops if you can get them.  If using the large sea scallops you will have to slice them in halves or quarters.
  • 1 dozen pitted Kalamata olives, diced
  • 3 stalks celery, diced
  • 15 ounce can of chickpeas, drained, rinsed (peel the tough
    skins off, or cook from scratch instead of using canned)
  • 1 medium red onion, diced (be sure not to use too much – the red onions are pretty gigantic in the supermarket these days)
  • 2 Tb. flat italian parsley, diced
  • 2 Tb. olive oil
  • 2 Tablespoons red vinegar
  • 2 Tablespoons white vinegar
  • salt and pepper

Mix it together and let marinate overnight.

Notes:

  • You can add 1/2 pound sliced cooked squid. Only parboil the squid for 30 seconds or it will become tough and rubbery.
  • Do not use any “imitation seafood” or “seafood legs” or any of those fake crab products – they are often made with wheat.

Appetizers, Christmas, Dairy Free, Fish and Seafood, Holidays, Recipes, Salads and Dressings gluten free, salad, seafood

Banana Cream Chocolate Pie – gluten free

0 · Oct 24, 2010 · Leave a Comment

Banana Cream Chocolate Pie Close up
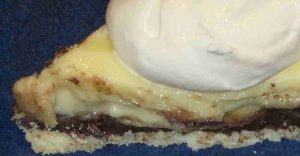
Close up of an actual slice of gluten free Banana Cream Chocolate Pie

This delicious pie is based on one from The Best of Cooking Light (2000).  We have changed a few things and made it gluten free.  As cream pies go, it is relatively light.  For those of you who eat pie for breakfast, we maintain that a slice of this pie is nutritionally not very different from a bowl of sugary cereal with milk and sliced bananas.  So, by all means, eat pie for breakfast!

It is possible to make this pie and serve it in 4 hours – you have to work quickly and chill at each stage.  Chill the pie crust immediately after it is baked, add the chocolate layer and chill, add the bananas and custard and chill again.  In winter, we take advantage of a table on a screened-in porch for these chilling stages. The screens on the porch are necessary to keep squirrels out of the pie.

First, you will need a one-crust gluten free pie shell.  You can make your own using 1/2 of this recipe: Pie Crust Recipe. Roll out a crust and line a 9 inch Pyrex pie plate.

Prick the crust all over with a fork and pre-bake the pie crust for 10-12 minutes at 450 degrees (for this crust you don’t need to use pie weights or dried beans to keep the crust from collapsing.)  In the event of a true pie emergency, you could use a Whole Foods gluten free pie crust from their freezer section.

Gather these ingredients:

For the chocolate part:

  • 1 TB cornstarch
  • 2 TB sugar
  • 2 TB unsweetened gluten free cocoa powder
  • 1/3 cup low-fat milk or gluten free rice milk
  • 2 ounces semi-sweet or bittersweet gluten free chocolate (chopped coarsely)
  • Dash of salt

For cooking the custard:

  • 2 TB cornstarch
  • 1 cup of low fat milk or gluten free rice milk
  • 1/2 cup sugar
  • 1/4 tsp salt
  • 2 large eggs
  • 1 TB butter

After cooking the custard, mix these in:

  • 2 tsp gluten free vanilla
  • 1/4 cup (2 ounces) gluten free cream cheese (for dairy-free, omit this)

Other:

  • 2 cups sliced ripe bananas (2 bananas)
  • Whipped cream, lightly sweetened and flavored with vanilla

You are going to layer up some thick chocolate paste which goes in to the baked pie crust first, then sliced bananas on top of the chocolate, then custard.  Chill for 2 hours or more, then serve with whipped cream!

For the chocolate part: Mix the cornstarch, sugar, cocoa, milk and salt  in a saucepan and cook, stirring constantly until the mixture thickens.  Add the chocolate and stir until it melts.  Spread this mixture over the bottom of the baked pie crust.

For the custard, get your immersion blender ready at your side in case you need it to correct custard disasters.  You basically have two choices.  You can mix the custard materials and cook over a boiling water bath, which takes more time and assures a lump-free custard, or you can mix the custard materials in a sturdy pot, cook over low heat, stirring constantly with a whisk, and if the custard curdles or looks at all lumpy give it a good blast with the immersion blender (taking care not to hurt yourself), adding a little heavy cream if necessary to loosen things up.  Either way works fine.

After you cook the custard mixture, while the mixture is still hot, stir in the vanilla and the cream cheese and mix thoroughly.  If you are making a dairy-free version, leave out the cream cheese.

Slice the bananas and put the slices on the chocolate layer, then spread the finished custard over the bananas.  Chill completely, slice and serve with whipped cream. There won’t be a lot of left-overs.

Make sure all your ingredients are gluten free!

Dairy Free, Dessert, Fall, Holidays, Pie, Recipes, Vegetarian dessert, gluten free, pie, vegetarian

Feeding a Gluten Free Toddler

0 · Oct 14, 2010 · Leave a Comment

A reader writes asking for gluten free suggestions for their 18 month old, a somewhat picky eater who is currently on a Gluten- and Dairy-Free diet.

Answer:

Well, first of all, it is important to consultant with your child’s doctor, and ask about seeing a nutritionist.  The gluten free diet can be tricky, and it is not always easy to balance the diet, especially in terms of vitamins.  There is a new book: Real Life with Celiac Disease: Troubleshooting and Thriving Gluten Free by Dennis and Lefler, which can point you in the right direction and help with finding resources.

Consider the possibility of using “naturally mushy” foods such as banana, avocado, cooked sweet potato etc.  These foods have a lot of curb appeal for the under 5 set.  Of course, you have to choose those foods that work for you and your family.

You can also make a very nice breakfast “smoothy” in the blender, from frozen orange juice, frozen strawberries, banana, honey, and gluten-free yogurt or gluten-free non-dairy yogurt – it is the basic concept of this smoothy that is important – you should adjust the ingredients to suit your child’s tastes and needs.

For a “sandwich” try making musubi – see the instructions here, and use fillings and accompaniments that your child can eat.

Most importantly, make sure that the diet you are feeding your toddler is nutritionally appropriate for a growing child. Consult your doctor, and ask him/her for a recommendation for a nutritionist as well.

Ask Gf-Zing! - Responses, Dairy Free, Recipes cooking, food, gluten free, kids, recipes, toddler

Gluten Free “Slowed Down” Pumpkin Muffin

3 · Oct 13, 2010 · 1 Comment

This is a story about “slowed down food.”

We have combined the fat-free muffin with the slow food movement, to make the Slowed Down Pumpkin Muffin. The reason that these pumpkin muffins can be called “slowed down” food is because they are meant to be made with canned pumpkin and jarred applesauce, but we had neither one in the cupboard.  So, the instructions here show how you can make them using local squash and an apple, and it also takes more time to make them!  The muffins still use processed sugar, so they are not consistent with full-bore “slow food” cooking.

We won’t pretend that these muffins, which have no oil in them, are non-fat because once you have slathered your pumpkin muffin with butter, all that “no fat” stuff goes out the window!  We also make these gluten free, doubling the flavorings to combat the black hole, flavor-neutralizing quality of gluten free cooking.  Note: Some people who eat gluten free avoid bean flours such as chickpea flour, so check with your gluten free friend before using this recipe.

How to prepare the squash (pumpkin) and apple:

Find a winter squash (pumpkin, butternut, buttercup, acorn – whatever), and a baking apple.  For a baking apple, you could choose a nice big Cortland, or a Northern Spy.  In this case, we used a butternut squash (long-necked pale orange squash) and a Northern Spy apple.

Cut off a chunk of winter squash, about 12 ounces should do it.  Poke several holes in the apple with a fork.  Microwave the squash and the apple on the setting you use for baking potatoes, until they are cooked through. Cool them so that you can peel them without burning yourself.

Peel the cooked squash and apple and remove and discard the apple core and its seeds and the peelings.  Mash the cooked squash and apple separately.  You need 1/3 cup of each.  If by chance you have too much of one, and not enough of the other, simply use enough of each to yield a combined total of 2/3 cup mashed material.

Preheat the oven to 350 degrees F.

Soak 1/2 cup raisins in boiling water while you mix the batter:

Mix dry ingredients in a large bowl:

1 1/2 cups plus 1 Tablespoon Gifts of Nature gluten free All Purpose Flour Blend (INGREDIENTS: Brown rice flour, potato starch flour, white rice flour, chick pea flour, sweet rice flour, tapioca flour, xantham gum)

1 1/2 cups sugar

1/2 teaspoon each: baking powder, baking soda, salt

1 teaspoon each: ground cinnamon, grated nutmeg, ground cloves

Mix the wet ingredients in another large bowl:

Mix the 2/3 cup cooked squash and apple with:

2 eggs

Stir the wet ingredients and dry ingredients together using a fork. This will be an interesting task – at first it will appear that there is not enough liquid, but as you mix the batter it will quickly become the consistency of a proper muffin batter.

Drain the almost-forgotten raisins (throw out the water, save the raisins.)  Add the raisins to the muffin batter. Stir well.

Line 12 muffin cups with paper muffin liners.  Fill each muffin liner to the top. You may be used to filling muffin liners 2/3 full, but in this case you can fill them right to the top.  Use up all the batter for the 12 muffins. Distribute the raisins evenly, to make sure each muffin has its fair share of raisins.

Bake for 30-35 minutes until the tops are dry and the muffins seem done.  You can poke them with a toothpick – toothpick should come out dry. Take cooked muffins out of the oven – the tops of these muffins have a chewy, caramelized quality and the muffins taste great with butter.  Technically, you should allow these muffins to cool before eating.

Make sure all your ingredients are gluten free!

Bread, Breakfast, Dairy Free, Fall, Recipes, Vegetables, Vegetarian, Winter baking, cooking, food, gluten free, muffin, pumpkin, squash, vegetarian

Chicken Sticky Rice

0 · Oct 8, 2010 · 1 Comment

This recipe makes a very nice comfort-food for the gluten free community.

Wash 1 cup of sweet brown rice (this is also called brown sticky rice), put it in a Zojirushi rice cooker, and add 1 1/4 cups of water.  Close the rice-cooker and set the menu to the sweet rice setting and turn it on.  It will cook in about an hour.

While the rice is cooking, in a non-stick pan put 1 teaspoon peanut oil, and stir-fry 1 shallot, peeled and diced, and 1 clove garlic, peeled and minced, for 2 minutes.  Then add 1 teaspoon strong gluten-free curry powder, 1 teaspoon salt, and 1/4 teaspoon sugar.  Stir-fry for 1 minutes.  Next, add 2 boneless chicken thighs, diced.  Stir-fry until cooked through.

When the sticky rice is done, add it to the chicken mixture and stir together with a wooden spoon.  Transfer it to a greased oven-proof casserole dish and bake, covered, for 15 minutes at 350, or make 6-8 tinfoil squares about 10 inches square, put 1/2-3/4 cup of the mixture on each square and make in to a log, then wrap the tinfoil around the rice mixture. Bake the logs at 350 for 15 minutes.  These packets can be kept in the refrigerator and reheated as needed.  They will keep a few days under refrigeration.

The dish is tasty and satisfying!

Make sure all your ingredients are gluten free!

Dairy Free, Fall, Lunch, Meat Dishes, Meat-eater, Recipes, Rice, Winter chicken, food, gluten free, recipes

Baked Brisket – gluten free

0 · Sep 12, 2010 ·

This is an easy way to cook a beef brisket – no fuss no muss, and no gluten.

For a 2 1/2-3 pound brisket of beef

Preheat the oven to 400 degrees.

Quarter 2 peeled spanish onions and place them on the bottom of a dutch oven. Put the brisket on top of the onions, fat side up.

Sprinkle with 1 envelope of gluten-free onion soup mix *, then mix the following and pour on top:

1 cup gluten free tomato ketchup
1 cup water
1/4 cup brown sugar

Cover the dutch oven and bake for 3+ hours, until done. The meat should be very tender. You can then cool and chill the dish, and then remove the fat. After removing the accumulated fat, you can slice the meat, return it to the dish, heat and serve.

* To make a substitute for a package of onion soup mix, follow the copycat instructions available on the internet. For example, Food.com has 2 such recipes: http://www.food.com/recipe/copycat-liptons-onion-soup-mix-24952 and http://www.food.com/recipe/copycat-lipton-onion-soup-mix-153788. Make sure to verify that the beef bouillon you use in making the copycat version is gluten free.

Make sure all your ingredients are gluten free.

Dairy Free, Fall, Meat Dishes, Meat-eater, Recipes, Winter beef, brisket, cooking, food, GF, gluten free, gourmet, recipe

Microwave Chicken Wings

3 · Jun 12, 2010 · Leave a Comment

We acquired a new microwave oven and have been playing around with it – a new way to save energy resources while cooking.

For 1.5-2 pounds of chicken wings, mix the following sauce in a large bowl:

1/4 cup gluten free orange marmalade

1 tablespoon honey

1 clove of garlic, minced

1/4 cup gluten free soy sauce

1 1/2 tablespoons fresh lime juice (about 1/2 of a lime)

black pepper

Remove the wing tips from the wings, and cut each wing in to two pieces at the joint. Mix the sauce with the chicken wings.  Place the wings and sauce in a glass pie plate (in a single layer) and cover loosely with plastic wrap.  Microwave for 10 minutes. Remove plastic wrap and microwave for 5-10 more minutes, until cooked through.  Preheat a broiler and broil the wings for 4-5 minutes to crisp up the skin.

If your microwave has an automatic sensor, follow the instructions for cooking chicken parts, remove the plastic wrap half way through the cooking time.  When the wings are done, broil as above.

Use all gluten-free ingredients!

Appetizers, Dairy Free, Fall, Meat Dishes, Meat-eater, Microwave Cooking, Recipes, Spring, Summer, Winter chicken, chicken wings, cooking, food, GF, gluten free, marmalade, microwave, recipe

Sweet Potato Fries

0 · Jun 9, 2010 · Leave a Comment

Serve these awesome baked fries with any dish that has a curry sauce.

For every 2 pounds of sweet potatoes, place the following in a large bowl:

2 teaspoons of Kosher salt (or 1 teaspoon of table salt)

1 teaspoon ground cumin

1 teaspoon cayenne pepper (or to taste)

2-4 TB olive oil

Cut peeled sweet potato in to french fry size – make 1/2 inch slices crosswise, then cut each slice in to 1/2 inch slices.  Mix these fries with the oil and spices to distribute evenly.  Place the spiced fries on a foil lined baking sheet in a single layer.  Do not use a silpat mat because the baking temperature exceeds the tolerance of silpat.

Preheat oven to 500 degrees F.  Bake the fries on the top shelf for 15 minutes, stir, then bake an additional 5 minutes.  Do not worry if some fries are slightly blackened.  The flavor will be awesome.

Serve with any dish that has a rich curry sauce, or as an accompaniment to meat dishes.

Dairy Free, Fall, Potatoes, Recipes, Spring, Summer, Vegetables, Winter baked, cooking, food, fries, GF, gluten free, gourmet, recipe, sweet potato

Rich Lamb and Cornish Game Hen Curry

0 · May 11, 2010 ·

Try this excellent curry – you won’t be sorry!

Fry one onion, chopped, in 2 Tablespoons of oil until browned.  Add 2 lamb shanks and brown them as well. De-glaze the pan with 1 cup of New England Hard Cider.

In to a pressure cooker, put:

1 can of coconut milk

2 Tablespoons of gluten free thai red curry paste

1 stalk of lemon grass, the white part at the root end only, chopped

2 Tablespoons of fresh ginger, chopped

Add the lamb shank mixture to the coconut milk mixture. Close the pressure cooker and bring up the pressure.  Pressure cook for 10 minutes, then let the pressure drop on its own.  Lamb shanks take a long time to cook. This pressure-cooking step will give the lamb a head start, ensuring that eventually the lamb gets nice and tender.

Carefully transfer the hot lamb shanks in their curry sauce in to a casserole that has a lid.  To this mixture, add

1 Cornish Game Hen

1 mango, peeled seeded and cut in to chunks (an under-ripe mango is perfect for this purpose.)

Braise the dish, covered, in a 350 degree oven for 2 hours, until the lamb is tender.  Skim off any fat that has accumulated.  Season with salt if needed.

Serve with Jasmine rice topped with plenty of fresh chopped cilantro, and fresh ground sea salt.

Note: If you don’t have a pressure cooker, you can cook everything except the game hen and mango for 1-1 1/2 hours and then add the game hen and mango and bake for an additional hour and a half.

Dairy Free, Fall, Meat Dishes, Meat-eater, Recipes, Winter, with New England Hard Cider chicken, coconut milk, cooking, cornish game hen, food, gluten free, gourmet, lamb, New England Hard Cider, recipe, thai red curry

Salad for two, with fried eggs

0 · Jun 3, 2009 · Leave a Comment

We are all excited that the first food share has arrived from a local CSA – a local community agriculture program.  The first share of the year included beautiful red lettuce, spinach, radishes, white turnips, and bok choy.

For this salad, we chose to use what was in the cupboard to approximate a recipe from the Hamersley’s cookbook – Bistro Cooking at Home.  This is a great spring meal after a hard day’s work.  It makes you realize how a few simple things are all that are needed for a truly fine meal!

Make a whole red lettuce ready for a salad dressing (clean and tear the salad).  Fry a couple of slices of gluten-free bacon until crispy, then drain the fat and reserve the bacon and a tablespoon of the melted fat. Toast up some regular wheat bread for the wheatavores, and a couple of slices of Glutino bread for the celiacs.  Set out some butter, the bacon pieces, and a couple of glasses of Riserva Ducale Chianti, 2005.

Next, make the dressing:

Mix: 1 teaspoon gluten-free Dijon mustard

1/2 a medium shallot, chopped fine

1/2 a clove of garlic, minced

1/4 teaspoon dried thyme

salt

fresh pepper

1 Tablespoon red wine vinegar

1/2 a Tablespoon sherry wine vinegar (that’s 1 1/2 teaspoons)

1 Tablespoon reserved bacon fat

2 Tablespoons olive oil

Dress the lettuce, then fry 4 eggs, over easy, in the remaining bacon fat.  Season them with salt and pepper.  Serve the dressed salad with fried eggs, bacon pieces, toast and butter on the side, and a glass of chianti!

Make sure all your ingredients are gluten-free!

Dairy Free, Recipes, Salads and Dressings, Spring, Summer, Vegetables bacon, cooking, eggs, food, gluten free, gourmet, greens, lettuce, recipe, salad

Lamb Steaks with Herbs and Lemon

0 · Jan 28, 2007 ·

This simple recipe from the Gf-Zing! website is designed for the gluten-free community, but the glutenated world will enjoy it too! You can make a delicious meal with a side of garlic mashed potatoes. Have ready a couple of plates, some mashed potatoes and a glass of pinot noir for the chef, and start cooking:

  • 1 to 1.5 pounds Lamb top round roast
  • 1 1/2 teaspoons dried thyme
  • 1 Tablespoon chopped fresh mint (optional)
  • 1 clove garlic, finely minced or grated
  • freshly ground salt and pepper
  • 2-3 Tablespoons olive oil
  • 1 large tomato cut into eight wedges
  • 1/2 a lemon

Slice the lamb roast into four 3/4 inch slices – each one should be the size of a playing card or a burger. Spread each slice on both sides with the minced or grated garlic, then sprinkle one side with thyme, mint, salt and pepper. Heat the olive oil in a robust pan until hot. Fry the lamb steaks on the non-herb side for 3 minutes, then flip them to the other side that has the herbs on it.

Fry for 2 minutes, then add the tomato wedges and fry for 2 minutes more. Move the lamb steaks and tomato wedges to your plates, sprinkle with fresh lemon juice and serve.

Dairy Free, Fall, Meat Dishes, Meat-eater, Recipes, Spring, Winter

Gluten Free Squash Muffins with Cranberries

0 · Jan 20, 2007 ·

Most muffin and quick bread recipes include a very large amount of sugar, producing a cloyingly sweet breakfast.  This Gf-Zing! recipe uses less sugar (and some honey), and is gluten free.
Mix Dry ingredients in a large bowl:

1 cup Bette Hagman’s Featherlight Mix, or other GF flour
3/4 cup cornmeal
1/2 cup pecan meal
1/3 cup firmly packed brown sugar
1 teaspoon xantham gum
1/2 teaspoon salt
2 teaspoons baking powder
1 teaspoon baking soda
2 teaspoons ground cinnamon

1/2 teaspoon freshly grated nutmeg
1/4 teaspoon ground cloves

Mix wet ingredients in another bowl:
1 cup fresh or canned squash, mashed
1/2 cup mango juice (or other fruit juice)
1/2 cup honey
1/4 cup vegetable oil
2 eggs or 1/2 cup egg product

Stir the two mixtures together until thoroughly mixed, then add:
3/4 cup dried cranberries or raisins

Preheat oven to 400 degrees.  Line 12-muffin pan with aluminum liner papers.  Fill liners with batter to the top.  Bake 20 minutes or until a toothpick stuck in the middle of a muffin comes out clean.

Make sure all your ingredients are gluten free!

Bread, Breakfast, Dairy Free, Fall, Recipes, Winter

  • Go to page 1
  • Go to page 2
  • Go to page 3
  • Go to page 4
  • Go to Next Page »

Primary Sidebar

Check out our Coupon Collection

Click Here to go directly to the Coupon page

Read more at The Rambling Epicure:

Click Here: The Rambling Epicure

QR code for your phone

qrcode for gfzing
NFCA logo

Blogroll

  • Aloha World Ono Recipes
  • Book of Yum
  • Dulce Cocina sin Gluten
  • Gluten Free Beer Association
  • Glutenfreie Rezepte | kaMehl
  • Hawai'ian Electric
  • Laylita's – Ecuador
  • Nombudsman
  • Papilles et Pupilles
  • Sea Salt with Food
  • The Rambling Epicure The Rambling Epicure is a daily international food chronicle, and the first online newspaper to follow global food trends and news.
  • Triumph Dining

Monthly Archive

Proud member of FoodBlogs

Load up on new recipes, exclusive goodies, + more!

Get the exclusive content you crave straight to your inbox.

Things to Read

Find by keyword

baking banana blueberry cake cardamom carrot cheese chicken chocolate cinnamon coconut cookies cooking curry custard dairy free dessert DIY dressing fish food fruit GF ghee gluten free gourmet homemade kids maple syrup meat microwave pie pork potato pumpkin recipe recipes rice salad sauce sausage soup sourdough sweet potato vegetarian

Copyright © 2025 GF-Zing! on the Cravings Pro Theme