• Skip to primary navigation
  • Skip to main content
  • Skip to primary sidebar
  • Skip to footer

GF-Zing! logo

  • Home
  • Coupon Collection
  • GF Foods & Groups
  • Ask Gf-Zing!
    • About the Author
    • About Gf-Zing!
  • Nav Social Menu

    • Email
    • Facebook

Condiments and Sauces

Say Cheese! – making homemade cheese

0 · Dec 9, 2011 · 1 Comment

By Alice DeLuca


Many years ago, on a train traveling slowly through the French countryside – I don’t remember exactly where and I refuse to invent a location for the sake of a story – I met a man whose job it was to sell cheese mold.  This friendly man was sitting in the same compartment with me.  I was naturally apprehensive when he started to speak. Sometimes men traveling on trains want to share stories and sometimes they want to show young women other things whether the women are interested or not, but that is another story.


The suited gentleman had a tidy briefcase which he offered to open so that I could see his wares.  It was a great relief to find that he was a genuine gentleman, and that what he wanted to display was an assortment of tiny envelopes containing samples of unique cheese molds that were required in the production of famous French cheeses such as Camembert and Brie.  Perhaps interpreting my relief at his desire to talk about cheese as an ardent interest in learning about his profession, he explained the whole process by which these molds would be sprayed on the cheeses during the manufacturing process.  The uniform, paint-white rind of fresh Brie, with its mushroomy aroma, had mystified me until that moment when I learned that the rind was a fungus just like the kind of thing that produces mushrooms and that this fungus was sprayed on to the cheeses; an aerosol mushroom.  I had wrongly pictured the right molds, living in the area, just meandering in on a fresh lavender-scented breeze from the French countryside and settled conveniently on each cheese, creating a uniform coating.


In fact, a mushroom is the fruiting body of an underground fungus, poking up through the forest floor.  The Brie cheese rind is seeded with the spores of a particular fungus that does not make those pop-up fruiting bodies.  So, fine cheese and mushrooms are related, which makes sense when you think about it, and I got the first inkling of this knowledge on a rumbling train.


It was also news to me at the time that cheeses were mass-produced rather than made individually the way we had tried to do at home.  Unlike our lonesome artisanal cheeses that cured with the native spores traveling through the air at our house, there were whole rooms full of camembert, just sitting around waiting to be sprayed with precisely engineered mold. I pictured in my mind whole rooms full of cheeses just sitting there, waiting.


Our few attempts at making homemade cheese had been laborious.  One particular cheese required a few gallons of whole, unpasteurized milk and some rennet, a funky smelling material derived from the stomach of a cow. You could obtain rennet at almost any grocery store by purchasing a package of “junket” mix – this is actually rennet that can be added to milk to make a sort of custardy dessert that has now fallen out of favor – or you could purchase rennet tablets specifically intended for cheesemaking, in a small cylindrical vial.[i] We used the rennet tablets and our homemade cheese had a pleasant flavor.  We coated the cheese with wax that we tinted turquoise with candle-dye, to make our cheese stand out from those endearing goudas encased in the bright red wax that children love to play with at the table, annoying the grownups.  Our wax was too hard and did not have the elasticity of the red cheese wax, so there were occasional holes and leaks in our coating which we patched horribly with little globs of additional wax.  As amateurs we had lots of enthusiasm, but we didn’t have all the skills and equipment of the professionals.


There are so many diverse careers out there in the world.  Here was a man who traveled around on trains with a suitcase full of mold.  He provided a vital service to one of France’s major food industries, and he obviously enjoyed the work, the travel and the conversations along the way. He was not a Willy Loman character[ii] suffering from depression and despair, ruining his home life with his philandering ways.  He was a proud, friendly gentleman who happily went about selling cheese mold to the heroes of French cuisine.  I did not get his name, and by now he must be a very old man, but if I could I would thank him and ask him so many more questions.


I encountered another great member of the world of cheese professionals on Arthur Avenue in the Bronx, New York, in the 1980s. My memory is of a small shop where a lumberjack-sized man with large handlebar mustaches created mozzarella cheese with his bare hands.  He made it look easy, as he kneaded the white curds in nearly boiling water until the cheese stretched like taffy.  The process of creating hot ropes of cheese from milk turned out to be much trickier at home, especially since my hands were not used to being immersed in very hot water for extended periods. My hands turned red as they cooked, and I did not have the strength of this giant professional.


This video demonstration evokes the gentleness and patience of the true process similar to what I recall from watching the fellow making mozzarella in the Bronx in 1982: http://www.youtube.com/watch?v=Z_48-nGlxaw&feature=related[iii]


I have recently learned that it is possible to make homemade mozzarella using a microwave oven.  People swear by this method and some claim to make cheese every week, almost ritually. This development could revolutionize many home kitchens, whether or not the cook adopts an obsessive-compulsive cheese-making habit.  Following are links to a pictorial instruction on how this microwave mozzarella is made.  The thing that is missing though is the slow, steady stirring; the brilliant efficiency of the strainer sinking in to the whey to separate the curds; the loving kindness of the great artisanal food artist at work.


Homemade microwave mozzarella: http://www.cheesemaking.com/store/pg/21.html

http://www.youtube.com/watch?v=RPUortoNUWo&feature=fvwrel


[i] Junket mix is still available today, and there are recipes for using it to make cheese here.

[ii] Miller, Arthur. Death of a Salesman.

[iii] This demonstration gives an idea of the same process done by cheese professionals: http://www.youtube.com/watch?v=2o-55_Hhjek&feature=related

Condiments and Sauces, Pickles and Preserves, Recipes, Vegetarian cheese, DIY, homemade, vegetarian

Spicy Sticky Cherry Blueberry Sauce for Ribs

1 · Jun 27, 2011 · 1 Comment

This nicely balanced 100% gluten free spicy, sweet and sour sauce from gfzing.com will go perfectly with barbecued ribs.

The ingredients are ideal for late June and early July:

First, in a non-stick pan, caramelize

  • 1/4 cup sugar
  • 1 teaspoon vegetable oil
  • 1/3 teaspoon salt

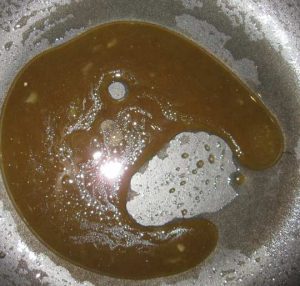
To caramelize, cook the mixture over low heat, stirring all the while, until the sugar clumps together in little lumps and then gradually melts in to a brown pool.

Add:

  • 1 clove garlic, peeled and minced
  • 1 dried cayenne pepper, chopped (about 1/2 teaspoon red pepper flakes)

Cook for just a few seconds, then

Carefully deglaze the pan with

  • 6 TB high-quality red wine vinegar (homemade is best)

There may be some spattering when you add the vinegar, so step back a bit and use a long-handled spoon to stir!

Stir constantly and when the sugar mass is nearly dissolved, add

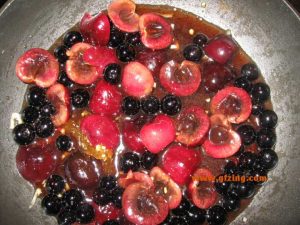
  • 1 cup halved, pitted fresh bing cherries
  • 1/2 cup whole fresh blueberries

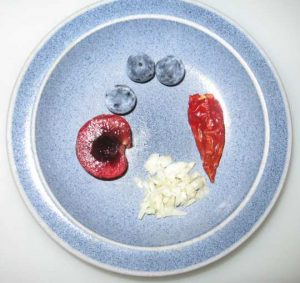
Cherry Blueberry Sauce plus fruit gfzing dot com

Raise the heat to medium and cook to thicken a bit, about 4 minutes.

Last, refresh the sauce with

  • 2 cloves of garlic, peeled and minced

Stir briefly and set aside.

Serve with barbecued ribs, duck or chicken.  In the winter, serve a similar sauce, using other fruits in season, for a roast dinner.

Condiments and Sauces, Fall, Meat Dishes, Meat-eater, Recipes, Spring, Summer, Uncategorized, Winter fruit, GF, meat, ribs, sauce

Homemade Seasoned Rice Vinegar

26 · Jun 24, 2011 · 4 Comments

Gfzing.com is once again bringing you the DIY recipe you have been looking for – how to make your own seasoned rice vinegar – the kind of vinegar that is used to make sushi.

The proportions for making Japanese seasoned rice vinegar are as follows – as described in the interesting Japanese cookbook Japanese Cooking for the American Table (by Karen Green, 1986, ISBN 0-87477-376-8).

Mix:

  • 4 TB rice vinegar
  • 2 TB sugar
  • 1 1/2 teaspoons salt

That’s it!  In any recipe that calls for seasoned rice vinegar you can use this mixture.  If you include your own homemade vinegar, even better! You can be sure that your seasoned rice vinegar is gluten free!


Condiments and Sauces, Dairy Free, Recipes, Salads and Dressings, Vegetarian DIY, homemade, vinegar

Salmon with Curry Dry Rub and Dressed Vegetables

0 · Feb 25, 2011 · Leave a Comment

This outstanding gluten free recipe is revised from one which appeared in Bon Appetit magazine nearly a decade ago.  There are 3 components:  the rice, the vegetables and dressing, and the salmon.

Prepare the Rice first:

Fry 1 Tablespoon homemade ghee or butter, then add:

  • 1 cup rinsed basmati or long grain rice

Stir fry for a minute or so, so that all the grains of rice are coated with the ghee or butter

Add:

  • 1 cup water
  • 2/3 cup coconut milk
  • 3/4 teaspoon salt

Bring to a boil, turn down the heat, cover and cook until the rice is done. Season with pepper.  Set aside, covered, to stay warm.

Prepare the vegetables :

Fry the following aromatics in 1 Tablespoon toasted sesame oil for one minute:

  • 2 teaspoons minced fresh ginger
  • 1 clove garlic, minced

Add sliced vegetables and stir fry for just a couple of minutes, then set aside:

  • 1 red bell pepper, sliced
  • Sliced shitake mushrooms, stems removed
  • 1 bunch of bok choy, sliced
  • Other options include carrots, scallions, celery, spinach, baby spinach, watercress, zucchini, bean sprouts with the ends removed etc.

Set the vegetables aside.

Make the dressing for the vegetables:

  • 6 Tablespoons rice vinegar or homemade cider vinegar
  • 3 Tablespoons gluten free soy sauce
  • 2 Tablespoons toasted sesame oil
  • 2-4 Tablespoons chopped fresh cilantro
  • 1 Tablespoon minced fresh ginger
  • 1 teaspoon sugar

Set the dressing aside.

Prepare the serving plates: You will need 4-6 dinner plates ready to go.

Prepare the fish:

Choose very fresh salmon fillets, with the evenest possible thickness for uniform cooking.  Instructions assume that there is a “skin” side, but if there is no skin side just proceed anyway.

Make a dry rub of  one teaspoon of each of the following spices:

  • gluten free chili powder
  • gluten free curry powder (make your own – that’s the best way)
  • gluten free ground cumin
  • gluten free ground coriander
  • gluten free mustard powder (difficult to find – if you can’t find gluten free, leave this out)
  • salt
  • sugar

Sprinkle each of 4-6 6-ounce salmon fillets (the flesh side of the fish, not the skin side) with a teaspoon or more of the spice mixture.  If you want to do something ahead, you could set the spiced fish aside, wrapped, in the refrigerator for 2-3 hours at this point, but we don’t bother – we proceed immediately with the cooking:

Heat a Tablespoon of vegetable oil in a non-stick pan over medium-high heat.  For 6 fillets, you might need 2 pans. When hot, add the salmon filets, skin side down, and fry for 3-4 minutes.  Flip the fish, spice side down now, and finish the cooking – another 3-4 minutes on this side. The fish should flake easily when done.

To Serve:

On each plate, arrange a serving of rice, a serving of vegetables, and a piece of salmon.  Drizzle the vegetables with a little of the dressing (a tablespoon or so).

Can be served with a rose wine, a dry red wine such as Tohu Pinot Noir from New Zealand, or a New England Hard Cider.  The dish is surprisingly well paired with a dry pinot noir, just for the record.


Condiments and Sauces, Fall, Fish and Seafood, Recipes, Salads and Dressings, Spring, Summer, Vegetables, Winter, with New England Hard Cider curry, fish, rice, salmon

Oyster Sauce and Hoisin Sauce

0 · Feb 23, 2011 · 2 Comments

Gf-Zing! received a request to find a gluten free Oyster Sauce and Hoisin Sauce in March 2006.  We have updated the links for 2011, and we remind our readers that we don’t verify the gluten free status of products.

For Hoisin, you might consider the Premier Japan brand of Wheat-Free Hoisin Sauce.  It is not the same texture as wheat-based hoisin sauces, and it is neither as thick nor as dark. See the Edwards & Sons Trading Company website regarding this product. We rely on the manufacturer to state the content. Please be sure to verify that any products you consume are safe for your situation. Gf-Zing! does not verify the gluten free status of products.

http://www.edwardandsons.com/specialdiets_celiac.itml (link updated 2011 Feb 23)

For the Oyster Sauce: You might consider the Lee Kum Kee brand for oyster sauce but  NOT for their hoisin sauce (see their website.)

Assuming you don’t want either 5 or 55 gallon drums of oyster sauce, then the Lee Kum Kee’s Choy Sun oyster sauce (yellow label) and the Panda Brand green label are the most likely candidates on their website (they make other kinds too, so it is important to check the bottle at the store.) Things change often in the food world, so you have to keep checking to see if they change their ingredients. Gf-Zing! does not verify the gluten free status of products.

http://us.lkk.com/faq (link updated 2011 Feb 23)

Note: Here at Gf-Zing! we do not verify the gluten-free status of any product. We rely on the manufacturers to declare the status of their products. It is up to the reader to check labels, and to verify that the products they consume are safe for them to use.

*Most Popular Recipes*, Ask Gf-Zing! - Responses, Condiments and Sauces, Recipes chinese, gluten free, hoisin, products, sauce

Homemade Vinegar

0 · Feb 3, 2011 · 1 Comment

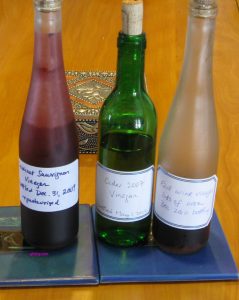
Homemade vinegar is easy to make – it kind of makes itself under the right conditions – and we have been making our own for 25 years.  The vinegar you buy in the grocery store (white, cider, wine) is sharp tasting and thin in flavor compared to the rich complexity of a homemade vinegar.  Make your own vinegar and you will become a fan!  Also, with your own homemade vinegar there is no need to read labels looking for gluten-containing items. The test of a delicious vinegar is this: sip up a teaspoon of the vinegar and you should want more! You will not want to waste this homemade vinegar making those baking soda and vinegar volcanoes that are so popular in elementary and middle school classes.

You will need:

  • Leftover Wine diluted with unchlorinated water
  • Vinegar culture (a bacterial culture, check with the manufacturer and do NOT use malt vinegar culture)
  • a wide-mouthed glass or stoneware container
  • Cheesecloth to keep fruit flies out of the vinegar while allowing air to enter the container
  • Room temperature (68-96 degrees)
  • surgical hemostat clamp (a ten dollar item) for easily removing old vinegar mother

If you really get in to making homemade vinegar, you may want to invest in a handy vinegar crock with a spigot, or an oak vinegar barrel.  Bear in mind that it is not safe to use homemade vinegar in home canning or pickling,  unless you are a talented chemist who can accurately test the acidity of your finished product.  For pickling, you need 5% acidity.

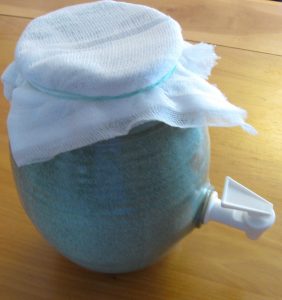
Coyote Vinegar Crock gfzing.com square
Gfzing.com uses a vinegar crock with spigot - made by Clay Coyote Gallery

To make Vinegar:

Choose what kind of vinegar you are making: red, white, cider.  Dilute leftover wine or hard cider with unchlorinated water, about 2 parts of wine to one part of water.  Put about a quart of diluted wine in to a cleaned large mouth jar or bowl, or vinegar crock.  We use C-brite to clean the container.  Add the starter culture. Stir with a clean spoon; cover the container with cheesecloth secured with a rubber band (keeps out fruit flies while allowing air to enter).  Store the crock at the back of the counter in your kitchen, where the vinegar will remain largely in the dark and at 68-96 degrees.  In about 4 weeks the first vinegar should be ready to use in salad dressings and sauces. Pour off some of the vinegar,  taste it and dilute it with additional water if it tastes too strong, then bottle it in sterilized bottles and cork the bottles.

Now add more diluted wine to your crock – this is called “feeding” your vinegar and let it go.    Each time you get ready to bottle some vinegar, taste the finished product to see if it is ready for bottling, and add water if the flavor is too strong.  Since this is a trial-and-error, imprecise method for achieving the final product, you will not know the final Ph of the homemade vinegar and cannot use this vinegar to make pickles or preserves that are not refrigerated.

Vinegar Culture:

To make vinegar, you add a starter culture of acetic acid bacteria to an alcohol base (like wine or hard cider).  For the starter culture, you can use some vinegar from a friend’s vinegar crock, or you can buy a culture. For gluten free vinegar, do not use malt vinegar culture.

Vinegar Mother:

Vinegar mother is a thick cellulose material created by the vinegar bacteria.  People who have never handled vinegar mother call it “slimy” but that is not a good description.  The material is strong, thick and fibrous, stretchy, slippery and somewhat leathery – like the covering on a papaya seed, or a sort of fibrous jelly. It can break cleanly in to clumps when you pull on it. The mother accumulates in your crock or barrel, and eventually some of it needs to be removed to make room for more wine.  The mother is not necessary to the formation of new vinegar – what you need is the bacteria.  So, if you have a friend who makes good vinegar and does not pasteurize it, ask for a sample of their vinegar and you are ready to go.

Vinegar Barrels:

A word about vinegar barrels – the oak vinegar barrel adds a strong oak flavor to a red wine vinegar, and we use one for this purpose.  However, the home vinegar maker should be forewarned about a couple of things. 1) The vinegar barrel should be soaked before using, to prevent leaking.  2) Unless the barrel has a large opening at one end, removing old vinegar mother from your vinegar barrel requires two people, because most of these barrels only have small holes through which to remove the mother.  One person holds the barrel so that a hole is facing downwards (the largest hole is the air hole at the top) and the other person uses a surgical hemostat clamp to grab bits of the mother and pull them through the hole. This is a messy process.

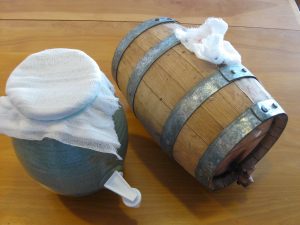
Vinegar Crock and Barrel from GFZINGdotcom
Gfzing.com uses the Vinegar Crock for cider vinegar and an Oak Vinegar Barrel for red wine vinegar

Bottling:

We bottle the vinegar without pasteurizing it.

Homemade Vinegar and Pickling:

  • Do not use homemade vinegar for making pickles. Vinegar used in pickling must be of a certain Ph, or you can have spoilage and dangerous bacteria can grow in the pickles.

More Instructions:

Further instructions for making your own vinegar are available here: http://www.claycoyote.com/blog//SunsetMagazine_Vinegar.pdf

homemade vinegar gfzing dotcom

Condiments and Sauces, Dairy Free, Pickles and Preserves, Recipes, Vegetarian DIY, gluten free, homemade, vegetarian, vinegar

Thai Cucumber Salad Dressing

1 · Feb 3, 2011 · Leave a Comment

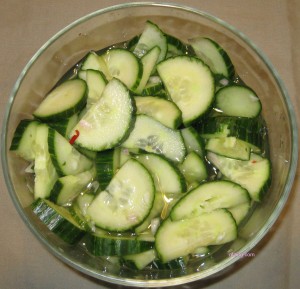
Salad is the BFF (best friend forever) of seasoned gluten free eaters. Here is another simple, inexpensive gluten free dressing that can be used on many different kinds of fresh vegetable.  In this case, we used English cucumbers – those long, long cucumbers that are often sold mysteriously laminated but have the advantage of holding few seeds.

To make attractive edges on the cucumber, increase the fiber in the finished dish, and avoid peeling, we use a fork to deeply score a cucumber from end to end, on all sides.  Scoring the cucumber in this way breaks up the peel so the diner does not have to masticate like a herbivore.  Then we cut the cucumber in half lengthwise, then sliced it crosswise into moon shapes. If you use a standard American cucumber, after halving it remove the seeds by scooping them out with a spoon.

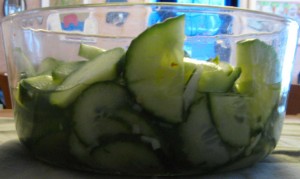
Put the cucumber slices (or grated carrot, daikon radish or whatever vegetable you want to lightly pickle) in to a glass bowl.  A fancy bowl is not required – any glass bowl will do.

Thai Cucumber Salad gfzing.com birdseyeview

Mix up the following dressing, pour it over the cucumber slices, stir and chill:

  • 1/2 cup cider vinegar (homemade is best)
  • 1/4 cup sugar
  • 1/4 water
  • 1 teaspoon salt
  • 1 medium shallot, peeled and minced
  • 1 dried cayenne pepper, minced (or 1/4 – 1/2 teaspoon red pepper flakes)
  • fresh ground black pepper (optional)

You can add more cucumbers to the leftover dressing and serve the same salad again the next day.

A note for the wheat-eater who is serving a gluten free diner: be cautious with the sugar container.  Sometimes a tired baker scoops up some flour from the flour container and then uses the same measuring cup to scoop up some sugar.  If that’s something you tend to do, use a fresh container of sugar to make this dressing for your gluten free friend.

Thai Cucumber Salad gfzing.com web

Condiments and Sauces, Dairy Free, Pickles and Preserves, Recipes, Salads and Dressings, Vegetables, Vegetarian cucumber, dressing, gluten free, salad, vegetarian

Lime and Agave Salad Dressing

0 · Jan 15, 2011 · Leave a Comment

Here is a delicious gluten free dressing of agave nectar and lime juice, based on a “thai-style” dressing that can be found all over the internet.  (The standard “thai-style” dressing contains the now evil corn syrup, once sooooo trendy and now hiding shamefully in the back of many American cupboards, waiting to be used in pecan pie.)

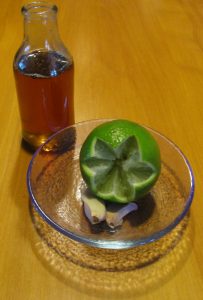
Lime and Agave dressing from Gfzing.com

We had a bottle of agave nectar sitting on the shelf, and apart from wondering why that agave was not made in to tequila we hadn’t given it another thought.   As usual, we are entering the new year with a load of greens on our plates, hoping to reverse the effects of holiday indulgences.   The problem with all that salad?  It can be boring!  The only hope is an arsenal of interesting sauces to “dress” up the greens.  Here’s one:

  • 1/4 cup amber agave nectar or other sweetener or your choice
  • 1 1/2 tablespoons gluten free soy sauce (check the label)
  • 1 1/2 tablespoons fresh lime juice (about 1/2 of a large lime, or one whole small lime)
  • 1 tablespoon oil (not from olives)
  • 1/2 teaspoon dried basil (or 1 tablespoon snipped fresh basil
  • 1 tablespoon snipped fresh mint leaves
  • 1/4 teaspoon ground chili (cayenne or red pepper)
  • 1 tiny clove of garlic, peeled and grated or minced

Mix all ingredients together and serve with a salad of mixed greens, sliced boneless chicken seasoned and pan-fried, sweet cherry tomatoes, nuts etc.

Chianti goes well with this dressing.

Condiments and Sauces, Dairy Free, Recipes, Salads and Dressings, Vegetarian agave, dressing, gluten free, lime juice, salad, soy sauce, vegetarian

Homemade Poultry Seasoning

0 · Nov 23, 2010 · Leave a Comment

herbs drying gfzing.com

Once again, Gfzing.com cracked the binding on a bunch of cookbooks to find a tasty gluten free poultry seasoning for the Thanksgiving turkey stuffing.  We looked through the usual suspects, those older books that included formulas for standard seasonings and came up empty! Then, on an old bottle marked “poultry seasoning,” we found a typed list, taped to the bottle.  The ingredients are listed below.

The herbs and spices for poultry seasoning are similar in all  formulations, it is just the proportions that change. The sage and thyme should predominate.  Some poultry seasoning recipes include nutmeg, and some include celery seed.

We dried the herbs from our garden, at the end of the fall, by hanging them upside down in the kitchen to dry.  If you don’t have home-dried herbs, you can use bottled herbs.

  • 2 parts dried sage
  • 3/4  part dried rosemary
  • 1 part dried marjoram
  • 1/2 part ground black pepper
  • 1/2 part grated nutmeg
  • 1  1/2 parts dried thyme

These ingredients are listed in “parts” – you can substitute teaspoon or Tablespoon for “part” in the recipe, depending on how much poultry seasoning you want to make.  You can assemble all of these in a large, stone mortar and pestle and grind them quickly to a fluffy powder. It is the sage that adds the fluffiness to this preparation.

Condiments and Sauces, Fall, Meat Dishes, Meat-eater, Recipes, Thanksgiving gluten free, homemade, recipe, seasoning, spice mixture

Homemade Spicy Tomato and Sweet Pepper Ketchup

0 · Nov 3, 2010 · Leave a Comment

Making your own custom ketchup is easy-peezy!  At gfzing.com, we made a careful study of the available recipes for homemade ketchup, and concluded that the ingredients in most tomato ketchups are pretty much identical.  The spicy ketchup variant here is gluten free and can be served with fries, meatloaf, Shepherd’s Pie, hamburgers, hash browns, corned beef hash or any other dish that requires ketchup.

We tasted the typical store-bought ketchup which is very smooth, mostly sweet, with heavy tomato and celery seed notes – sort of like sweetened and thickened V8 juice! We also read Malcolm Gladwell’s interesting discussion of why there are so many mustards and only one ketchup.  Afterward reading that, we thought that we would not like a ketchup substitute, but we were wrong.  This ketchup is better than bottled ketchup!

Spicy Tomato and Red Pepper Ketchup
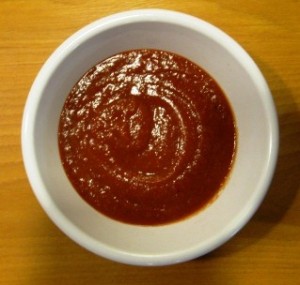
Homemade Ketchup has a rich color and complex flavors

We started with a Saveur recipe for homemade ketchup. We replaced half the tomatoes with sweet red peppers, added sweet potato and dates for sweetening and thickening, and switched out their brown sugar with some agave syrup and gluten free fruit jam, to reduce the amount of refined sugar in the recipe.  We changed the amount of spices, and upped the hot peppers.  The final ketchup has some chutney-like flavors.  It has more flavor than bottled ketchup, and far less refined sugar.  It provides dynamic tension for your meatloaf!

Ingredients:

14 0unces diced or petite cut canned tomatoes

3 long sweet red peppers, stemmed, seeded and sliced

1 cup water

1/2 of a large red onion, peeled and chopped

1 clove garlic, peeled and sliced

1 dried cayenne pepper, stemmed and sliced

2 Tablespoons agave nectar

1/3 cup cider vinegar (we make our own cider vinegar out of homemade New England apple cider, from local apples)

1/4 teaspoon celery seed

1/4 teaspoon dry mustard

1/4 teaspoon ground allspice

1/4 teaspoon ground ginger

1/4 teaspoon ground black pepper

1/8 teaspoon ground cloves

1/8 teaspoon ground cinnamon

1 1/2 teaspoons salt

2 Medjool dates, pitted and sliced

1 1/2 ounces of peeled sweet potato, chopped –  a piece of sweet potato about the size of an extra-large egg

2 Tablespoons plum jam

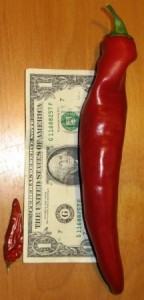
How big are the peppers
A dried cayenne pepper on the left, and a sweet red pepper on the right

The Steps:

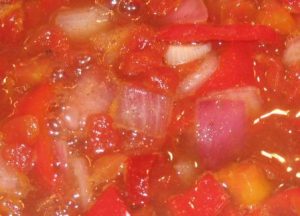
Homemade Spicy Tomato and Sweet Pepper Ketchup before cooking
The ketchup before the cooking...

First, put all the ingredients in a saucepan and cook over medium heat for about 45 minutes, stirring occasionally,  until reduced by half.  The material will start to stick to the bottom of the pan.  Be careful that it does not burn.

When cooked, cool and then puree the mixture thoroughly in a blender or food processor.  Taste, and adjust the salt, sweet, and sour flavors as necessary. That’s it!  Serve warm or cold.  Store, covered,  in the refrigerator.  This is not a “preserve” since it has a low sugar content and low salt content.  It cannot be kept indefinitely.  Make sure all your ingredients, including spices, are gluten free.

Condiments and Sauces, Recipes, Salads and Dressings, Vegetarian cooking, gluten free, gourmet, homemade, recipe, vegetarian

Homemade Garam Masala

0 · Oct 19, 2010 · Leave a Comment

Garam masala is an Indian spice mixture used in many dishes and often added at the very end of the cooking of a dish. It can be 100% gluten free if made correctly.  Like curry powder, garam masala usually seems to be made from a standard list of spices, the amounts of each spice customized according to taste.

Interestingly, if you do a Google search for “homemade garam masala” there are only a million hits – that’s twice as many hits as for “homemade ketchup” or “homemade mayonnaise” but not as many hits as for “homemade mustard”.  What is going on with that mustard?  Are beer drinkers interested in mustard at the season of the Oktoberfest?

Back to the topic at hand.  We compared recipes for Garam Masala from two authors: Julie Sahni and Madhur Jaffrey.  Both have written wonderful cookbooks which are excellent and frequently consulted resources – these authors were instrumental in bringing the world of interesting, largely gluten free, Indian cooking to the North American audience.

For a generic Garam Masala (there are other more specialized types of garam masala as well) these authors offer varying formulas, using the following spices.  The weights in parentheses are just there to give you an idea of the ratio of amounts that could be used – we have measured here the weights for one of the Jaffrey recipes:

Cardamom Seed (25 pods – see the picture below for a couple of pods next to the seeds from 25 pods)

Black Peppercorn (2  1/8 ounces or 62 grams)

Whole Cumin Seed (1 1/4 ounces or 36 grams)

Whole Coriander Seed (1/2 ounce or 15 grams)

Cinnamon Stick (3, 3 inch sticks)

Whole Cloves (4 to 6 cloves)

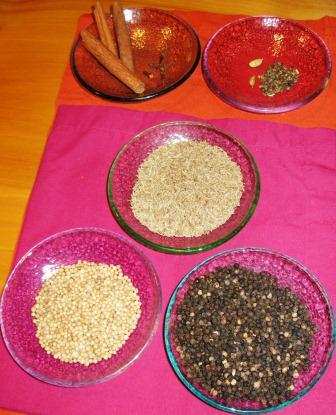
To give you an idea of what this amount of spice looks like, here is the full amount:

Gfzing.com Garam Masala spice picture 3
Garam Masala spices before grinding. Clockwise from top left: Cinnamon and Cloves, Cardamom, Cumin (in cener), Black Pepper, Coriander.

Sahni generally recommends toasting the spices in a dry skillet for 10 minutes, stirring all the while, then cooling and grinding to a powder.  Jaffrey’s instructions generally omit the toasting process and go right to the grinding. Jaffrey sometimes omits the coriander and adds nutmeg.

By volume, Jaffrey’s recipe from Indian Cooking uses 3 times as much black peppercorn as Sahni’s recipe from Classic Indian Cooking.  Other proportions are very similar in both recipes.

Why buy stale old spice mixtures ready-made when you can easily make your own pungent gluten free garam masala using whole spices, toasted (or not) and ground up?

Condiments and Sauces, Cookbooks, Recipes, Vegetarian garam masala, gluten free, homemade, Indian, recipe, vegetarian

Homemade Thai Red Curry Paste

0 · Oct 17, 2010 · Leave a Comment

One reader asked if we had looked at recipes for making homemade Thai curry paste.  Well, we have.  We used the following useful sources :

Seductions of Rice by Jeffrey Alford & Naomi Duguid 1998

Saveur Magazine

Thai in Minutes by Vatcharin Bhumichitr 2004

Thai Cuisine with Jasmine Rice from Eastland Food Corporation

Thai Culinary Art by Srisomboon Bhandhukravi 1993

Terrific Pacific Cookbook by Anya von Bremzen & John Welchman 1995

Thai Red Curry Paste recipes use a basic list of ingredients, and all the recipes seem to include chilies, coriander, cumin, peppercorn, garlic, lemongrass, galangal, a fishy element like shrimp paste or fish sauce, and salt.  Most also include shallots, kaffir lime leaf or zest, and either cilantro leaf or root. A few add nutmeg, paprika, or cardamom.

Dry chilies are usually seeded and soaked. Dry spices are generally toasted in a skillet before grinding. Garlic and shallot are peeled and chopped before making in to a paste. The bottom 3 inches of lemon grass stalk is cut off, the toughest leaves removed, and the whole piece is then smashed with the flat side of a cleaver before the lemon grass is minced.

Shrimp paste or fish sauce must be investigated for gluten free status before using. Shrimp paste is a dry product that is dry roasted before use.

Ultimately, all the ingredients are ground to a homogeneous paste.

Based on the following table, you can see that Thai Red Curry paste is made using a fairly standardized set of ingredients, easily customized by the home cook to make a “signature” gluten free blend.

Thai Red Curry Paste Comparisons from gfzing.com

Make sure that all of your ingredients are gluten free!

Condiments and Sauces, Cookbooks, Product Reviews, Recipes cooking, gluten free, homemade, recipes, thai red curry

Making Your Own Homemade Curry Powder

3 · Oct 15, 2010 · 7 Comments

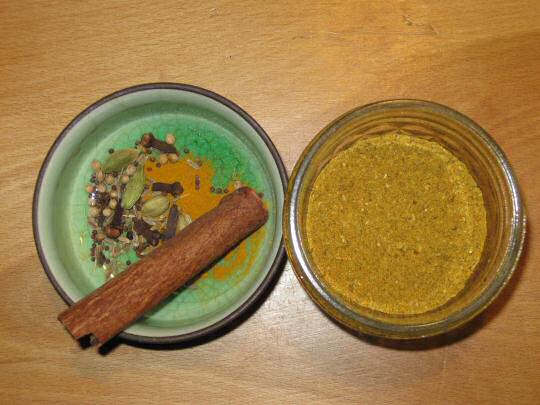
Homemade Curry Powder

It is as easy to make homemade gluten free curry powder as it is to grind coffee!

With a little trial and error you can create your own signature gluten free curry powder!  We use a 30 year old coffee grinder to make ours from whole spices.  Once you make your own, you won’t be able to go back to using store-bought curry powder. Also, your friends will want your recipe.

The Spices:

Make sure that whatever spices you add to your curry powder are gluten free. And, the fresher the spices, the better the flavor.

The Coffee Grinder:

Some recipes will advise you to buy a separate coffee grinder for making spice mixtures like curry powder, but we use one coffee grinder for everything – we have been doing it for decades. After using the coffee grinder for grinding spices, you can clean the coffee grinder using a toothbrush to loosen up ground spices and wipe the grinder clean.  If your coffee grinder is white plastic, the turmeric may turn the plastic yellow, but when you then revert to grinding coffee in the grinder the flavor of your coffee will not be altered.

What amounts to use?

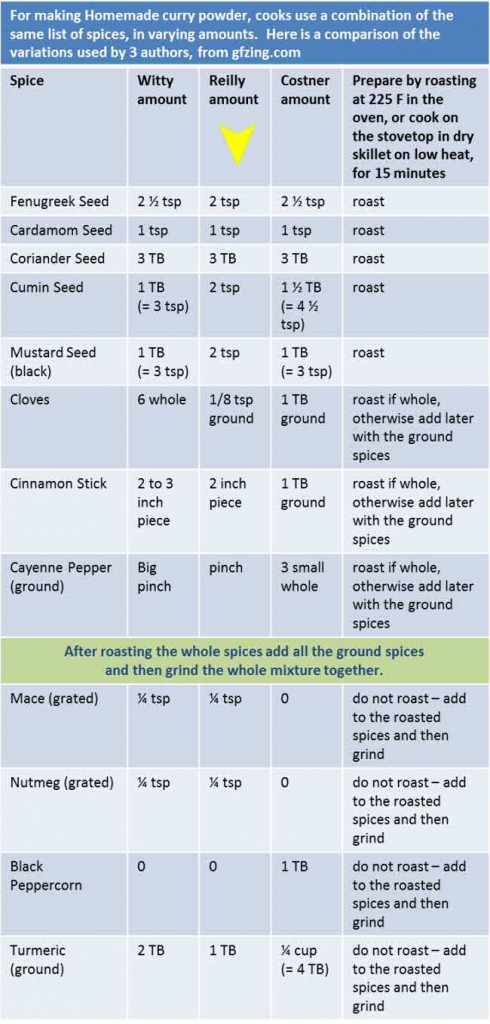
At gfzing.com, we have analyzed a few recipes for homemade curry powder and provide the following table of formulas from some of our favorite cookbooks.  Note that the biggest variation occurs with the turmeric and the pepper.  Turmeric has a surprisingly strong taste, so experiment with it a little to decide how much to use.

Our favorite curry powder recipe comes from Robin Reilly’s excellent book Gluten-Free Baking. We add a whole dried cayenne pepper to her mixture because we like our curry powder spicy. Robin Reilly uses a combination of roasted coriander seed, fenugreek seed, cumin seed, black mustard seed, cardamom seed, cinnamon stick, with added ground turmeric, ground mace, nutmeg, and cloves.  We add a whole dried cayenne pepper to her recipe, then grind it in two batches in the 30 year old coffee grinder.  After grinding the two batches, we mix the stuff together thoroughly and store it in a half pint Mason jar.

Another similar curry powder formula is to be found in Better Than Store-Bought by Witty and Colchie, originally published in 1979.  This is a unique cookbook which shows how to make a large variety of items from scratch.

A third example of homemade curry powder lives in another excellent do-it-yourself cookbook called Gifts of Food, by Susan Costner, published by Consumer Reports in 1984. Again, the list of spices is pretty much the same – varying amounts are used.

In this table, we compare these 3 recipes, demonstrating that indeed, the list of spices is pretty much the same but the amounts differ.  Fiddle with these spices and develop your own signature gluten free curry powder! Package it up nicely, and give it as a gift!

Homemade Curry Powder comparisons
Homemade Curry Powder - comparisons from Gfzing.com

Try the curry powder in these recipes:

Chicken Sticky Rice

Curried Cream of Root Vegetable Soup

Curried Tofu Meatballs

Creamy Lentil Soup with Curry and Chipotles

Rich Lamb and Cornish Game Hen Curry

Pineapple Fried Rice

*Most Popular Recipes*, Condiments and Sauces, Cookbooks, Meat-eater, Recipes, Vegetarian curry powder, DIY, gluten free, homemade, recipes, vegetarian

Preserving Fresh Ginger

0 · May 11, 2010 · Leave a Comment

It is easy to keep fresh ginger available at all times.  Get some really nice looking fresh ginger, peel it, cut it in chunks, and put the chunks in a nice jar that can be closed tightly.  Pour in some vodka to cover the ginger completely.  This ginger will keep for a very long time and you can take it out of the vodka as needed, chop it up and use it in curries or stir-fries.

Condiments and Sauces, Pickles and Preserves, Recipes GF, ginger, gluten free, preserves

Mango Pineapple Salsa

0 · Jul 5, 2008 · Leave a Comment

This one is for the Engineers who all converged on Boston for the Fourth!

This salsa requires grilled onions and pineapple, so it is suitable to make before you put your chicken on the grill for barbecue. Heat up your barbecue, and do the pineapple and onions first!

Obtain some gluten free soy sauce – this means reading the labels to make sure there are no wheat, barley or rye ingredients.

Make half inch thick slices from a large red onion and a peeled, cored pineapple. Put the onions and pineapple on a rack and grill them over hot coals for 3-5 minutes, or until they start to smell good and are lightly browned. Remove them from the grill and dice them.

Put the grilled, diced onion and pineapple in a bowl and add:

2 mangoes, peeled and diced

1 red bell pepper, seeded and diced

1/3 to 1/2 cup chopped fresh mint

1 to 2 Tablespoons grated fresh ginger

2 Tablespoons each of rice vinegar and gluten free soy sauce
Juice of one fresh orange

1 Tablespoon olive oil (to taste – you may need more)

1 Tablespoon sesame oil

A few dashes of Tabasco sauce

A small amount of salt

Fresh ground pepper

Condiments and Sauces, Recipes, Salads and Dressings, Summer, Vegetables mango, pineapple, salsa

Ghee

0 · Jul 5, 2008 · Leave a Comment

Ghee is a useful type of highly flavored clarified butter. You can use it in French and fusion recipes, substituting 1/4 the amount of ghee for the amount of butter in some sauces, achieving great flavor without all the fat.

To make ghee, put one pound of unsalted butter in a pot, and simmer it on low-medium heat without stirring for about 20 minutes. There will be foam that rises to the top, and then the butter will bubble and boil as the water content evaporate – when the solids at the bottom of the pot start to brown, remove the pot from the heat. The flavor of the browned bits in the bottom of the pan will permeate the butter, giving ghee its distinctive browned-butter taste! Make sure that the solids do not burn, but also make sure that they get browned. You have to walk a fine line, when making ghee.
Strain the ghee through a fine strainer in to a one-pint Mason jar (canning jar that can withstand high heat), being careful not to burn yourself, and let it cool. When this clarified butter is cool, you can store it in the refrigerator. Some recipes say that you can store it without refrigeration, but we always keep it in the refrigerator anyway.

Condiments and Sauces, Recipes cooking, ghee, gluten free, recipe

Baking Powder – Make your own!

0 · Nov 24, 2007 · 1 Comment

Did you run out of baking powder like we did, on the holiday, when even the convenience stores were closed? You can make your own, and it will last about a month in a bottle on the shelf. Cream of tartar is a bi-product of making wine, for those who like to know the origin of everything they eat.
Mix together:

4 parts cream of tartar
3 parts cornstarch
2 parts baking soda

For a small batch, use a teaspoon as the measure – this will yield 3 tablespoons of baking powder (9 teaspoons), which is less than a quarter cup.

Condiments and Sauces, Recipes baking, DIY, gluten free

Creamy Tarragon Salad Dressing

0 · May 4, 2006 · Leave a Comment

This dressing is excellent on Boston Lettuce, especially in the spring when the tarragon is just starting to sprout new shoots. The recipe was developed for the Gf-Zing! website, which celebrates flavor in the gluten free world.

Mix in a bowl:

1/3 cup gluten free mayonnaise
1 1/2 Tablespoons freshly squeezed lemon juice
1/3 cup olive oil
1/4-1/2 teaspoon salt
1/4-1/2 teaspoon freshly ground black pepper
1 Tablespoon snipped fresh chives
1 teaspoon snipped fresh tarragon (or more)
sugar to taste

For the sugar, only add this by 1/4 teaspoon amounts until the flavor of the dressing is balanced. If the lemon is not very sour, there will be no need for the sugar.

Set the dressing aside for 20 minutes or a half hour before serving – this will allow the chives and tarragon to flavor it up!

You can add coarsely grated carrots, steamed or roasted asparagus, chopped walnuts, raisins or diced hard-boiled eggs to this salad.

Condiments and Sauces, Dairy Free, Recipes, Salads and Dressings, Spring, Summer

Homemade Major Grey Chutney – from pineapple

0 · Feb 20, 2006 · Leave a Comment

This recipe makes a little more than 1 quart of chutney. It was adapted for the gluten free community by Gf-Zing! , which celebrates flavor in the gluten free world.

4 cups fresh pineapple (peeled, cored and coarsely chopped in small bite-sized pieces)
1 cup dark brown sugar
1 cup apple cider or white vinegar
1 cup Spanish onion, coarsely chopped
3/4 cup golden raisins
1/2 cup lime, seeded and chopped – leave the peel on
1/2 cup ginger root, peeled and minced
1/2 cup orange, peeled, seeded and chopped
1/2 cup molasses
1/4 cup lemon, peeled, seeded and chopped (about 1 lemon)
3 garlic cloves, minced
1 Tablespoon mustard seed
1 teaspoon dried red pepper flakes (or one dried cayenne pepper, minced)
1 teaspoon gluten free ground cinnamon
1/4 teaspoon gluten free ground cloves
1/4 teaspoon gluten free ground allspice
1-1/2 teaspoons kosher or sea salt (if you use table salt, use non-iodized, and use less)

Mix all the ingredients in a large non-reactive pot (non-stick, enamel or stainless). Bring to a boil and simmer for 30 minutes, stirring occasionally. Make sure the chutney does not burn.

Adjust the sweetness if necessary (you may want to add a 1/4 cup of sugar, for example.)

The original recipe (from the Bernardin canning jars manufacturer) called for mangoes and cilantro and did not include any salt. Also, the original recipe gave instructions for canning. Since this recipe has been altered, it is not known how long the chutney would have to be processed for canning. Therefore the chutney should be kept refrigerated.

Make sure all your ingredients are gluten free!

Condiments and Sauces, Dairy Free, Recipes

Quick Gluten Free Red Enchilada Sauce

0 · Dec 15, 2005 · Leave a Comment

The original recipe included wheat flour, but this recipe is gluten free. This Gf-Zing! recipe produces 2 cups of finished enchilada sauce.

1/2 cup minced onion
1 clove garlic, minced
2 Tablespoons olive oil
1/4 cup gluten free chili powder
1/2 teaspoon dried oregano
1/4 teaspoon ground cumin
1 teaspoon salt
1 cup tomato puree
1 cup water or stock

Fry the onion and garlic gently in oil until they are wilted. Add the seasonings and stir. Add the tomato and stock and simmer 10 minutes.

Be sure to use all gluten free ingredients, including the spices, canned tomato product and stock. As of December 15, 2005, the McCormick brand states on their website: “When a product that contains gluten is formulated, we take precautions to ensure the source of gluten is declared on our label in the ingredient statement.” This makes the McCormick brand of spices very attractive to the gluten-free community. The DelMonte website makes similar statements about their tomato products. “The list below includes products that, to the best of our knowledge, do not contain wheat, oats, rye or barley/malt ingredients. The list may change or not be complete due to formula changes or new product introductions. Please read the ingredient statement on the label for the most current information.”
Note: it is important to check with the manufacturer and read labels to see if policies or ingredients have changed.

Condiments and Sauces, Recipes cooking, enchilada, gluten free, recipe

The Gravy Problem

0 · Nov 22, 2005 · Leave a Comment

2010 Update –

The immersion blender is the modern GF cooks best friend!  When your gluten free gravy lumps up, as it may, take out that immersion blender that someone gave you at the holidays, and follow the directions carefully.  Following the directions, you can blend the gravy without splattering the whole kitchen!

If all you have in the cupboard is some mochiko (sweet rice) flour for thickening, take heart.  Go ahead and follow an old favorite recipe for gravy, using equal parts of butter and mochiko. For example, you might melt 3 Tablespoons of butter and stir in 3 Tablespoons of mochiko.  Then, you start adding your stock, stirring slowly.  Suddenly, the whole thing goes lumpy and you fear disaster!  No worries! Here’s where you transfer the mess to a deep bowl, use the immersion blender (magic occurs), then transfer the mixture back to the cooking pot and continue whisking in stock. Presto, the mixture is a nice smooth gravy.  You can use the same trick when making macaroni and cheese, by the way.

—and now, the original article from 2005:

The annual holiday dilemma is – how do you make a gluten free gravy that is not reminiscent of glue, or perhaps paste?

There are several methods that work well, and Gf-Zing! has tested several options for the gluten free community.

First, let’s talk about the gourmet version. Here, you add a reduction or a ‘gastrique’ to the stock, and thicken the gravy with arrowroot. It is more of a sauce than a gravy, but will be delicious. You may want to increase the quantities to produce more gravy!

Degrease the pan juices from the roast bird. To the remaining juices, add 2 cups of hard cider (or 1/2 cup white wine) and reduce by heating – reduce it down to just 1/4 cup or a few tablespoons. Add 1 1/2 cups of stock, and reduce this mixture down by one third.

Mix 1 Tablespoon of arrowroot or cornstarch with a little stock and add it to this remaining sauce gradually, stirring constantly. Heat until thickened. Add salt and pepper as needed, and strain the sauce before serving. You may add currant jelly, as well, a few tablespoons, and a few tablespoons of fresh butter, to enrich the sauce.

You can make a similar sauce using a french ‘gastrique.” For this, you cook 1/4 cup of white sugar with 1/4 cup of red wine vinegar in a 2-quart saucepan until it caramelizes into a brown syrup – this will be thick, and you don’t want it to burn so watch carefully. Next, add 1 1/2 cups of rich stock and a little wine if you like, while being careful not to be burned by spattering syrup! The caramelized vinegar and sugar is the gastrique that will make your gravy taste really good. Thicken as before, adding a mixture of 1 Tablespoon arrowroot mixed with enough water to make a soupy mixture, and cook until thickened. Refresh this gravy with a little butter, and add some salt and pepper as needed.

For a more standard gravy, use a gravy flour mix as follows:

2 Tablespoons brown rice flour
3/4 Tablespoon sweet rice flour (mochiko)
1 1/2 teaspoons tapioca starch
1/3 teaspoon of xantham gum

Mix these ingredients together thoroughly, and then use it in place of flour in your regular gravy recipe.  Give the gravy a zap with the immersion blender and you will have a typical gravy, maybe even better than a wheat-based gravy.

Make sure all your ingredients are gluten free!

Ask Gf-Zing! - Responses, Condiments and Sauces, Holidays, Recipes, Thanksgiving

Spice Rub for Turkey

0 · Nov 12, 2005 · Leave a Comment

1 teaspoon dried thyme
1 teaspoon dried marjoram
1 teaspoon paprika
1 teaspoon gluten free prepared mustard
salt
freshly ground pepper

For every 7-8 pounds of bird, mix up the above amount of herb mixture. Rub this mixture on the bird, and roast as usual. The herbs will season the drippings in the pan, and make for a more interesting gravy.

The paprika contributes to the attractive coloration of the roast. You can use this mixture for chicken and cornish game hens also.

The mixture comes from a recipe by one of our favorite cookbook authors, Perla Meyers. The original recipe, which includes a butternut squash and lingonberry sauce, is called Roast Turkey in Lingonberry Sauce, and can be found in the From Market to Kitchen Cookbook, 1979.

Make sure all your ingredients, including herbs and spices, are gluten free!

Condiments and Sauces, Dairy Free, Fall, Holidays, Recipes, Thanksgiving, Winter

Chipotles in Adobo – homemade

0 · Nov 7, 2005 · Leave a Comment

Many modern American recipes call for Chipotle Chiles in Adobo sauce – a tablespoon or two. Some of the best fusion cooking recipes include this flavoring. Unfortunately for the gluten free community, the canned chipotles readily available in supermarkets often contain wheat flour (weirdly, because there is no wheat flour in original Mexican recipes for this sauce.) Gf-Zing! has developed this good, gluten free recipe for this smoky, extremely spicy sauce, based on a number of recipes including some translated from Mexican websites.

The recipe presented here is a combination of the “best of” recipes for quick-cooking chipotles in adobo (adobados) from around the web. The original recipes can be time-consuming, calling for soaking the chilies in vinegar for four days, reducing large quantities of vinegar by boiling, or they may give instructions for a half pound of chiles! The following recipe will make a modest amount of sauce, enough for a small family. Store it in small containers in the freezer – we use 8 little take-out containers and put a couple of tablespoons of the sauce in each one.

1 ounce dried chipotles (this could be 8-12 peppers)
1/3 cup onion, chopped
5 Tablespoons gluten free cider vinegar
2 cloves garlic, sliced
4 Tablespoons gluten free ketchup
2 Tablespoons chopped roasted green chilies (canned)
1/8 teaspoon ground cumin
1/4 teaspoon dried oregano
1/4 teaspoon salt
1 peppercorn
3 cups water

Soak the chiles in boiling water to cover for one hour, to soften them up. Using the point of a small, sharp knife, make a slit in the side of each chipotle chili and remove the seeds and the hard stem end out of the chili. Be very careful, as you trim the chili peppers, not touch your face with your hands – these chilies are very spicy and the chemicals that cause the spice of the peppers (capsaicinoids) can burn mucous membranes. You may notice that breathing the vapors from the chilies may make you cough as well – so use good ventilation.

Put the chilies and all the other ingredients in a 2 quart saucepan and bring to a boil. Cover, reduce the heat to a simmer, and cook for 1 or 1 1/2 hours until the chilies are soft like overcooked peas. Keep an eye on things so the sauce doesn’t boil down too much. The total quantity of sauce, at the end, will be 2 cups. Put all of the sauce and chiles in the blender and puree completely. You may want to add another 1/4 teaspoon of salt and a pinch of sugar to adjust the flavors.

Store in small containers in the freezer.

If you take an interest in the huge variety of Mexican sauces, and you can read Spanish, try this website.

Make sure that all the ingredients, including spices, are gluten free!

*Most Popular Recipes*, Condiments and Sauces, Dairy Free, Recipes adobo, chipotle, chipotles, cooking, DIY, gluten free, pepper, recipe, sauce

Honeydew Melon Chutney

5 · Nov 5, 2005 · 1 Comment

1 large honeydew melon, seeded, peeled and cut into 1 inch chunks.
1/4 cup pickling salt, plus an extra 1/2 teaspoon
2 cups gluten free cider vinegar
2 cups light brown sugar
1 teaspoon ground ginger
1/4 teaspoon crushed dried cayenne pepper
1/4 teaspoon whole allspice, crushed in a mortar and pestle
2 inches of cinnamon stick
1 cup chopped onion
1/2 cup EACH diced red and green bell pepper
1 clove garlic, minced or grated

1/2 cup dry currants
1/3 gluten free brandy

Soak the melon cubes in cold water to cover, with the 1/4 cup pickling salt, overnight in the regrigerator. The pickling salt is not iodized, so your pickle will not turn brown. Drain and rinse the melon in several changes of cold water.

Put the remaining ingredients (except for the currants and brandy,) in a large heavy pot and bring to a boil. Add the melon chunks and the currants and brandy, and simmer the chutney for nearly 2 hours, until it has reduced in volume by a half and thickened up. Do not cover while cooking. Store the chutney in the refrigerator. This chutney will keep for a long time.

Make sure all your ingredients are gluten free.

Condiments and Sauces, Dairy Free, Fall, Recipes, Summer, Winter

  • Go to page 1
  • Go to page 2
  • Go to Next Page »

Primary Sidebar

Check out our Coupon Collection

Click Here to go directly to the Coupon page

Read more at The Rambling Epicure:

Click Here: The Rambling Epicure

QR code for your phone

qrcode for gfzing
NFCA logo

Blogroll

  • Aloha World Ono Recipes
  • Book of Yum
  • Dulce Cocina sin Gluten
  • Gluten Free Beer Association
  • Glutenfreie Rezepte | kaMehl
  • Hawai'ian Electric
  • Laylita's – Ecuador
  • Nombudsman
  • Papilles et Pupilles
  • Sea Salt with Food
  • The Rambling Epicure The Rambling Epicure is a daily international food chronicle, and the first online newspaper to follow global food trends and news.
  • Triumph Dining

Monthly Archive

Proud member of FoodBlogs

Load up on new recipes, exclusive goodies, + more!

Get the exclusive content you crave straight to your inbox.

Things to Read

Find by keyword

bacon baked baking beans beef berries blueberry cake cheese chicken chocolate coconut cooking curry dessert DIY dried beans easy fish food fruit GF ghee gluten free gourmet homemade lamb maple syrup meat microwave New England Hard Cider pie pork pumpkin recipe recipes rice salad sauce soup stewed strawberries sweet potato thai red curry vegetarian

Copyright © 2023 GF-Zing! on the Cravings Pro Theme