• Skip to primary navigation
  • Skip to main content
  • Skip to primary sidebar
  • Skip to footer

GF-Zing! logo

  • Home
  • Coupon Collection
  • GF Foods & Groups
  • Ask Gf-Zing!
    • About the Author
    • About Gf-Zing!
  • Nav Social Menu

    • Email
    • Facebook

dessert

Armenian Dessert Cake with Syrup – gluten free

0 · Jun 22, 2011 · Leave a Comment

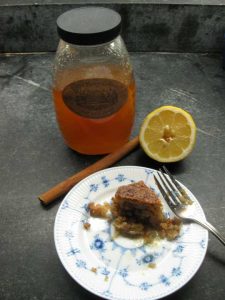
Armenian syrup cake w honey gfzing

This outstanding dessert is a seriously sweet, robust cinnamon-clove flavored cake soaked until wet with a honey-lemon syrup.  The cake tastes like baklava, and is served cold, with whipped cream if desired.

Originally, this dessert is made with Cream of Wheat. Gfzing.com has adapted it to be gluten free, replacing the Cream of Wheat with Cream of Rice and cornmeal. The recipe is from Rose Baboian’s Armenian-American Cook Book, published in 1964. The book seems to have its own Facebook page now, and is available for sale here: http://www.stvartanbookstore.com/browseproducts/Armenian-American-Cookbook–hc.html.  Similar recipes for cereal cakes abound around the internet, with Greek, Lebanese etc. variations.

Make this cake by hand, for aerobic exercise.

If you are making this in a wheatavore kitchen, bring in your own sugar or make sure that their sugar does not have remnants of wheat flour from wheatavore cooks using the same measuring cup for flour and then for sugar.

Grease and 8×8 pan or 9×9 pan well, using the wrapper from your butter.

Preheat oven to 350.

Cream together:

  • 10 TB salted butter
  • 3/4 cup white sugar
  • 1/2 cup dark brown sugar
  • 1/2 teaspoon cinnamon
  • 1/2 teaspoon cloves

Add and stir to incorporate:

  • 1/2 cup dry uncooked Cream of Rice cereal
  • 1/2 cup cornmeal
  • 1 teaspoon baking powder
  • 3/4 cup finely chopped walnuts
  • 3/4 cup shredded coconut


Add and stir to incorporate:

  • 1/4 cup milk


Add one at a time and stir til well mixed:

  • 3 eggs (large)

Pour in to the greased pan and spread out to distribute evenly.  Bake at 350 degrees, 45 minutes for 8×8 pan, 35 minutes for 9×9. A knife inserted in the cake should come out clean.  Take the cake from the oven, hold it ten inches above the counter and drop the pan straight down on the counter to settle the cake.  The cake should be top side up, still in the pan – you are just settling it, not removing it from the pan.

Make a syrup of

  • 1 cup white sugar
  • 1 cup water


Bring to a boil, then add

  • 1 Tablespoon honey
  • 1 soup spoon of fresh lemon juice

Pour the hot syrup evenly over the cake. Cover the pan and let sit until room temperature, then chill until cold. Cut into squares. The syrup will settle to the bottom of the cake, leaving that part sort of  “juicy.”

Use all gluten-free ingredients!

Dessert, Fall, Recipes, Rice, Spring, Summer, Vegetarian, Winter cake, dessert, honey, vegetarian

Gourmet Gluten Free Brownies

0 · Mar 18, 2011 · Leave a Comment

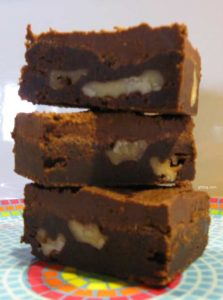
Gourmet Gluten Free Brownies from gfzing dot com

A gourmet gluten free brownie that is just like the best wheat brownie you ever had.

Use the absolute best quality gluten free chocolate you can obtain.  It is worth doing the website and company research to find the richest, darkest gluten free chocolate that is available.

For the brownies:

Melt the following in a small pot, then set aside to cool briefly:

  • 1 1/2 sticks (12 ounces) unsalted butter
  • 7 ounces bittersweet gluten free chocolate
  • 3 ounces gluten free unsweetened chocolate

Place the following in a large bowl:

  • 1 1/2 cups sugar
  • 1 1/2 teaspoons vanilla or 1/2 teaspoon of Authentic Foods gluten free powdered vanilla
  • 1/4 teaspoon salt
  • 4 eggs

Beat the sugar/egg mixture with a spoon, then stir in the melted chocolate/butter mixture.

In a small bowl, combine

  • 1 cup Authentic Foods GF traditional flour blend
  • 1/2 teaspoon xantham gum

Mix the GF flour mixture in to the chocolate batter.  Stir just to combine well.

Stir in:

  • 1 cup walnut pieces, sized according to your preference.

Line a 9 x 13″ pan with parchment paper leaving quite a bit up paper going up the sides (so that you can grab the paper later and pull the whole brownie unit out of the pan.  Pour and spread the batter in to the paper-lined pan and ease the batter out to the edges and corners of the pan.  Bake at 350 F degrees for 30 minutes.  Remove from the oven and cool completely before frosting.     Don’t remove the brownies from the pan yet – frost first!

Frosting:

Melt in a microwavable glass dish:

  • 6 ounces unsalted butter
  • 4 Tablespoons milk (can be non-fat milk if you want)

Add:

  • 4 Tablespoons (1/4 Cup) best quality gluten free cocoa powder
  • 1 teaspoon vanilla
  • 2 2/3 cups gluten free confectioner’s sugar

Stir together with a kitchen spoon until completely smooth.  Because the butter is melted, the frosting can still be a bit loose or runny when you spread it, because the frosting will stiffen up later, as the butter cools and hardens. Spread the frosting on the brownies, then transfer the pan to the refrigerator to chill until firm.

To remove brownies from pan, just grab the edges of the parchment paper and lift. Transfer the paper of brownies to a cutting board and proceed to cut them.

Cut the brownies with a sharp knife.  To make clean cuts, occasionally run the knife blade under hot water then wipe dry with a clean towel.  Using a heated, clean knife will ensure a clean cut with no crumbs.

Make sure to use all gluten-free ingredients.  If you are using a wheatavore kitchen, ensure that the sugar container is not contaminated with flour by wheatavore cooking adventures.

Christmas, Cookies, Dessert, Holidays, Recipes, Spring, Summer, Vegetarian, Winter brownie, chocolate, cookie, dessert, gluten free, vegetarian

Indian Pudding

1 · Dec 6, 2010 · Leave a Comment

Indian Pudding, one of the finest desserts ever invented, is a naturally gluten-free American dessert over two centuries old.  The recipes vary over the years, but the ingredients always include milk, corn meal (the “Indian meal” from which the dessert gets its name), spices and some type of sweetener.  Note that once in a while a recipe for Indian Pudding will include a small amount of completely unnecessary wheat flour. At gfzing.com, we have studied the subject at length and have 2 recommended recipes for excellent gluten free Indian Pudding – one sweetened primarily with maple syrup and one made primarily with brown sugar.  Our favorite recipes appear near the end of this article, after some historical bits.

Historical Recipes:

In American Cookery, by Amelia Simmons, published in 1796, there are 3 recipes for Indian Pudding.  The two baked versions include eggs, which later recipes for the dessert often omit.

  • No. 1. 3 pints scalded milk, 7 spoons fine Indian meal, stir well
    together while hot, let stand till cooled; add 7 eggs, half pound
    raisins, 4 ounces butter, spice and sugar, bake one and half hours.
  • No. 2. 3 pints scalded milk to one pint meal salted; cool, add 2 eggs,
    4 ounces butter, sugar or molasses and spice q. f. it will require two
    and half hours baking.
  • No. 3. Salt a pint meal, wet with one quart milk, sweeten and put into
    a strong cloth, brass or bell metal vessel, stone or earthern pot,
    secure from wet and boil 12 hours.

Table Talk monthly magazine, which billed itself as the “The American Authority Upon All Culinary and Household Topics,”  included in its September 1893 issue ten recipes for Indian Pudding (go to page 323 in this document). Some of these recipes omit the eggs, and some use the technique of mixing the hot porridge-like base for the pudding and then pouring an amount of cold milk on top, leaving the cold milk without stirring, then baking the whole dish for from 2 to 8 hours.

Now for how we actually prefer to make Indian Pudding. We like the following 2 recipes, with a preference for the one sweetened primarily with maple syrup which has a more interesting flavor than modern brown sugar.  We actually wonder if the antique recipes used a form of brown sugar more similar to jaggery, rapadura or panela – which would have had a more subtle flavor.

Maple Syrup Cookbook

by Ken Haedrich, 1989

(our preferred ingredient list)

Early American Recipes by Eloise Frost, 1953
Whole Milk 5 cups 1 quart (4 cups), scalded + 1 cup cold
Corn Meal 2/3 cup ½ cup
Sugar 1 cup grade A Amber Maple Syrup (or Grade B) 1/3 cup light brown sugar
Molasses 1 TB (we used 2) 1/3 cup
Ground Cinnamon ½ teaspoon 1 teaspoon
Ground Ginger ½ teaspoon 1 teaspoon
Dried Fruit 1 cup raisins or chopped dated (we used raisins) none
Salt ½ teaspoon 1 teaspoon
Butter 4 tablespoons 3 tablespoons

Both recipes are baked in a well-buttered 9 x13″ baking dish at 300 F; a porcelain, ceramic or Pyrex dish is necessary for the baking; for the clean-up be prepared to soak the cooking and baking dishes before cleaning. The basic cooking method is as follows.

For the maple syrup recipe, in a heavy-bottomed pot, cook the milk over medium heat until it is almost scalded, then whisk in the cornmeal, stirring all the while.  Keep whisking for 10 minutes until the porridge is thickened slightly.  The porridge will be a very, very pale yellow. Remove from the heat and use a wooden or bamboo spoon to stir in the rest of the ingredients, stirring all the while.  Give one last vigorous stir to distribute the raisins evenly and pour it in to the prepared porcelain (or Pyrex or ceramic) dish.  Bake for 2 and a half hours.  Remove from the oven, let cool for about a half hour and serve with vanilla ice cream or plain cream.

For the brown sugar recipe: Mix the scalded milk, molasses and brown sugar.  Whisk in the corn meal, salt, cinnamon and ginger. Cook, stirring constantly, for 5 minutes.  Pour in to the prepared baking dish and dot with the butter.  Bake 1 hour, then pour the cup of cold milk over the top (do not stir) and cook for 2 more hours. Remove from the oven, let cool for about a half hour and serve with vanilla ice cream or plain cream.

We hope you enjoy this review of Indian Pudding through the ages, from gfzing.com.  Indian Pudding is the best dessert ever, and deserves to return to its rightful place as a mainstay of American cooking!

Breakfast, Dessert, Fall, Vegetarian, Winter dessert, gluten free, pudding, vegetarian

Crustless Custard Apple Pie

1 · Dec 5, 2010 · Leave a Comment

In the mood for pie, but don’t want to roll out a crust?  You can use the new gluten free Bisquick to make a pie that creates its own crust.  This pie is like a gluten free French Clafoutis, but more economical because it uses cranberries instead of cherries.  The large amount of cinnamon and vanilla balances out the deeply flavorless gluten free Bisquick.

Fruit mixture ingredients:

3 large flavorful apples that hold their shape (use types like Northern Spy, Winter Banana and Roxbury Russet – do not use Macintosh) – pared, cored and cut in to pie-type slices

1/2 cup (or more) gluten free dried sweetened cranberries

1 Tablespoon fresh lemon juice

2 Tablespoons gluten free Bisquick (and you will need more later)

Custard Ingredients:

14 ounces fat-free gluten free sweetened condensed milk

1 1/2 cups water

3 large eggs

1/2 cup gluten free Bisquick

4 Tablespoons butter, melted

2 teaspoons vanilla

1 teaspoon cinnamon

1/2 teaspoon grated nutmeg

In a large deep bowl, mix the apples, cranberries and lemon juice and then stir in the 2 tablespoons of gluten free Bisquick to coat the fruit.

Preheat the oven to 350 F.

Butter a glass pie plate (10 inches, or marked 25 cm on the bottom), then spread the apple-cranberry mixture evenly in the dish.

In the now-empty bowl, mix the rest of the ingredients: condensed milk, water, eggs, 1/2 cup gluten free Bisquick, butter, vanilla, cinnamon and nutmeg. Use an immersion blender to mix these custard ingredients until smooth – about 3 minutes.  Pour this custard mixture over the apples and cranberries in the pie plate.  The dish will be very full, so take care not to spill.

Bake for45-50 minutes until the custard is cooked through and the top is browning a little.  Remove from the oven, set aside to cool. Serve cool or cold.

There will be a kind of crust that has settled out on the bottom of the pie – the texture of the “crust” will be the texture of a mochi, slightly chewy and quite intriguing.

Be sure to use all gluten free ingredients.

Breakfast, Dessert, Fall, Pie, Vegetarian apple, custard, dessert, gluten free, pie, vegetarian

Banana Cream Chocolate Pie – gluten free

0 · Oct 24, 2010 · Leave a Comment

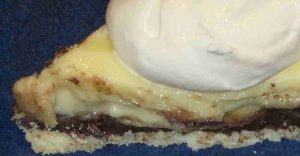
Banana Cream Chocolate Pie Close up
Close up of an actual slice of gluten free Banana Cream Chocolate Pie

This delicious pie is based on one from The Best of Cooking Light (2000).  We have changed a few things and made it gluten free.  As cream pies go, it is relatively light.  For those of you who eat pie for breakfast, we maintain that a slice of this pie is nutritionally not very different from a bowl of sugary cereal with milk and sliced bananas.  So, by all means, eat pie for breakfast!

It is possible to make this pie and serve it in 4 hours – you have to work quickly and chill at each stage.  Chill the pie crust immediately after it is baked, add the chocolate layer and chill, add the bananas and custard and chill again.  In winter, we take advantage of a table on a screened-in porch for these chilling stages. The screens on the porch are necessary to keep squirrels out of the pie.

First, you will need a one-crust gluten free pie shell.  You can make your own using 1/2 of this recipe: Pie Crust Recipe. Roll out a crust and line a 9 inch Pyrex pie plate.

Prick the crust all over with a fork and pre-bake the pie crust for 10-12 minutes at 450 degrees (for this crust you don’t need to use pie weights or dried beans to keep the crust from collapsing.)  In the event of a true pie emergency, you could use a Whole Foods gluten free pie crust from their freezer section.

Gather these ingredients:

For the chocolate part:

  • 1 TB cornstarch
  • 2 TB sugar
  • 2 TB unsweetened gluten free cocoa powder
  • 1/3 cup low-fat milk or gluten free rice milk
  • 2 ounces semi-sweet or bittersweet gluten free chocolate (chopped coarsely)
  • Dash of salt

For cooking the custard:

  • 2 TB cornstarch
  • 1 cup of low fat milk or gluten free rice milk
  • 1/2 cup sugar
  • 1/4 tsp salt
  • 2 large eggs
  • 1 TB butter

After cooking the custard, mix these in:

  • 2 tsp gluten free vanilla
  • 1/4 cup (2 ounces) gluten free cream cheese (for dairy-free, omit this)

Other:

  • 2 cups sliced ripe bananas (2 bananas)
  • Whipped cream, lightly sweetened and flavored with vanilla

You are going to layer up some thick chocolate paste which goes in to the baked pie crust first, then sliced bananas on top of the chocolate, then custard.  Chill for 2 hours or more, then serve with whipped cream!

For the chocolate part: Mix the cornstarch, sugar, cocoa, milk and salt  in a saucepan and cook, stirring constantly until the mixture thickens.  Add the chocolate and stir until it melts.  Spread this mixture over the bottom of the baked pie crust.

For the custard, get your immersion blender ready at your side in case you need it to correct custard disasters.  You basically have two choices.  You can mix the custard materials and cook over a boiling water bath, which takes more time and assures a lump-free custard, or you can mix the custard materials in a sturdy pot, cook over low heat, stirring constantly with a whisk, and if the custard curdles or looks at all lumpy give it a good blast with the immersion blender (taking care not to hurt yourself), adding a little heavy cream if necessary to loosen things up.  Either way works fine.

After you cook the custard mixture, while the mixture is still hot, stir in the vanilla and the cream cheese and mix thoroughly.  If you are making a dairy-free version, leave out the cream cheese.

Slice the bananas and put the slices on the chocolate layer, then spread the finished custard over the bananas.  Chill completely, slice and serve with whipped cream. There won’t be a lot of left-overs.

Make sure all your ingredients are gluten free!

Dairy Free, Dessert, Fall, Holidays, Pie, Recipes, Vegetarian dessert, gluten free, pie, vegetarian

Blueberry Pie sweetened with Maple Syrup

2 · Apr 19, 2010 · Leave a Comment

You can make a fine blueberry pie using dark maple syrup as a sweetener instead of granulated sugar.  This pie is refreshingly fruity and not as sweet as the more common sugar-sweetened pie.

Here are the general rules:

for 5-6 cups of Maine wild blueberries, add the following in a large bowl:

1 cup of pure maple syrup

2 Tablespoons of cornstarch

3 Tablespoons of flavorless tapioca starch (Authentic Foods offers a tapioca starch) or 1/4 cup instant granulated tapioca.  If you use instant granulated tapioca, let the whole mixture sit for 15 minutes before constructing the pie.

1/8 teaspoon salt

3-4 Tablespoons of fresh lemon juice to offset the maple syrup

1/4 teaspoon of ground cinnamon

Use a 2-crust recipe for pie crust, and use a 9 or 10 inch glass pie dish. If you use a larger pie dish, the pie will have less depth, and if you use a smaller pie dish then the pie will be more “heaped up.”  Line the pie dish with 1 piece of crust pastry, fill with the blueberry mixture, top with the second crust. Sprinkle the top crust with 1/4 cup of granulated sugar.

Bake in preheated 375 degree oven for 1 hour.  If the blueberries are frozen, the pie may need a few extra minutes.  Cool the pie on a rack before cutting.

Use all gluten-free ingredients!

Dessert, Pie, Recipes baking, blueberry, cooking, dessert, food, fruit, GF, gluten free, gourmet, maple syrup, pie, recipe

White Chocolate and Strawberry Dessert

1 · Jun 11, 2009 · Leave a Comment

For this dessert, you need fresh local strawberries, high quality white chocolate (gluten free) in a bar form, and gluten free orange liqueur.

Find a bowl that will hold 3 cups exactly when filled to the top with water.  This will be serving dish.  Set it aside.

Melt a 4-ounce bar of gluten free white chocolate over hot water.  Take it off the heat, add 1 Tablespoon sugar, 1 Tablespoon gluten free orange liqueur, 1/2 teaspoon vanilla and 1 ounce of cream cheese.  Beat well until mixed.

In a different bowl beat 1/2 cup of heavy cream until stiff.  Fold in the white chocolate mixure.

Put enough strawberries (or other berries) in the serving bowl to cover the bottom of the bowl.  Spoon the whipped cream/white chocolate mixture on top.  Smooth the top and chill the dessert for 3 hourss or overnight.  This will serve 3-4 people.

You can triple the mixture, make a crumb crust in a spring-form pan, and triple the amount of berries, put the berries on the crust, add the cream mixture, chill, then cut the dessert like a cake (since it has a crust.)

Make sure all your ingredients are gluten free.

Dessert, Recipes, Spring, Summer baking, berries, cooking, dessert, food, fruit, gluten free, gourmet, recipe, strawberries, white chocolate

Banana Coconut Ice Cream

0 · May 24, 2009 · Leave a Comment

It’s time for the Memorial Day barbecue, and with 6 extra-ripe bananas on the countertop, our minds wandered – what to do, should we make 4 loaves of gluten free banana bread?  No, and although deep-fried banana fritters were sounding pretty good what ended up seeming much better was homemade ice cream.

This recipe is refreshing, and not high in fat.  The bananas have a slight tartness, and the dulce de leche’s deep brown color covers up the color of the overripe bananas, making an attractive finished ice cream.  There are no egg yolks or heavy cream in this ice cream, but the texture is creamy.  The major ingredient is banana.

Make the following mixture (use a potato masher to mix), and chill in the refrigerator for a few hours:

3 cups 1% milk

1 cup coconut milk

2/3 cup sugar

6 very overripe bananas, too mushy for anything but banana bread

13.4 ounce can of gluten free Dulce de Leche (or you can make your own)

1/2 teaspoon cinnamon

1/8 teaspoon cardamom

1/8 teaspoon cloves

1/8 teaspoon nutmeg

The mixture will be brown, like caramel.  After the mixture has chilled, freeze it in an ice cream maker according to the directions.

Make sure all your ingredients are gluten free!

Dessert, Fall, Recipes, Summer banana, coconut, cooking, dessert, dulce de leche, food, gluten free, gourmet, ice cream, recipe

Gluten Free Trifle

0 · Mar 24, 2009 · Leave a Comment

It’s spring and the temptation to purchase strawberries is renewed again.  Unfortunately, “strawberry disappointment” follows, when the first strawberries to arrive in the supermarket, while red, are not flavorful!  Time to make trifle, but how to do this in an interesting and gluten-free way?

We searched the internet for gluten free trifle recipes, and found the most interesting recipe, not quite gluten-free and way too complicated, at this address: Teafactory.  Even though this recipe is “simplified” it is still too complex for ordinary humans like us, and it includes puff pastry which is not gluten free, and 2 custards.  So, we have modified it to a delicious, easy and gluten-free dessert.

At the request of a fan, we have added the measurements for volume, rather than weight, for the dry ingredients, but we strongly recommend using the weights.  GF flours can be ground finely or coarse, and that changes the volume tremendously.  When we measured the ingredients with tablespoons, we used Koda Farms mochiko, and finely ground cornmeal and garbanzo bean flour from the natural foods store nearby.

Included in the original recipe is a Cardamom Biscuit which is gluten free and a very close textural approximation of an English digestive biscuit, but with a whallopping cardamom punch.  This is an excellent cookie in its own right.

You need to make 4 layers:  The strawberries, the cookies, the custard, the whipped cream.  Use a scale to measure the ingredients.

Berry Jelly:

Make a compote by mixing the following ingredients and simmering them for 20 minutes:

250 grams of strawberries, cut in quarters

40 grams of sugar (3 TB or slightly more)

1 teaspoon gluten free amontillado sherry or vanilla

1 teaspoon lemon juice

(the original recipe includes rose water which we omitted)

When it has cooked for 20 minutes, add 1 envelope of plain gelatin (no flavor) which has been softened in cold water.  Do not add the gelatin directly to the strawberries without first softening the powder in water or the gelatin will form globs of glue in a strawberry soup – not what you want.  Cool to room temperature then distribute amongst 8 dishes that hold about 1 cup each. Refrigerate these 8 dishes until the strawberry layer has firmed up. (If you do not add the gelatin, the strawberry liquid would soak through the biscuits which are the next layer.)

Cookie layer: (this has been altered to eliminate some refrigerating and freezing steps)

Use a scale to weigh out the ingredients – this really makes a difference!

70g unsalted butter (softened) – about 5 Tb

45g white sugar – about 3 Tb + 1 tsp

25g ground almonds – about  3 Tb + 1 tsp

¼ tsp salt

½ tsp baking powder

35g glutinous rice flour (also called mochiko) – about 4 Tb + 1 tsp

25g cornmeal – about 3 Tb + 1 tsp if finely ground

20g chickpea (garbanzo bean) flour – about 2 Tb + 2 tsp

1 tsp freshly ground cardamom (skin the pods, and grind 1 teaspoon of seeds in a mortar and pestle)

1/2 tsp powdered vanilla from Authentic Foods

1 egg yolk

  1. Cream the butter & sugar.
  2. Add all the dry ingredients & mix well.
  3. Add the egg yolk and mix until a dough forms.  Make the dough in to a disk shape.
  4. The original recipe calls for chilling the dough for one hour here, but we just proceeded since the air is cold in winter.
  5. Get 2 pieces of waxed paper about the size of a cookie sheet.  Put 1/8 cup of white rice flour on the bottom piece, put the disk of dough on the flour and turn it over to coat both sides with rice flour.  Put the second sheet of waxed paper on top. Roll the dough to 1/8 inch thick and cut cookies in a size that will fit in the dishes that have the strawberry mixture in the bottom.  Re-roll the dough as necessary to make 16 cookies (17 if you want to taste one.)
  6. preheat the oven to 300F
  7. Transfer the cookies to a parchment lined baking sheet and bake for 10-12 minutes until golden. Cool on the pan, then remove them gently and put one cookie on top of the strawberry mixture in each dish.  You will have 8 cookies left for the next layer.

Custard layer:

Mix 1 cup 2% milk, 3/4 cup light cream, 1 teaspoon amontillado sherry and one small (3 oz.) package of gluten free instant vanilla pudding.  Beat with a whisk until thick.  Divide amongst the 8 dishes on top of the cookie layer.  Add another cookie on top of this custard.

Whipped cream:

Whip one cup of heavy whipping cream with some sugar to sweeten. Add vanilla or sherry to flavor this whipped cream and distribute on top of the last cookie layer.

Candied nuts (can be omitted):

Taste some pumpkin seeds and sunflower seeds to see if their flavor will be an asset to the dish.

In a pan that can be heated relatively hot, put 2 Tb of pumpkin seeds and 2 Tb of sunflower seeds with 2 Tb of sugar.  Heat the nuts over medium heat, stirring constantly until the sugar melts and the nuts brown slightly.  Transfer to a plate immediately and cool completely.  Garnish the top of the whipped cream with these nuts if you want an extra crunch texture.

Make sure all your ingredients are gluten free!

Dessert, Recipes, Winter berries, cardamom, cooking, custard, dessert, food, gluten free, gourmet, recipe, strawberries, strawberry, trifle

Gluten Free or GF Pie Crust

2 · Nov 10, 2005 · 2 Comments

We tried mixes, and recipes, and had almost given up on ever having a decent pie again, when we discovered this method for making gluten free pie crust. Let’s just mention that pie was one of the most important foods in our repertoire, and we used to be very proud of our pie crust, and then we entered the parallel universe of gluten free cooking, for medical reasons. We went in to pie withdrawal – depression, cold shakes, somber mood…..after all, what were we going to have for breakfast, if we couldn’t eat left-over pie?

Well, the news is good – you can have your pie and eat it too!

Use the Dream Pastry Recipe from Bette Hagman’s More From the Gluten-Free Gourmet. A very similar recipe is also called “Donna Jo’s pie crust” and is available on the internet. (Be careful about the recipes on the internet, which are sometimes missing key ingredients in the list of flours, such as the sweet rice flour, for example!) Of course, we don’t exactly follow the recipe anyway, so we have printed here the method we are using at the moment…..

We prefer the flavor of lemon juice to the flavor of vinegar, so we use fresh lemon juice in the recipe. Also, we use one stick of gluten free margarine and one of butter (we don’t like Crisco so much). Lastly, we sprinkle the top of a two crust fruit pie liberally with sugar.

To save time and aggravation when hand-mixing the pie dough, we use a large cheese grater to grate the butter into the dry ingredients. This makes it much easier to get the “lima bean” sized pieces of butter called for in the recipe. We have also used a Braun food processor to make this crust, and it was acceptable, you just have to be careful not to overmix the butter.

Here are the ingredients for one two-crust pie shell:

Dry ingredients:

1/2 cup tapioca flour (tapioca starch) – make sure this is the flavorless kind, not the fermented find
1/2 cup cornstarch
1/4 cup potato starch (katakuriko in Japanese stores – this is NOT the same as potato flour)
1 cup sweet rice flour (mochiko flour – not the same as white rice flour)
1 teaspoon xanthan gum
1/2 tsp salt
1/2 teaspoon sugar

Shortening:
1/2 cup gluten free margarine or butter
1/2 cup butter

(we use all butter)

Liquid ingredients:

1 egg
1 Tablespoon fresh lemon juice
1 Tablespoon ice water

wax paper
sweet rice flour to sprinkle on the wax paper
lots of sugar for sprinkling on the top of the pie

Put the dry ingredients in a bowl and mix them thoroughly with a fork. If you own a sifter, you could sift them together, but it is not necessary. Grate in the butter and margarine using a large cheese grater. Mix the dry ingredients and the shortenings up with a fork until the pieces of butter are distributed evenly – you don’t need to get the pieces of butter as small as they would be in a wheat crust. The size of “lima beans” may be a little large, but don’t go smaller than kidney beans! Anyway, mix up the liquid ingredients until well combined, then pour them in to the dry ingredients and mix together. Squish the dough into a ball and wrap it up to store in the refrigerator for one hour. (For the record, we have made this crust in the winter and gone straight to rolling it out, without refrigerating it. You wouldn’t do this when the air is warm in the summer, but it is ok to do this in the winter when it is cold.)

Divide the dough in half.

To roll out this crust, spread out a piece of wax paper, dust it with sweet rice flour or GF flour mix, or whatever comes handy, put one piece of the dough on top, sprinkle with more flour, spread another piece of wax paper on top of the dough, and roll out with a rolling pin. * The dough is now contained between two sheets of wax paper. Peel off the top piece of wax paper, flip the crust on top of the pie plate, adjust it to fit the dish and remove the other piece of wax paper. Your counter is clean, and your pie crust did not fall to pieces when you tried to put it in the pie dish! You rock!

Fill your pie, then repeat the pie crust rolling maneuver for the top crust. Cut pretty holes in the top crust before transferring it to the pie, if you wish. After putting the top crust on the pie, sprinkle the top crust liberally with sugar – maybe 2 – 4 Tablespoons! Cut steam vent holes in the crust, if you forgot to do it before, and then bake the pie. This crust gets nice and brown and crispy, and it has a delicious buttery flavor! You bake it as you would any other pie crust (about 50 minutes at 400 degrees, for a filled two-crust fruit pie.)

*Note about the rolling pin: We use a piece of dowel from the hardware store – makes a perfect rolling pin, and costs very little. The piece we purchased was being sold as “closet pole” and is 1″ in diameter and 18 inches long.

Some Pies to Try:

  • Blueberry Pie Sweetened with Maple Syrup
  • Gluten Free Quiche
  • Key Lime Pie – Gluten and Dairy Free
  • Pumpkin Pie – Gluten and Dairy Free
  • New England Apple Pie
  • Coconut Cream Pie – no cream!
  • Pumpkin Pie with Coconut Milk
  • Plum Pie

See this post for yet more thoughts on gluten free pie crust: Click here.

Make sure to use all gluten free ingredients!

*Most Popular Recipes*, Breakfast, Dessert, Fall, Holidays, Pie, Recipes, Spring, Summer, Thanksgiving, Winter dessert, pastry, pie, pie crust

Primary Sidebar

Check out our Coupon Collection

Click Here to go directly to the Coupon page

Read more at The Rambling Epicure:

Click Here: The Rambling Epicure

QR code for your phone

qrcode for gfzing
NFCA logo

Blogroll

  • Aloha World Ono Recipes
  • Book of Yum
  • Dulce Cocina sin Gluten
  • Gluten Free Beer Association
  • Glutenfreie Rezepte | kaMehl
  • Hawai'ian Electric
  • Laylita's – Ecuador
  • Nombudsman
  • Papilles et Pupilles
  • Sea Salt with Food
  • The Rambling Epicure The Rambling Epicure is a daily international food chronicle, and the first online newspaper to follow global food trends and news.
  • Triumph Dining

Monthly Archive

Proud member of FoodBlogs

Load up on new recipes, exclusive goodies, + more!

Get the exclusive content you crave straight to your inbox.

Things to Read

Find by keyword

baking banana blueberry cake cardamom carrot cheese chicken chocolate cinnamon coconut cookies cooking curry custard dairy free dessert DIY dressing fish food fruit GF ghee gluten free gourmet homemade kids maple syrup meat microwave pie pork potato pumpkin recipe recipes rice salad sauce sausage soup sourdough sweet potato vegetarian

Copyright © 2025 GF-Zing! on the Cravings Pro Theme