• Skip to primary navigation
  • Skip to main content
  • Skip to primary sidebar
  • Skip to footer

GF-Zing! logo

  • Home
  • Coupon Collection
  • GF Foods & Groups
  • Ask Gf-Zing!
    • About the Author
    • About Gf-Zing!
  • Nav Social Menu

    • Email
    • Facebook

Winter

Sesame-Crusted Tofu with Quick Microwave Curried Carrot Soup

0 · May 14, 2012 · 1 Comment

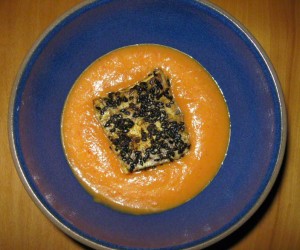
Curried Carrot Soup with Sesame Crusted Tofu - Alice DeLuca 2012 digimarc
Curried Carrot Soup with Sesame Crusted Tofu in a blue Heathware bowl

The inspiration for this dish from www.gfzing.com was a trip to the Garden Grille in Providence, Rhode Island.  They make truly delish vegetarian food, much of which they will also prepare gluten free.  This is recipe is NOT one of theirs, it is just inspired by their cooking.  I did not have a chance to try their sesame-crusted tofu, unfortunately.

The soup here is done in the microwave oven, for quick, efficient dinner preparation.

It is easily adapted for vegetarians and vegans – just omit the fish sauce and adjust the salt.

For the Soup:

5 ounces peeled Spanish onion, diced

1/2 ounce (2 cloves) garlic, peeled and diced

1 TB olive oil

3 ounces red bell pepper, diced

3 carrots (about 6 ounces), peeled and chunked

3/4 cup rich coconut milk

1 cup water

2-3 teaspoons gluten free fish sauce (omit for vegetarians)

2 teaspoons gluten free Thai Red Curry paste

1 TB currant jelly

salt to taste (1/4-1/2 teaspoon)

To Fry the Tofu:

1 package of extra-firm tofu, drained and slice the short way in to four slices, then cut the other way to make 8 squares about 3/4 inch thick.

1 teaspoon homemade curry powder (see recipe on this site)

2 TB black sesame seeds

2 TB peanut oil

1 teaspoon sesame oil

To make the soup:

In a 1 1/2-2 quart microwavable casserole dish (such as Corningware), place the chopped onions, chopped garlic and 1 TB of oil. Cover and microwave on high for 5 minutes.  Allow to cool for a few minutes before removing the cover (to avoid steam burns).

To the cooked onions and garlic in the casserole dish add the rest of the soup ingredients from the red bell pepper through the currant jelly.  Cover and microwave until the carrots are tender, about 10 minutes.  Allow to rest a few minutes before you remove the cover, to avoid steam burns.

Use a stick or immersion blender to puree the soup. Season with just a little bit of salt to taste. Adjust the sweetness. Set aside.

For the Tofu:

Mix the curry powder and sesame seeds and pat the mixture on to one side of each of the squares of tofu.  Heat the oil and sesame oil in a large, heavy frying pan.  When hot, add the tofu squares, seed side up. Fry over medium heat, undisturbed for 4 minutes.  Salt the tofu squares.  Use a spatula to turn the tofu squares and fry the other side undisturbed for 3 minutes. Salt the other side.  The frying will crisp the tofu, rendering it golden brown.

Remove the fried tofu from the pan.

To Serve:

Reheat the soup briefly and serve 2 squares of fried tofu, seed side up, on each serving of the hot soup.
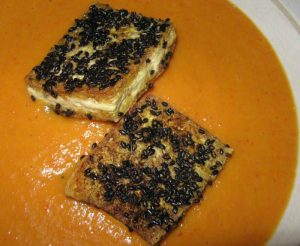
Curried Carrot Soup with Sesame Crusted Tofu in a Heathware bowl - Alice DeLuca 2012 digimarc
Curried Carrot Soup with Sesame Crusted Tofu in a white Heathware bowl

Serve with lime wedges, and a salad made from chopped arugula, fresh mint, orange juice, olive oil, gluten-free mustard, salt and pepper.


Appetizers, Dairy Free, Fall, Lunch, Meat-eater, Microwave Cooking, Recipes, Soups, Spring, Summer, Vegetables, Vegetarian, Winter carrots, curry, gluten free, microwave, soup

A Sausage Walks in to a Bar…

1 · May 3, 2012 · Leave a Comment

By Alice DeLuca

A story for carnivores

Assador - Alice DeLuca 2012 digimarc
Assador - for roasting sausages

This whole adventure started with a search for the perfect sausage to use in a recipe for pork with clams, which led to a little ceramic pig, and ended up with a truly excellent party. This cute little piece of specialty cookware, which looks like footwear for some impossible outer-space monster, is in fact designed for brazing sausages over flaming, hi-octane Portuguese liquor.  As we learned the purpose and the method for using this device, we became completely distracted from our original mission and found ourselves planning a sausage-roast.

Linguica roasting - Alice DeLuca 2012 digimarc
Linguiça roasting over flaming aguardente

First, we had to obtain the little pig dishes from Portugal – that was easy and took only a few weeks. As soon as the dishes arrived we set about making home-smoked sausages and invited some guests to come over and roast them with us – RSVPs were instantaneous and none declined the invitation.

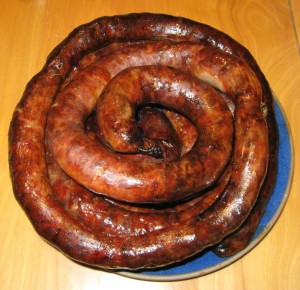
The sausages that are required – linguiça or chourico – are not easily found freshly made in the grocery store; the smoked sausages you do find are often laminated in plastic, oozing a creepy slime when opened, delivering a texture of rubber bands with what seem like bits of potato thrown in – the bits are the fat but for some reason completely unlike the fat in a homemade sausage.  If these laminated sausages are the only smoked sausage you have ever known, then you must find some real, home-smoked sausages, or make your own.  With pork shoulder and a few other ingredients, a good old-fashioned meat grinder, and some type of smoker, you can have a plate of these sausages to set fire to with your friends.

Linguica on Heathware plate - Alice DeLuca 2012 digimarc
Vermillion Linguica looks stunning on blue Heathware plates!

People have been making sausages and brazing them since the dawn of time.  You can follow the accurate but brief instructions provided in the Ancient Roman De Re Coquinaria of Apicius (published by Walter M. Hill, 1936). Here, the proper color of smoked sausages is described perfectly – vermillion – a nearly forgotten word and color that deserves to make a comeback.  Vermillion is the color of notoriously poisonous cinnabar, which is a substance with an interesting history of its own.  Take a look at cinnabar on dolomite and you will see that the Romans have described the color of smoked sausage precisely in the recipe for Cirellos isiciatos, Round Sausage.

“Fill the casings with the best material [forcemeat]. Shape the sausage in to small circles, smoke. When they have taken on vermillion color, fry them lightly.”

The Recipe

To make linguiça, we chose “the best material” – a simple formulation with garlic, paprika and sweet rosé wine because pork is so often excellent with sweet, fruity flavors.  Sausages of this type sometimes include oregano and vinegar, but this recipe “LINGUICA PORTUGUESA A’LA ANA“ is more delicious than those, perhaps because of the sweet rosé.  The sausage ingredients are posted here with permission from AnaCatarina Louro Ferreira Alves, who generously provides the recipe to the world on her blog: http://anydaysoiree.com/

5 lbs. ground pork butt
3 Tb. paprika (not smoked)
2 Tb. fine minced garlic
3 Tb. salt
1 cup sweet rosé wine
1 tsp. sugar
1 Tb. black pepper

A sliced lemon for soaking the hog casings

Apple wood for smoking

Hog Casings – for stuffing – about 2 or 3 feet of casing per pound of meat


Concerning the Meat and its Preparation

Start out a day or two before you want to eat the sausage, to complete the marinating phase.

In an agrarian economy, the seasonal time for making sausage was in the fall when a hog was slaughtered; everyone hurrying to preserve the large quantities of meat for the long winter. Smoked sausage was a hedge against starvation.  In the modern, refrigerated world, sausage can be made year-round and is a reason for a party! When making sausage at home, be careful to use safe food-handling techniques, clean equipment and clean hands at all times.  Note that the Latin root of the word “botulism” is the word for sausage – botulus.  That is not a coincidence. Study the conditions under which food pathogens can replicate and then avoid those conditions.

To obtain several pounds of ground pork for sausage, purchase a “pork shoulder” weighing over 9 pounds. Very carefully remove the skin from the pork shoulder (not used in the sausage), slice the meat from the bone with a boning knife, and cut the meat in to large chunks. The foundation of the pork shoulder is a complex articulated joint, so extreme care must be exercised when wielding the boning knife.  How do orthopedic surgeons ever actually manage a functioning joint replacement?

Save the bone to cook with dried beans.

After cutting the meat from the bone, modern cooks might be tempted to eliminate and discard all the fat, but the fat and connective tissue are the keys to great flavor.  Remove the fat and you surely will create disappointing, dry sausage like the last bit of an overcooked turkey breast that’s been loitering on the platter way too long after the Thanksgiving dinner. To make a good sausage, fat is required.

Marinating

Weigh the boned meat and season it with proportional amounts of the paprika, fresh garlic, salt, Portuguese rosé wine, sugar and pepper called for in the recipe.  We had 6 pounds of meat, so we increased the seasonings proportionally.

Stir together the spices and wine, then mix in the chunks of meat – and commune with the ancestors who were marinating meat for millennia. Judging from 18th century engravings, the ancestors seemed to have had cats, chickens and dogs running around under the table during the sausage-making process, not the ideal situation for food preparation.  Perhaps it is wise to banish the cats, dogs and chickens to the yard, before proceeding.

Unlike ancient peoples, we refrigerate the marinating meat and keep it cold during the remainder of the 1-2 day process.

Grinding

After marinating the meat under refrigeration, grind or chop it in to small pieces.  There are many different types of grinding devices available.  Whichever method you use, your goal is to produce small bits but not a paste – one of the principle differences between a sausage and a lowly hot dog is the consistency.

The mechanism of the old-fashioned meat grinder is an Archimedes screw.  Archimedes of Syracuse, c. 287 BC – c. 212 BC, is credited with the invention of the screw conveyor which has been used since antiquity to move water uphill from one place to another. In a meat grinder, the screw is carrying the meat from one place to another (from the hopper to the blade.)

We use a Magimix food processor for chopping meat, working with a small amount of the meat at a time (maybe a half pound) and using the “pulse” feature – intermittent chopping – as noted in the directions that came with the machine.  This works very well. Many older-model food processors would grind the meat too finely.

If you have an old fashioned meat grinder, use the blade and the coarsest disk.  Again, a great opportunity for living the life of the ancestors presents itself.  The sinews can clog up the disk, requiring frequent cleaning, We use our old-fashioned grinder mostly for stuffing the sausage casings. The grinder clamps to the table and can be easily removed, cleaned and stored.

Another style of meat grinder is screwed permanently to the table.  We can’t see how this would be practical unless you grind things every day or perhaps enjoy the aesthetic and conversation-piece value of the thing – “Let us show you our newly renovated kitchen with built-in meat grinder….”

The other meat grinder that makes no sense is the kind that suctions to a smooth surface. This seems impractical because of the amount of force required to grind meat, and because suction devices usually cease to function correctly despite being adhered to a glass-smooth surface.  How many times has the suctioned soap dish fallen in the shower, or the GPS device toppled in to the automobile?

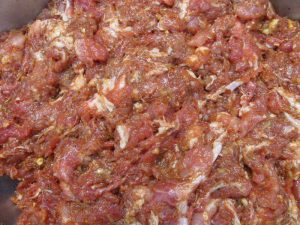
One way or another, chop the marinated meat in to small bits, then chill it while you prepare the casings.

Linguica chopped and seasoned  -Alice DeLuca 2012 digimarc
Marinated meat, chopped and ready for stuffing

Preparing the Casings

The next step will be preparation of the hog casings.  For unknown reasons, hog casings, if you are lucky enough to find any, are usually on the top right hand corner of the supermarket shelf that houses ham and pork products.  In a plastic tub or sometimes a plastic bag, the “casings,” which are really cleaned intestines, are packed in salt.  Years ago, hog casings had a distinctive funky odor but recently purchased hog casings have had no odor whatsoever.  We were surprised to find that packages of hog casings come from all over the world – it is interesting to read the label on the package.

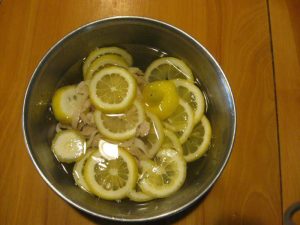
Soak the hog casings (3 feet for every pound of meat) in warm water with a sliced lemon for 30 minutes to soften and desalinate the casings, then run water through them to ensure they are clean (discard the lemon slices).

Soaking Hog Casings - Alice DeLuca 2012 digimarc
Sausage casings soaking with aromatic lemon slices

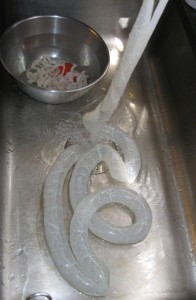
As the water runs through, marvel at the structure and strength of this wonderful material.


Cleaning Sausage Casings - Alice DeLuca 2012 digimarc
Rinsing the sausage casings

One of the many remarkable things about sausage casings, or intestines in general, is how terrifically strong they are.  They have been used for millennia as string and thread, and as strings for musical instruments.  The 120 foot intestine of a cow is formed in to harp strings and then, under enormous tension the strings are plucked to produce musical notes; Gut is used by surgeons to sew up wounds, and by tennis players to string their rackets so they can slam balls in to the ground at upwards of 70 mph.


Stuffing


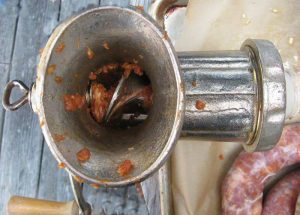
Archimedes Screw - sausage grinder - Alice DeLuca 2012 digimarc
An Archimedes screw moves meat through a grinder

It is much easier and more fun to stuff sausage with two people working than all by yourself.

Use a meat grinder to stuff the sausages.  You need 3 feet of hog casing per pound of sausage, allowing for a little extra at each end of the sausage.  Remove the blade and grinder disk and attach a sausage stuffing funnel. Slide a length of hog casing on to the funnel.  Now put the seasoned sausage meat through the grinder, turning the handle slowly and steadily with one hand and easing the meat in to the casings with your other hand. The meat goes in to the hopper and comes out in to the casing.  When the casing is nearly full (with 6 inches of empty casing remaining) remove the sausage from the funnel and start on the next sausage. Don’t complicate your life by trying to tie knots in this sausage.  Just set the filled sausages aside to chill in the refrigerator until it is time to smoke them.


Linguica stuffing - Alice DeLuca 2012 digimarc
The sausage stuffing funnel is efficient!

Smoking

Part of the reward for making your own smoked sausage is aromatic.  The scent of smoked sausage would tame the wild wolf and bring him to your doorstep; it would make the wolf volunteer to be the captive family dog if only he could have some of this delicious meat.[i]  (As expected, both our tame dog and cat became increasingly animated while the sausage was smoking, and eventually they were invited to retire indoors.)

Follow the instructions on a smoker, and use apple wood for the smoke.  Check the internal temperature of the smoker to insure that it is hot enough to do the job safely.  We used a Primo ceramic grill to smoke the sausage, paying careful and regular attention to adjusting the vents, and maintaining a higher temperature than recommended in the original recipe – just below 200° F.  We chose to smoke the sausage until the internal temperature of the sausage was 170° F, which took approximately 3 hours.  We recommend that any home cook do their own research to determine a safe process.  The FDA provides some guidance on this.  When completely smoked, the color of the sausages will be a deep red vermillion. The sausages are not preserved by this smoking – they are merely cooked through.  From this point on, they should be preserved like any other meat – in cold storage for a few days or in the freezer for a longer period of time.

Do the homemade sausages look dry to you?  That is the miraculous thing about real smoked sausage – although the exterior of the sausage is dry, the interior is just right – juicy and delicious.  As a reward for your labor, taste a few slices before you put them away to chill.


Setting Things on Fire

Roasting sausages over flaming cheap brandy is a social form of cooking, an adventure to be shared with brave and hearty friends who enjoy hazardous adventure and are willing to take responsibility for their own actions. Perhaps you could have your guests agree to a “Safe Sausage Disclaimer”:

“I recognize that consuming homemade sausage is fraught with danger and I am willing to fully assume all the risk and untold horrors so I may experience real food.”

We used a little parade of two “assadors” to roast our sausages.  For fuel, we used inexpensive aguardente, lighting the flame under the sausages with foot-long matches and keeping a fire extinguisher available nearby. (Incidentally, we are intrigued to learn more about the high-walled linguiceira shown at the Borderless Cooking blog. It appears immune to the windy conditions that prevailed during our party.)

Place the assador on a heat-proof surface, preferably in a location that is not windy. Pour a pool of aguardente in to the assador.  Using a long match, set the aguardente ablaze without setting anything else on fire. Cut off pieces of sausage to fit the assador and place them on the racks over the flames. As the sausage cooks, some of the fat melts in to the cooking device and fuels the alcohol-based fire, and as this happens the flame goes from blue to yellow and the sound of sizzling fills the air.  The blue flame from burning alcohol is cooler than the ensuing yellow flame from the burning fat. The cooking process speeds up as the flame turns yellow and gets hotter. Turn the sausages carefully with tongs, and make sure to cook them until they are blackened.  Remove them from the flames too soon and the interior will be dry and hard.  Keep cooking the smoked sausages until they are crisped up on the outside, and the fat is melting on the inside.  One of our assadors acquired a small crack during the roasting party, so again, take precautions and take good care.

Video:

Linguica roasting over aguardente

We poured a rosé with the linguiça, to match the flavoring component of the sausage.  A dry, hard cider and beer were also fine accompaniments, along with a Colombian bean dish, a selection of cheeses including the outstanding Winnimere cheese from Jasper Hill Farm in Vermont, and a fine green salad supplied by some excellent cooks among the company at the table.  We ate, as the Hawaiians say, until we were tired.

Notes for further study: There are other versions of this type of sausage brazing grill – This one uses skewers, for example.  This one shows a much deeper, sturdier cooker  which we are interested in acquiring, in case anyone knows where to get one. Here is a video recipe that shows grilled linguiça as a garnish for a small soup.


[i] Read: The Cat That Walked by Himself, by Rudyard Kipling: http://www.gutenberg.org/files/2781/2781-h/2781-h.htm#2H_4_0011

Dairy Free, Fall, Holidays, Meat Dishes, Meat-eater, Recipes, Spring, Summer, Winter, with New England Hard Cider aguardente, assador, DIY, homemade, linguica, pork, sausage

Leek, Potato and Cauliflower Potage

0 · Jan 26, 2012 · Leave a Comment


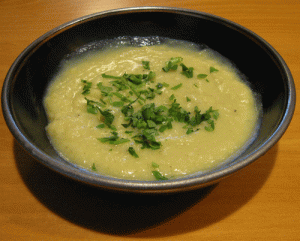
This is an easy, vegetarian gluten free soup from the website gfzing.com to serve as a first course or as a main course with an accompaniment of gluten free toast or scones.

It is delicious!

In a large pot, place 3 leeks, cleaned, trimmed and chopped, 5 Red Bliss potatoes, peeled and cut in half, and about a third of a head of cauliflower, cleaned and cut in to flowerets.

Pour in water to cover (6-8 cups), add 2 teaspoons of salt and bring to a boil, turn down to a simmer and cook until the potatoes and cauliflower are tender, about 20 minutes.  Add 2 tablespoons of ghee (clarified browned butter) and a 1/2 teaspoon of freshly ground pepper, then puree the soup carefully using an immersion blender stick until it is velvety.  If you do not have an immersion blender, use a regular blender or food processor, being careful not to burn yourself with the hot soup.

Note:  If you are a wheatavore serving a gluten-free diner, make sure to use plain fresh water to make this soup. Don’t use water that was just used for cooking pasta, for example.

Test the soup for salt and balanced flavors, then serve sprinkled with a little chopped parsley if you have some.

It would be fine to substitute other vegetables for the cauliflower – for example: carrot,s sweet potato, broccoli, peas, spinach etc.

Make sure all the ingredients are gluten free.

Appetizers, Fall, Lunch, Potatoes, Recipes, Soups, Vegetables, Vegetarian, Winter cauliflower, gluten free, leek, potato, soup, vegetarian

Baked Gluten Free Chicken Burgers

0 · Jan 11, 2012 · Leave a Comment

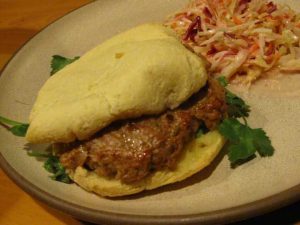
Chicken Burger from Gfzing dot com


Read a Southeast Asian cookbook and you will likely come across a recipe for meatballs including baking powder.  Baking powder is an oddball ingredient for those of familiar with western meatballs, so I thought I had better give it a try.

I made two attempts.  The first, using a recipe from A Vietnamese Kitchen by Ha Roda, and the second using a chicken burger recipe from one of my very favorite new cookbooks, Poulet – More Than 50 Remarkable Meals that Exalt the Honest Chicken, by Cree LeFavour.  The recipes in this book are easily adaptable for the gluten free community.

Based on experimenting with a modified version of Cree LeFavour’s Phuket Beach Cart Sandwiches, I am recommending the baking powder addition to meatballs and burgers for those of us who use low fat meats and poultry to make burgers.  The result is juicy and interesting! (I always grind meat or poultry when making balls and burgers; using good quality meat to start out with yields a tastier ground product, and you know for sure what went in to the bowl).

My instructions to grind your own spices may seem silly until you catch a scent of the amazing, lemony coriander blasting out of the mortar as you grind. It is worth the tiny moment of your time and the little bit of muscle that is required, just to have this aromatherapy experience.

Grind in a mortar and pestle:

  • 1 teaspoon whole coriander seeds – Pow!

Put the ground seeds in a food processor and add:

  • 2 pounds of boneless chicken thighs
  • 1/2 or 1 dry cayenne pepper (LeFavour uses 2 or 3 habanero chilies but even 1 was too spicy for us)
  • 1/3 cup gluten free fish sauce – check the label
  • 1 Tablespoon sugar
  • 2 teaspoons baking powder
  • 1/2 teaspoon ground cinnamon – (grind some cinnamon stick in a mortar and pestle – such a sweet smell!)

Zap all these ingredients together in the food processor until smooth.  Shape 4 patties using wet hands.

This amount of mixture will yield four absolutely enormous burgers, each one almost 2 inches thick after baking.  I found it practical to make the four giant patties, put them on a parchment lined baking sheet and bake for 30 minutes at 350 degrees.  Check the interior temperature so it reaches 175 degrees in at least 2 places, then when the burgers are cooked through slice each one horizontally in half to yield 8 burgers.

LeFavour recommends serving the burgers on buns with fresh cilantro leaves (instead of lettuce) and a sambal mayonnaise, with a side of carrot and mung bean salad.

I used buns made from Pao de Quejo Brazilian Cheese bread dough (Chebe makes a gluten free mix that works well for these buns, each package yielding 4 buns that are 4-5 inches in diameter),  fresh cilantro, and a sauce made from equal parts of mayonnaise and gluten free Thai sweet chile sauce with a very small amount of gluten free chile paste with garlic.  Serve with a side of gluten free coleslaw.

LeFavour toasts the hamburger buns she uses, but instead we used the Pao de Quejo right out of the oven, split horizontally.

This is a delicious, juicy burger experience from a highly recommended cookbook – Poulet by Cree LeFavour!

Cookbooks, Fall, Lunch, Meat Dishes, Meat-eater, Product Reviews, Recipes, Spring, Summer, Winter baking powder, burger, chicken, gluten free, meatball

Sealed With A Quiche

0 · Dec 28, 2011 · Leave a Comment

Including a food trend prediction for 2012…


By Alice DeLuca


When first married, I received lots of advice on how to stay married which is of course so much more complicated than “getting” married. For example, Sally told me that both a happy marriage and a career had been possible for her because she created and froze 4 quiches at a time.  I immediately pictured 4 quiches in the deepfreeze, carefully labeled for rotation of the stock so as to avoid freezer-burn and waste. The quiches would keep.


Sally said she could just run home, pop a frozen quiche in the oven, and make a salad and – presto – dinner was on the table.  That was the clue to a happy marriage for a woman who began her career in the late 1960s and lived through the advent of non-stick cookware and the 1970s food processor revolution.  She soldiered on with frozen pie shells to make all things possible.[i] Sally’s husband enjoyed both a fabulous career and his hot meals without ever giving a thought to the benefits of compulsive quiche stockpiling. Sally did remain married and retained her career right through to retirement, so perhaps the quiche did the trick and the best wedding present for the new couple today would be a sturdy porcelain pie plate.


American quiche from the 1980s bears little resemblance to the quiches that graced the window of every charcuterie in Paris in the 1970s.  The French Quiche Lorraine was a tart made with poitrine fumée, diced in to tiny delicious fatty cubes, just a hint of smoke barely held in suspension by a creamy egg custard.  The total thickness of the quiche was just a matter of a few centimeters.  The crust was buttery and flaky.


American artisanal quiche of the 1970s and 80s was really more of a pie, and a close relative of the casserole.  Its deep-dish heart and soul was convenient sustenance with no hint of subtlety, yet it was delicious in its own right.  Almost anything that could be considered main-course fare was served up in a quiche. It seemed like every restaurant served quiche[ii] and salad, and there were whole restaurants in the West that were entirely devoted to pie of all types and served up quiche in quarters.  A quarter of a quiche was a serving.  Up until at least the 1990s, it was still possible to waltz in to a Frontier Pies in Wyoming and buy a hearty slab of quiche for a quick dinner.  Pioneer Pies was another such restaurant.  In the early 2000s these pie-themed restaurants fell on hard times, but now that we are hearing that “pie is the new cupcake” perhaps these wonderful pie restaurants will make a comeback?  They have a web presence again, although their menus show pie only as an afterthought, but we can perhaps hope and dream.


If you want to stock-pile frozen American downhome quiches as a hedge against late meetings and bad traffic, there is no better place to start looking for recipes than the cookbooks put out by local women’s groups during the height of the quiche rush[iii].  I use a deep dish 9-inch Pyrex pie plate, recalling however that as a marriage-saving device my friend used frozen pie shells.  (Why not compromise and stockpile your own frozen pie shells?)  The general rule that I follow is based on the Colorado Cache Cookbook:


For the custard that holds things together in the 9 inch Pyrex plate, beat together:


4 large chicken eggs

1 ½ cups of cream or other milk-based products

Seasoning such as salt and pepper, dried marjoram, fresh parsley, chives, a grating of nutmeg etc.


The flavoring and savory ingredients are up to the artisan.  As a thoroughly mundane but delicious example of the filling, you could prepare the following ingredients and sprinkle them evenly in to an unbaked gluten-free pastry shell.


Hickory-smoked bacon fried until crisp (omit for vegetarian)

Spanish onions fried in butter until golden

½ pound of Gruyere or other hard cheese loitering in the refrigerator, coarsely grated to yield 2 cups


Pour the beaten custard over all of these and bake at 400 degrees F for 40 minutes, more or less, until a knife inserted in the center comes out barely clean.  Serve warm.  Or, freeze for later to save your marriage.


Other savory filling choices might be spinach and feta, ratatouille, wild mushroom with thyme (vegetarian), duck and preserved lemon (for meat-eaters), boneless Buffalo wings and gluten free blue cheese (for meat-eaters), five onion varieties (onion, garlic, shallot, leek, and scallion).  The choices for savory fillings are certainly not limited to the tastes of the 1970s.  Latin American, Cambodian, Thai, what sorts of quiche innovations await us now?


An American quiche renaissance is predicted – you heard it here first – and this will come as a great relief to the increasing number of people keeping “home flocks” of hens and consequently holding a surplus of eggs.  The future of so many fledgling marriages and careers could depend upon a happy wedding of eggs and cheese.


[i] “Food Timeline: History Notes-pie & Pastry.” Food Timeline: Food History & Vintage Recipes. Web. 28 Dec. 2011. <http://www.foodtimeline.org/foodpies.html>.

David, Elizabeth, and Juliet Renny. French Provincial Cooking. Harmondsworth: Penguin, 1984. Print.

[ii] Kalter, Suzy. “Jaye Tishman’s Business Is Serving Quiche to the Stars, and That’s Not Just Pie in the Sky: People.com.” People.com: The #1 Celebrity Site for Breaking News, Celebrity Pictures and Star Style. 30 Nov. 1981. Web. 28 Dec. 2011. http://www.people.com/people/archive/article/0,,20080809,00.html.

“When it comes to quiche, John Travolta prefers chicken-and-corn, Barbra Streisand orders broccoli-and-mushroom and Suzanne Pleshette likes Roquefort. So confides Jaye Tishman, 43, proprietor-chef of Ms. Tish’s Quiche Co. in Los Angeles, whose clientele reads like the Bel Air phone book. Her egg-and-cheese pies, which come in more than 100 varieties (from apple to zucchini), have themselves become celebrities of a sort. “Ms. Tish’s quiche boggles the senses,” raves food critic Merrill Shindler of the Los Angeles Herald Examiner. “It’s as close to perfect as I could want.”…”

[iii] Colorado Cache Cookbook. Denver, CO: Junior League of Denver, 1978. Print.

Gillies, Linda, Anita Muller, and Pamela Patterson. A Culinary Collection; Recipes from Members of the Board of Trustees and Staff of the Metropolitan Museum of Art. New York: Metropolitan Museum of Art, 1973. Print. (including a recipe for lettuce and bacon quiche)

Quiche – gluten free!

Fall, Lunch, Meat-eater, Pie, Recipes, Summer, Vegetarian, Winter cheese, gluten free, meat, quiche, vegetarian

Gluten Free Cinnamon Rolls

0 · Dec 28, 2011 · Leave a Comment

Originally published January 14, 2009 and updated on December 28, 2012.

In 2009 we hit upon a really good gluten free cinnamon roll and in 2012 we still think these are great.  Here is how you make these not-too-sweet cinnamon rolls.  Make the dough for dinner rolls described at the Book of Yum website ,  omitting all flavorings except the salt (don’t use rosemary, sun-dried tomatoes, or any of those sorts of things) to make a plain dinner roll dough:

http://www.bookofyum.com/blog/adeenas-gluten-free-rosemary-teff-dinner-roll-recipe-1478.html

Then proceed as follows:

Make a mixture of 1/2 cup brown sugar and 1 teaspoon cinnamon and set aside (you may need more of this mixture depending on how much you put in each roll.)  Get out some yellow raisins and set aside.

Put a paper muffin liner in to each part of a 12-cup muffin pan and 6 more cups from another pan (total of 18).

Put about 1/2 cup mochiko rice (sweet rice) flour on a large piece of wax or parchment paper.  Make 3 rolls at a time as follows, take about 1/2 to 3/4 cup of the mixed plain roll dough and plop it onto the rice flour.  The mochiko flour should be nice and thick on the paper to keep the dough from sticking.

Pat the dough into a rectangle about 7 inches wide by 4 inches tall, and a little less than a 1/2 inch thick.  These are rough measurements.  Dot the surface with butter (6 small bits of butter, totaling about 1 Tablespoon.)  Sprinkle the surface (the whole surface of the rectangle) with a few tablespoons of the brown sugar/cinnamon mixture, and sprinkle with 8-10 raisins, distributing evenly.  Very gently, roll the rectangle up like a jelly roll (from the 7 inch side), so that in the end you have a 7 inch long roll.  Slice the roll in to 3 equal length sections.  Put each section in to a paper-lined muffin cup so that the cut side is facing up.  The top of the roll should show some sugar filling. Proceed the same way until you have used up all the dough.  As you work, rearrange the remaining rice flour on the paper to provide a nice cushion for the dough.

Set the rolls aside to rise until doubled – this takes about 1/2 hour to 1 hour on a warm radiator.  Bake to rolls at 400 degrees for about 20 minutes or until a knife comes out clean.

Allow to cool briefly, then slather each one with some of the following mixture.

  • 2 Tablespoons softened butter
  • 2 cups confectioner’s sugar
  • 1/2 teaspoon vanilla
  • 1/2 teaspoon almond extract
  • enough fresh orange juice to make a nice frosting

Another excellent recipe for Cinnamon Rolls – Gluten Free – is available here: http://www.food.com/recipe/cinnabon-ish-cinnamon-rolls-gluten-free-376575/review

Bread, Breakfast, Recipes, Vegetarian, Winter baking, cinnamon, rolls, vegetarian

Gluten Free Fruitcake

0 · Nov 29, 2011 · Leave a Comment

The Best Laid Plans of Mice[i]….

By Alice DeLuca


The black-and-white “tuxedo” cat who moved in recently is sleeping on the radiator, as an early snowstorm downs trees and power lines outside, and there is no sign of any mouse in the kitchen.  At this time of year, just before guests start arriving for holiday meals, hordes of country mice would usually flood the house from every hole that is larger than a dime.  They are Old World house-mice and little New World white-footed mice. These tiny half-ounce creatures can run at 8 miles an hour and jump vertically to distances of a foot and a half.  The speed and agility explain how the fabulous mouse athletes got in to the chocolate, and also why we have a cat. Quite directly related to the presence of this cat is the very sparse influx of mice for the 2011 holiday season.

Mice Named After Famous English Cheeses - The Misses Cheddar - ADeL

These are “The Misses Cheddar,” from a series of costumed mice called “Mice Named After Famous English Cheeses” obtained in Britain in the late 1990s. They are shown alongside an American dime, to demonstrate that a dime-sized hole, through which mice can pass, is very small.


Some mice sing[ii] – a lucky person who lives near mice will have heard this unforgettably sweet song once or twice, and there are scientific references from long ago alerting us to the fact that mice are known to sing.  Despite this long-standing human knowledge, the internet abounds today with seemingly authoritative articles stating “It was recently discovered that male mice produce complex, ultrasonic songs” [iii] – but this is not news to anyone who lives around these delicate, small but annoying creatures.


The beautiful soprano warbling song coming from the silverware drawer late at night leaves me with mixed feelings.  On the one hand having mice in the kitchen is disagreeable – since they rarely venture more than fifty feet from their established nest, have hundreds of offspring, spread disease and inadvertently cause expensive damage when they nip through electrical wiring and such.  I do not blame them as they are just trying to live their lives, but when they nested in the seldom-used oven broiler, the conflagration of the nest caused a smoky incident that brought 3 fire fighters decked out in full turn-out gear to the house.  There followed a visit from an extremely well-compensated stove repair technician who nonchalantly advised me to “turn the broiler on at least once a month just to discourage them.”  He said he “saw this kind of thing all the time.”


A cascading mouse disaster also led to the expensive replacement of an automatic dishwasher – a mouse nested in the dishwasher insulation; the cat yanked off the bottom panel of the dishwasher to get at the mouse; the plumber who installed the new, replacement dishwasher said there was no point in plugging up the holes in the floor – “they can get in anywhere. It doesn’t matter what you do.”


Even while the mice cost us untold thousands of dollars and un-ending work, the presence of mice who have come in from the cold signals the start of one of the best food seasons of the year. It is a good season for roast pork, chicken and duck, and though many people today have lost touch with its glories, fruitcake.


A really good fruitcake made mostly of fruit, and soaked repeatedly in vast quantities of distilled liquor, is a great treat – very expensive and a required food for the winter season. The creation and production of a fruitcake marks the passing of time in the dark months. To have a fruitcake ready for the Christmas season, it is necessary to start working on the project now.


There follows a recipe for a terrific Fruitcake based on instructions from Darina Allen and Rosemary Kearney in their authentic and down-to-earth cookbook Healthy Gluten-Free Cooking. I have interpreted their instruction to season with “mixed spice” through research on such mixtures curated by the authoritative Elizabeth David, and I have adulterated the cake by completely saturating it with copious quantities of high quality gluten free Irish whisky*. (For the gluten free status of this whisky, see: http://www.jamesonwhiskey.com/Distillery/Meet-the-Distillery-Masters/FAQ.aspx)


1. Prepare an 8 ½” inch round, 3” deep pan, buttered and then lined with parchment. The parchment should stick up at least 1 ½ “ above the top of the pan. We have used one pan that was originally purchased to make cheesecake during the cheesecake mania of the early 1980s and have also used a spring-form pan effectively.


2. Mix up a batch of Mixed Spice (there will be some leftover after you use a teaspoon to make the cake so you can store that in a bottle for other uses). This mixture is based “loosely” on one from Elizabeth David’s English Bread and Yeast Cookery.  I say “loosely” because I made a careless error in transcribing it at one time or another, and doubled the ginger.  The error has persisted and this is the mixture I use. Again note that this will yield 3 teaspoons of which you will use only 1 :

1 teaspoon ginger
½ teaspoon pepper
½ teaspoon cloves
½ teaspoon nutmeg
½ teaspoon cinnamon


3. An important and informative note on Whisky:  We use the better part of a quart of Jameson’s Irish Whisky for this cake.  I would recommend that you use an Irish Whisky that does not have any smokiness to its flavor.  Some Irish whisky is “enhanced” by smoked peat and frankly that flavor would do nothing good to this cake.

4. Use a kitchen scale to weigh the ingredients for this recipe.

5. Macerate the Fruit ingredients for an hour or so – the timing is truly irrelevant as this is not science and very little whisky is involved at this point in the recipe:

2 ounces sliced almonds

2 ounces finely ground almonds

12 ounces brown raisins

12 ounces golden raisins

12 ounces dried currants

1 cup (8 ounces) glace cherries (leave whole or cut in half but no smaller than half. I have successfully used dried cherries that have been rehydrated and cooked in a sugar syrup)[iv]

½ cup (4 ounces) candied citron – you can use homemade candied citrus peel instead[v]

Shredded rind of both an orange and a lemon

2 Tablespoons of Jameson’s Irish whisky (Jameson’s is an excellent choice – a whisky that does not have heavy “tobacco” notes – and noted as gluten free on the manufacturer’s website 2011-11-29)


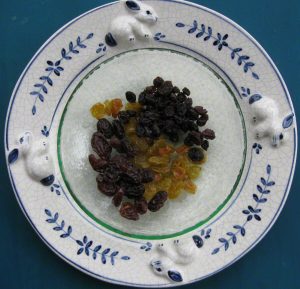
Note: You want a total of 3 pounds of dried fruit, with vine fruits predominating.  Candied Pineapple can be added successfully, providing a nice textural nuance. Currants are a required ingredient.  Much different from raisins, currants are sugar-packed and have a crystallized texture that cannot be achieved with any substitution.

Raisins and Currants ADeLuca 2011
Vine Fruits Predominate in a fine fruitcake

6. Preheat oven to 350 F.

7. Mix the Wet ingredients:

Cream 8 ounces of sweet butter, then stir in 8 ounces of brown sugar and beat until “pale and light.” Add 6 eggs one at a time, beating after each addition.

8. Mix the Dry ingredients:


Mix one teaspoon Mixed Spice[vi] with 8 ounces of finely ground almonds, 4 ounces of white rice flour (finely ground rice flour is available in Asian groceries – make sure it is rice flour and not sweet rice flour), 2 teaspoons of xanthan gum[vii], 1 cooking apple shredded (Golden Russet, Baldwin, Yellow Delicious).

9. Mixing and Baking:


Stir the Wet ingredients in to the Dry ingredients, and then add the Fruit ingredients. Do not overbeat. Scoop the very thick mixture in to the parchment-lined pan.  Wet your hand and use your hand to smooth the top. Bake the cake for one hour, then reduce the heat to 325 and bake the cake for another 2 hours until a skewer comes out clean.  The cake will be very dark. The original recipe calls for more baking, but I have found that it is important to start checking the cake after 2 hours.

10. Soaking:


Remove the pan from the oven and pour 2 ounces additional Irish whiskey over the cake. Let cool in the pan overnight.

11. More Soaking, a critical addition to an excellent recipe: Remove the cooled cake from the pan and remove the parchment.  Wrap the cake in cheesecloth, and then soak the cake liberally with an additional ½ cup of Irish whiskey. Wrap the cheesecloth covered cake in an outer layer of tinfoil to completely cover the cake, then store the whiskied-up, tinfoil-covered cake in a tin or other container. Every 1-2 weeks, or whenever you remember, remove the cake from its tinfoil wrapper and soak the cake liberally on all sides with additional Irish whiskey. Restore the foil and put it back in its storage container. Continue soaking the cake every couple of weeks until Christmas.

12. In the original Allen/Kearney cookbook, there are elaborate instructions for adding an almond paste coating that I have never tried.  It sounds like a good idea, but since we soak our cake in whiskey we have not felt the need for the almond paste coating.


Our fruitcake will be safe from the mice this year, well-wrapped and now protected by the feline security system. The cat has shown the discouraged mice the door, and they have packed up and moved their residence outside to the car. They continue to be very expensive tenants, however, and I have just received the car repair bill – $99 for removing a mouse nest from the engine.

Mouse Nesting in the car
Mouse Nesting in the car engine - a very expensive problem


The cat brings his own set of problems and expenses, but he is a charming and effective mouse-deterrent.  He is good company, and does not eat and contaminate all the stored food, such as the all-important fruitcake – a medieval gourmet treat that marks the coming of the darkest season with the hope of new fruit on the vine the following summer.


[i] Burns, Robert.  “To A Mouse. On turning her up in her nest with the plough”, November 1785. Accessed November 29, 2011 http://www.rbwf.org.uk/poems/translations/554.htm.

[ii] Dice, Lee R. 1932.”The Songs of Mice”, Journal of Mammology, Volume 13 Number 3. Accessed October 31, 2011 http://www.jstor.org/pss/1373992.

[iii] Ballenger, L. 1999. “Mus musculus” (On-line), Animal Diversity Web. Accessed October 31, 2011 http://www.animaldiversity.org/site/accounts/information/Mus_musculus.html.

[iv] Witty, Helen, and Elizabeth Schneider Colchie. Better than Store-bought: a Cookbook. New York: Harper & Row, 1979. Print.  This book contains extensive instructions on candying a variety of fruits.

[v] Witty, Helen, and Elizabeth Schneider Colchie. Better than Store-bought: a Cookbook. New York: Harper & Row, 1979. Print.  This book contains extensive instructions on candying a variety of fruits.

[vi]The following mixture is based on reading David, Elizabeth. English Bread and Yeast Cookery. New York: Viking, 1980. Print. …and several other books..  and then making a transcription error many years ago.

1 teaspoon ginger

½ teaspoon pepper

½ teaspoon cloves

½ teaspoon nutmeg

½ teaspoon cinnamon


[vii] The Xanthan Gum compensates for the lack of gluten in rice flour.

Christmas, Dessert, Fall, Holidays, Recipes, Vegetarian, Winter baking, cake, fruit, gluten free, vegetarian

Spicy Sticky Cherry Blueberry Sauce for Ribs

1 · Jun 27, 2011 · 1 Comment

This nicely balanced 100% gluten free spicy, sweet and sour sauce from gfzing.com will go perfectly with barbecued ribs.

The ingredients are ideal for late June and early July:

First, in a non-stick pan, caramelize

  • 1/4 cup sugar
  • 1 teaspoon vegetable oil
  • 1/3 teaspoon salt

To caramelize, cook the mixture over low heat, stirring all the while, until the sugar clumps together in little lumps and then gradually melts in to a brown pool.

Add:

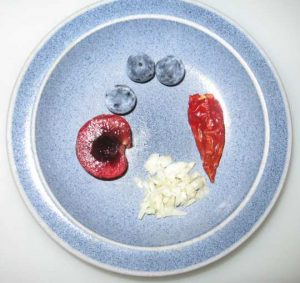
  • 1 clove garlic, peeled and minced
  • 1 dried cayenne pepper, chopped (about 1/2 teaspoon red pepper flakes)

Cook for just a few seconds, then

Carefully deglaze the pan with

  • 6 TB high-quality red wine vinegar (homemade is best)

There may be some spattering when you add the vinegar, so step back a bit and use a long-handled spoon to stir!

Stir constantly and when the sugar mass is nearly dissolved, add

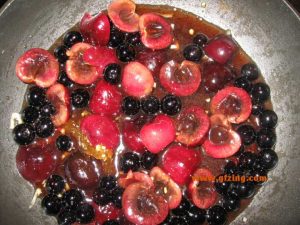
  • 1 cup halved, pitted fresh bing cherries
  • 1/2 cup whole fresh blueberries

Cherry Blueberry Sauce plus fruit gfzing dot com

Raise the heat to medium and cook to thicken a bit, about 4 minutes.

Last, refresh the sauce with

  • 2 cloves of garlic, peeled and minced

Stir briefly and set aside.

Serve with barbecued ribs, duck or chicken.  In the winter, serve a similar sauce, using other fruits in season, for a roast dinner.

Condiments and Sauces, Fall, Meat Dishes, Meat-eater, Recipes, Spring, Summer, Uncategorized, Winter fruit, GF, meat, ribs, sauce

Armenian Dessert Cake with Syrup – gluten free

0 · Jun 22, 2011 · Leave a Comment

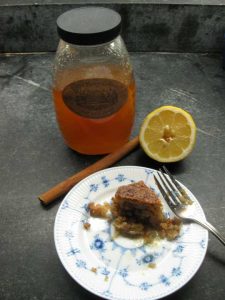
Armenian syrup cake w honey gfzing

This outstanding dessert is a seriously sweet, robust cinnamon-clove flavored cake soaked until wet with a honey-lemon syrup.  The cake tastes like baklava, and is served cold, with whipped cream if desired.

Originally, this dessert is made with Cream of Wheat. Gfzing.com has adapted it to be gluten free, replacing the Cream of Wheat with Cream of Rice and cornmeal. The recipe is from Rose Baboian’s Armenian-American Cook Book, published in 1964. The book seems to have its own Facebook page now, and is available for sale here: http://www.stvartanbookstore.com/browseproducts/Armenian-American-Cookbook–hc.html.  Similar recipes for cereal cakes abound around the internet, with Greek, Lebanese etc. variations.

Make this cake by hand, for aerobic exercise.

If you are making this in a wheatavore kitchen, bring in your own sugar or make sure that their sugar does not have remnants of wheat flour from wheatavore cooks using the same measuring cup for flour and then for sugar.

Grease and 8×8 pan or 9×9 pan well, using the wrapper from your butter.

Preheat oven to 350.

Cream together:

  • 10 TB salted butter
  • 3/4 cup white sugar
  • 1/2 cup dark brown sugar
  • 1/2 teaspoon cinnamon
  • 1/2 teaspoon cloves

Add and stir to incorporate:

  • 1/2 cup dry uncooked Cream of Rice cereal
  • 1/2 cup cornmeal
  • 1 teaspoon baking powder
  • 3/4 cup finely chopped walnuts
  • 3/4 cup shredded coconut


Add and stir to incorporate:

  • 1/4 cup milk


Add one at a time and stir til well mixed:

  • 3 eggs (large)

Pour in to the greased pan and spread out to distribute evenly.  Bake at 350 degrees, 45 minutes for 8×8 pan, 35 minutes for 9×9. A knife inserted in the cake should come out clean.  Take the cake from the oven, hold it ten inches above the counter and drop the pan straight down on the counter to settle the cake.  The cake should be top side up, still in the pan – you are just settling it, not removing it from the pan.

Make a syrup of

  • 1 cup white sugar
  • 1 cup water


Bring to a boil, then add

  • 1 Tablespoon honey
  • 1 soup spoon of fresh lemon juice

Pour the hot syrup evenly over the cake. Cover the pan and let sit until room temperature, then chill until cold. Cut into squares. The syrup will settle to the bottom of the cake, leaving that part sort of  “juicy.”

Use all gluten-free ingredients!

Dessert, Fall, Recipes, Rice, Spring, Summer, Vegetarian, Winter cake, dessert, honey, vegetarian

Gluten Free Reuben Sandwich

0 · Jun 1, 2011 · 1 Comment

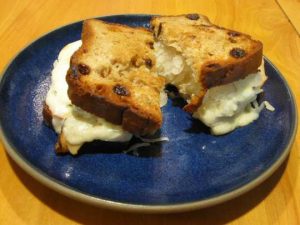
gfzing reuben sandwich

A craving for a gluten free Reuben Sandwich (Grill) sent me to the local supermarket in search of corned beef, sauerkraut, swiss cheese, dressing and gluten free “rye bread” since I have not made some.  Well, of course disappointment awaited, since they carry no gluten free corned beef at the store.  How is it possible to put wheat in corned beef?  It’s meat, right?  Sliced meat.  Of gluten free rye bread, there was none.

A few compromises later, and I had a decent sandwich that had much in common with a Reuben sandwich.  The following is a very good sandwich in its own right, and the directions show how to obtain the melted cheese and hot interior of a fine sandwich, despite the remarkable insulating qualities of gluten free bread.

Ingredients:

2 slices Rudi’s gluten free Cinnamon Raisin Bread

2 teaspoons butter

2 thin slices baby swiss cheese

2 thin slices gluten free deli barbecue chicken (check the label on the Dietz & Watson brand which at this writing was labeled gluten free)

Sauerkraut (check the status on refrigerated Ba-Tampte New Kraut which at this writing was labeled with these ingredients: Cabbage, Water, Vinegar, Salt, Sugar, Less Than 1/10 of 1% Benzoate of Soda, Sodium Bisulfite).

1 TB gluten free Thousand Island dressing (check the status of the Wishbone brand which at this writing was labeled gluten free.)

Melt the butter in a frying pan on medium low heat.  Put the two slices of bread in the melted butter to coat one side of each slice.  Turn off the heat and set the bread aside.

Drain 2 TB of the sauerkraut, place it in a microwavable glass dish and microwave for about 1 minute until hot. Set aside.

Put one slice of buttered bread, butter side down, in the pan.  Coat the top side of that slice with Thousand Island dressing. Lay the 2 slices of cheese and the 2 slices of chicken on top.  Cover with the other slice of bread, butter side up.

Turn the heat to medium low, and cover the pan.  The goal here is to brown the bread without burning the raisins. Fry the sandwich for about 1 minute (check to make sure the bread toasts but doesn’t burn).  When the bread on the bottom is brown, flip the sandwich and cook for 1 minute (covered) on the other side.  When both sides are toasted, transfer the sandwich to a microwavable plate.

Open the sandwich and add the pre-heated sauerkraut. Close the sandwich.

Microwave the sandwich for 1 minutes until the cheese melts.  (Adding the microwave step is the key to melting the cheese when using gluten free bread). Slice the sandwich in two pieces and serve!

Make sure that all your ingredients are gluten free!


Bread, Fall, Lunch, Meat Dishes, Meat-eater, Recipes, Spring, Summer, Winter cheese, meat, sandwich, sauerkraut

Vegetarian Maple Baked Beans

0 · May 31, 2011 · 3 Comments

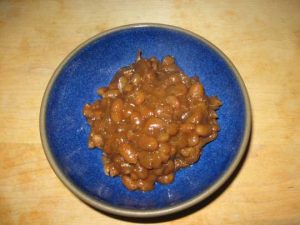
gfzing maple baked beans

These gluten free, simple baked beans are sweetened with maple syrup and maple sugar and have minimal ingredients.  They bake for a long time while your slow-cooked meat is cooking on the grill. Despite the small quantity of pepper they are surprisingly spicy.

Note: you add the salt to dried beans at the end of the cooking, so the beans will not toughen.

12 ounces dried flageolet beans (soaked overnight or pressure cooked for 2 minutes and allowed to sit until the pressure reduces naturally, or boiled for 2 minutes and allowed to sit for 1 hour.)

Drain the soaked beans and put them in an ovenproof casserole with a lid.  We use a Corningware casserole that hold 2.5 liters or quarts.

Add to the drained beans:

2 Tablespoons ghee (clarified browned butter)

1/3 cup dark maple syrup

1/3 cup maple sugar

1/2 teaspoon black pepper (less if you don’t like spicy food)

1 large onion, peeled and diced

1 1/2 teaspoons French’s mustard (verify that this product is gluten free at the time of purchase)

2 Tablespoons of gluten free chili powder

4 cups boiling water

Cover and bake at 350 for 2 hours, remove the cover and continue to bake until the liquid has reduced to a thick sauce – another 2 hours or more is not unusual.  Stir occasionally.

When the beans are done, add 1 Tablespoon of table salt and stir thoroughly.


Fall, Recipes, Spring, Summer, Vegetarian, Winter baked, dried beans, maple syrup, vegetarian

Gluten Free Sourdough Banana Bread

0 · Apr 19, 2011 · 4 Comments

This delicious, intensely-flavored banana bread is baked with brown rice flour sourdough, cinnamon and brown sugar.  It stands up to a good buttering!

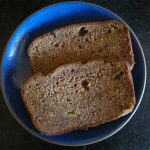
Here is a real, honest picture of this bread, highlighting the banana elements.

Gluten Free Sourdough Banana Bread gfzing

First, make a gluten free sourdough starter according to this recipe http://www.gfzing.com/2011/gluten-free-sourdough-starter-and-pancakes/.  Then, the night before you want to make banana bread,  make a brown rice flour Overnight Sponge using 1 cup of brown rice flour and 1 cup of water, added to your starter.

Next day:

Preheat oven to 350 F degrees

Line a 9×5 loaf pan with parchment paper – use one large piece of paper and fold at the corners so that no part of the inside of the pan is showing

Ingredients:

1 cup gluten free sourdough Overnight Sponge (return the rest of the sponge, covered,  to the refrigerator – that will be the “starter” for the next project)

1/2 cup white sugar

1 cup dark brown sugar

1/2 cup melted butter

2 eggs, beaten

1/2 teaspoon salt

1 cup mashed banana (about 2 bananas)

1 teaspoon gluten free ground cinnamon

1 teaspoon baking soda dissolved in 1 teaspoon water

1 1/2 cups finely ground brown rice flour mixed with 1 teaspoon xantham gum

Mix all ingredients up through the cinnamon, then add the baking soda mixture, then the rice flour mixture.  Stir thoroughly – the mixture will stiffen as you stir.  You can add raisins if desired.  Spoon mixture in to lined pan and bake 1 hour at 350.

When the bread is done, remove the pan from the oven, lift the pan up about 10 inches above the counter and drop the pan straight down – that’s right – drop the pan on the counter top, bottom side down of course.  This action will prevent the bread from falling. Cool ten minutes in the pan, then lift up the parchment paper to remove the bread from the pan to cool the rest of the way.

Bread, Breakfast, Fall, Lunch, Recipes, Spring, Summer, Vegetarian, Winter banana, bread, gluten free, sourdough, vegetarian

Gourmet Gluten Free Brownies

0 · Mar 18, 2011 · Leave a Comment

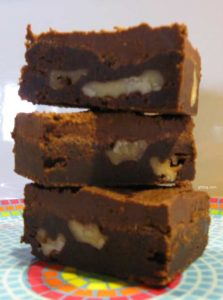
Gourmet Gluten Free Brownies from gfzing dot com

A gourmet gluten free brownie that is just like the best wheat brownie you ever had.

Use the absolute best quality gluten free chocolate you can obtain.  It is worth doing the website and company research to find the richest, darkest gluten free chocolate that is available.

For the brownies:

Melt the following in a small pot, then set aside to cool briefly:

  • 1 1/2 sticks (12 ounces) unsalted butter
  • 7 ounces bittersweet gluten free chocolate
  • 3 ounces gluten free unsweetened chocolate

Place the following in a large bowl:

  • 1 1/2 cups sugar
  • 1 1/2 teaspoons vanilla or 1/2 teaspoon of Authentic Foods gluten free powdered vanilla
  • 1/4 teaspoon salt
  • 4 eggs

Beat the sugar/egg mixture with a spoon, then stir in the melted chocolate/butter mixture.

In a small bowl, combine

  • 1 cup Authentic Foods GF traditional flour blend
  • 1/2 teaspoon xantham gum

Mix the GF flour mixture in to the chocolate batter.  Stir just to combine well.

Stir in:

  • 1 cup walnut pieces, sized according to your preference.

Line a 9 x 13″ pan with parchment paper leaving quite a bit up paper going up the sides (so that you can grab the paper later and pull the whole brownie unit out of the pan.  Pour and spread the batter in to the paper-lined pan and ease the batter out to the edges and corners of the pan.  Bake at 350 F degrees for 30 minutes.  Remove from the oven and cool completely before frosting.     Don’t remove the brownies from the pan yet – frost first!

Frosting:

Melt in a microwavable glass dish:

  • 6 ounces unsalted butter
  • 4 Tablespoons milk (can be non-fat milk if you want)

Add:

  • 4 Tablespoons (1/4 Cup) best quality gluten free cocoa powder
  • 1 teaspoon vanilla
  • 2 2/3 cups gluten free confectioner’s sugar

Stir together with a kitchen spoon until completely smooth.  Because the butter is melted, the frosting can still be a bit loose or runny when you spread it, because the frosting will stiffen up later, as the butter cools and hardens. Spread the frosting on the brownies, then transfer the pan to the refrigerator to chill until firm.

To remove brownies from pan, just grab the edges of the parchment paper and lift. Transfer the paper of brownies to a cutting board and proceed to cut them.

Cut the brownies with a sharp knife.  To make clean cuts, occasionally run the knife blade under hot water then wipe dry with a clean towel.  Using a heated, clean knife will ensure a clean cut with no crumbs.

Make sure to use all gluten-free ingredients.  If you are using a wheatavore kitchen, ensure that the sugar container is not contaminated with flour by wheatavore cooking adventures.

Christmas, Cookies, Dessert, Holidays, Recipes, Spring, Summer, Vegetarian, Winter brownie, chocolate, cookie, dessert, gluten free, vegetarian

Salmon with Curry Dry Rub and Dressed Vegetables

0 · Feb 25, 2011 · Leave a Comment

This outstanding gluten free recipe is revised from one which appeared in Bon Appetit magazine nearly a decade ago.  There are 3 components:  the rice, the vegetables and dressing, and the salmon.

Prepare the Rice first:

Fry 1 Tablespoon homemade ghee or butter, then add:

  • 1 cup rinsed basmati or long grain rice

Stir fry for a minute or so, so that all the grains of rice are coated with the ghee or butter

Add:

  • 1 cup water
  • 2/3 cup coconut milk
  • 3/4 teaspoon salt

Bring to a boil, turn down the heat, cover and cook until the rice is done. Season with pepper.  Set aside, covered, to stay warm.

Prepare the vegetables :

Fry the following aromatics in 1 Tablespoon toasted sesame oil for one minute:

  • 2 teaspoons minced fresh ginger
  • 1 clove garlic, minced

Add sliced vegetables and stir fry for just a couple of minutes, then set aside:

  • 1 red bell pepper, sliced
  • Sliced shitake mushrooms, stems removed
  • 1 bunch of bok choy, sliced
  • Other options include carrots, scallions, celery, spinach, baby spinach, watercress, zucchini, bean sprouts with the ends removed etc.

Set the vegetables aside.

Make the dressing for the vegetables:

  • 6 Tablespoons rice vinegar or homemade cider vinegar
  • 3 Tablespoons gluten free soy sauce
  • 2 Tablespoons toasted sesame oil
  • 2-4 Tablespoons chopped fresh cilantro
  • 1 Tablespoon minced fresh ginger
  • 1 teaspoon sugar

Set the dressing aside.

Prepare the serving plates: You will need 4-6 dinner plates ready to go.

Prepare the fish:

Choose very fresh salmon fillets, with the evenest possible thickness for uniform cooking.  Instructions assume that there is a “skin” side, but if there is no skin side just proceed anyway.

Make a dry rub of  one teaspoon of each of the following spices:

  • gluten free chili powder
  • gluten free curry powder (make your own – that’s the best way)
  • gluten free ground cumin
  • gluten free ground coriander
  • gluten free mustard powder (difficult to find – if you can’t find gluten free, leave this out)
  • salt
  • sugar

Sprinkle each of 4-6 6-ounce salmon fillets (the flesh side of the fish, not the skin side) with a teaspoon or more of the spice mixture.  If you want to do something ahead, you could set the spiced fish aside, wrapped, in the refrigerator for 2-3 hours at this point, but we don’t bother – we proceed immediately with the cooking:

Heat a Tablespoon of vegetable oil in a non-stick pan over medium-high heat.  For 6 fillets, you might need 2 pans. When hot, add the salmon filets, skin side down, and fry for 3-4 minutes.  Flip the fish, spice side down now, and finish the cooking – another 3-4 minutes on this side. The fish should flake easily when done.

To Serve:

On each plate, arrange a serving of rice, a serving of vegetables, and a piece of salmon.  Drizzle the vegetables with a little of the dressing (a tablespoon or so).

Can be served with a rose wine, a dry red wine such as Tohu Pinot Noir from New Zealand, or a New England Hard Cider.  The dish is surprisingly well paired with a dry pinot noir, just for the record.


Condiments and Sauces, Fall, Fish and Seafood, Recipes, Salads and Dressings, Spring, Summer, Vegetables, Winter, with New England Hard Cider curry, fish, rice, salmon

Gluten Free Miso Soup

0 · Feb 24, 2011 · Leave a Comment

Miso Soup gfzing dot com

Loaded with vegetables, this simple, easy gluten free soup can be put together in under a half hour. Use other vegetables in place of the ones specified in this recipe – whatever you have available. Cruciferous vegetables (Brassicaceae family) like cabbage, broccoli, cauliflower, turnip, watercress etc. or quick-cooking greens like spinach are ideally suited to this type of soup.

Ingredients:

2 Tablespoons toasted sesame oil

3 cloves garlic, minced

1 Tablespoon fresh ginger, minced

5 scallions, cleaned and minced

2 quarts water

1/2 cup dried sliced shitake mushrooms

1/2 head of cauliflower, in flowerets

1 bunch (1 pound) asparagus, washed, tough end removed, sliced in 1/2 inch slices

1 large yam or sweet potato (about 1 pound), peeled and cubed

8 Tablespoons gluten free miso (we used South River 3-year Hearty Brown Rice Miso – check with the manufacturer’s website for gluten free status)

black pepper

Simply heat the sesame oil, stir fry the garlic, ginger and scallions or onion for 30 seconds, then add the water.  Bring to a simmer, then add the dried shitake mushrooms, cauliflower, asparagus and yam or sweet potato. Simmer for 10 minutes until the yams are tender.  Stir in the gluten free miso paste, season with pepper and serve hot.

A surprisingly rich and satisfying vegan soup.

Double-check to make sure the miso paste you choose is gluten free.

Dairy Free, Fall, Recipes, Soups, Spring, Vegetables, Vegetarian, Winter gluten free, miso, soup, vegetarian

A Simple Brown Rice Flour Pie Crust

2 · Feb 18, 2011 · Leave a Comment

If you are trying to make a gluten free pie crust and find yourself with few ingredients, or want to make a gluten free pie crust with a whole grain flour and no xantham gum, try this one.  It does contain some cream cheese, so be certain your guests can eat dairy products.

For a one-crust pie:

1 cup finely ground brown rice flour

1/3 cup corn starch

1 Tablespoon sugar

1/2 teaspoon salt

1/4 teaspoon baking powder

8 Tablespoons unsalted cold butter (1 “stick”)

2 Tablespoons gluten free cream cheese (cold)

1 teaspoon fresh lemon or lime juice

1 Tablespoon beaten egg white

Using a food processor, mix the dry ingredients (brown rice flour, cornstarch, sugar, salt and baking powder) just until mixed.  Add the butter, cream cheese and lemon juice and mix until the mixture is crumbly.  Dribble in the egg white while mixing, just until everything comes together in to a ball.  A tiny bit more egg white may be required to get it to come together.  Adjust the egg white as necessary.

Roll the dough out between two sheets of wax paper.  There is no need to chill before rolling.

To make a pre-baked shell, line a 9-10″ glass pie plate with the rolled out pastry, then bake in a pre-heated 400 degree oven for 10-15 minutes until browned slightly but remove it from the oven if it starts to crack.  Unlike wheat crusts, this crust does not need to be filled with pie weights when baking a pre-cooked shell.

Make sure to use all gluten free ingredients, and, if you are cooking for a gluten free friend and you don’t keep a gluten free kitchen, make sure the ingredients are not contaminated with wheat flour from your other cooking adventures.

Ask Gf-Zing! - Responses, Dessert, Fall, Holidays, Pie, Recipes, Vegetarian, Winter brown rice, gluten free, pie, pie crust, vegetarian

Gluten Free Lace Cookies

0 · Jan 18, 2011 · Leave a Comment

Lace cookies are quick to make, and require few ingredients.  It is just as easy to make them gluten free if you substitute cornstarch for the wheat flour in the recipe.

In a 2-cup Pyrex measuring cup, put the following ingredients – then microwave on the setting you would use for 1 cup of coffee, until the butter melts and the mixture bubbles.

  • 2 Tablespoons butter
  • 1 1/2 Tablespoons corn syrup
  • 2 Tablespoons dark brown sugar

Remove from the microwave, then stir in

  • 2 Tablespoons cornstarch

gluten free lace cookie dough

Deposit the batter in teaspoon-sized circles on parchment paper lined baking sheet.  Be sure to leave 3 inches between each cookie, and make only about 6 cookies at a time if you plan to roll them in cylinder or cone shapes because you will have to work quickly.

lace cookie size

Bake the cookies 6 minutes, until spread out, brown and bubbly.  Watch them carefully to make sure they don’t burn.

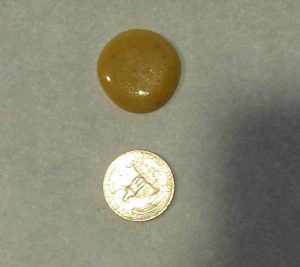
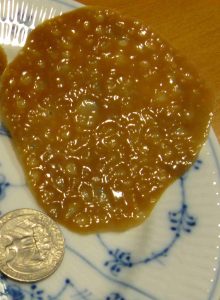
Remove the sheet from the oven.  If you are going to make cylinders or cone shapes, allow them to cool about 15 seconds and then start working with them.  Otherwise, wait about a minute and the parchment paper will be easy to peel right off the cookies!  As you can see from the picture, these cookies spread quite a lot.  I have included a quarter in the photos so you can compare the size, uncooked and cooked.

lace cookie - cooked

and these cookies are delicate like glass. Here are about 7 of them stacked on a Heath Ceramics coffee cup – (cup color is Moonstone.)

lace cookies stacked on Heathware cup

Christmas, Cookies, Dessert, Fall, Holidays, Recipes, Vegetarian, Winter baking, cookies, GF, gluten free, vegetarian

Braised Lamb Shanks with pepper and Green Peas

0 · Jan 18, 2011 · Leave a Comment

This rich, delicious dish is based on one for North African-Influenced Lamb Shanks with Couscous by Emeril.  We have added more vegetables, and removed all the gluten.

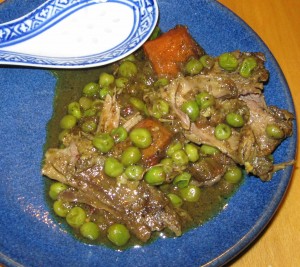
Braised spicy lambs shanks gluten free

  • 2 1/2 pounds lamb shanks (if these are American hind quarter shanks you will have 2 shanks)
  • 1 teaspoon salt
  • 2 teaspoons ground black pepper
  • 1 teaspoon turmeric

Sprinkle the spices over the shanks and fry them in 3 Tb of olive oil until browned on all sides.  Remove the shanks to a large covered casserole that can go in the oven.

In the same pan where you fried the shanks, add:

  • 1/2 teaspoon ground cinnamon
  • 1 teaspoon ground cumin
  • 1/2 teaspoon ground ginger
  • 1/2 a dried cayenne pepper, minced, or 1/4-1/2 teaspoon cayenne pepper, ground

Stir fry the spices for 30 seconds, then add:

  • 1 1/2 cups coarsely chopped spanish onion
  • 2 large carrots, peeled and cut in 1 inch chunks
  • 1 sweet potato, peeled and cut in half

Stir fry the vegetables until the onion is a little bit golden, then add:

  • 1 Tablespoon chopped fresh garlic (about 4 cloves)

Stir fry until the garlic is fragrant only – about 30 seconds. (Emeril’s recipe called for stirring the garlic for 30 minutes, which must be a typo)

Add:

  • 2 cups rose wine
  • 1 cup chopped tomatoes (about 1 large tomato)
  • 4 cups chicken stock – if you are reconstituting this from bouillon mix, make sure the mix is gluten free and use less than is called for on the package – to avoid over-salting)
  • Juice of one orange
  • 2 strips of orange zest (you can remove the pieces when the braising is complete)

Bring to a boil, then add the vegetable-wine-tomato mixture to the lamb shanks in the other pan.  Cover the pan. Place in a 350 degree oven for 2-2 1/2 hours until the meat is falling off the bone.  Check occasionally to see if more liquid is required. Remove from the oven, and remove the pieces of orange peel.

Add:

  • 1/2 pound frozen green peas

Cook on top of the stove until the peas are just barely cooked.

Gfzing.com likes to serve with steamed artichokes for dipping up the delicious sauce.

If you want a gluten free substitute for the “couscous” in the original recipe, substitute 1 cup pre-rinsed quinoa and 2 cups water for the couscous.  Microwave the quinoa and water, covered, for 8 minutes on high, then add the rest of the seasoning ingredients in Emeril’s recipe and set aside, covered for about 10 minutes until the water is completely absorbed by the quinoa.

Dairy Free, Fall, Meat Dishes, Meat-eater, Recipes, Winter GF, gluten free, lamb, spicy, stew

Maple Pumpkin Pie, no dairy, from fresh pumpkin

0 · Jan 14, 2011 · Leave a Comment

small pumpkin pie
Non Dairy, Gluten-Free Pumpkin Pie

This interesting recipe from gfzing.com has no milk, cream, rice milk or any other type of milk, is gluten free and uses fresh rather than canned pumpkin. The type of pumpkin used is the small “pie” or “sugar” pumpkin – they are sold at farm stands for the purpose of making pies. The natural liquid in the freshly cooked pumpkin is sufficient liquid and no added milk products are needed.  Do not use canned pumpkin for this recipe.

The pie is quite light, and since the only sweeteners are maple syrup and molasses the pie is not too sweet.

Ingredients:

  • 1 “pie” or “sugar” pumpkin
  • 1/2 cup dark maple syrup
  • 1/4 cup molasses
  • 3 eggs
  • 1/2 teaspoon salt
  • 1 teaspoon cinnamon
  • 1/2 teaspoon ginger
  • 3/4 teaspoon freshly grated nutmeg
  • 1 unbaked Whole Foods gluten free (gf) pie shell, thawed and cracks repaired

Preheat the oven to 450 degrees F.

Defrost the gluten free pie shell and repair any cracks.  Sometimes frozen pie crusts get broken, but you can smush the crust back together along the breaks to make a whole crust.

Next, remove the stem (just break it off) from the pumpkin and stab the pumpkin through the shell to the center in 4 or 5 places with a pairing knife – to let out steam.  You don’t need to cut the pumpkin up or remove the seeds before cooking.  Set the prepared pumpkin in the microwave oven and cook it as for baked potato (use the setting on the microwave).

Remove the very hot pumpkin from the oven using potholders and let cool completely.   Now cut the cooked pumpkin in half, use a large spoon to scoop out and discard the seeds. Then, scoop out the cooked flesh, set it aside for use and finally discard the peel.  You should have about 24 ounces cooked pumpkin (weigh the cooked flesh.)  You do not need to mash or strain the pumpkin flesh.

In a food processor, combine about 24 ounces ( one and a half pounds) of cooked fresh pumpkin (not canned) with all the rest ingredients except the pie shell.  Process until the mixture is completely smooth. Pour most of the pumpkin mixture in to the uncooked pie shell until the pie shell is filled almost to the top.  Depending on the size of the pumpkin, there may be a cup or so of extra filling.  If so, grease a small oven-proof dish and pour the excess in there.

Put the pie in to a 450 degree oven for 10 minutes, then reduce the heat to 350 and cook for another 45 minutes.  Check the pie – if the filling is set, the pie is done.  Cool and serve with your favorite pie topping.

For the extra filling, bake that along with the pie but it will be done and ready to take out of  the oven well before the pie. You can use this cooked pumpkin pie filling to make a nice pumpkin parfait, layering the cooked chilled filling with your favorite gluten free pie topping (whipped cream if you use it).

Breakfast, Dairy Free, Dessert, Fall, Microwave Cooking, Pie, Recipes, Thanksgiving, Vegetarian, Winter dairy free, gluten free, pie, pumpkin, vegetarian

Gluten Free Deep Dish Pizza

0 · Jan 7, 2011 · Leave a Comment

We were addicted to the deep dish pizza made by Edwardo’s on the South Side of Chicago in the 1980s, and after leaving that part of the country we went to great lengths to learn how to make deep dish pizza at home.  We even purchased an enormous specialized pan purposed for making stuffed pizzas. Fast forward a few decades and sadly a gluten free deep dish pizza seemed like an impossible dream.  But continue on, dear reader, because you can have a reasonable deep-dish pizza, gluten free, if you have a cast iron or Le Creuset skillet available to you.  The crust will be little chewy, somewhat denser than an ideal crust, but flavorful because of the potato flour in the dough.  It will have unique characteristics which make it worth eating, even though it is gf.

Crust:

Cut a 12″ diameter circle of parchment paper to line a 10 inch heavy cast iron skillet (ours is the enameled Le Creuset designed for use in a hot oven – some of the Le Creuset skillets are not meant for very hot ovens, so make sure yours is – the enamel on the inside of the pan should be black). A flat circle must be creased a few times to line a 3 dimensional pan, so flatten the paper against the bottom of the pan, and pleate and crease it up the sides to make it “fit”.  Make one recipe of the pizza base dough from Darina Allen and Rosemary Kearney’s Healthy Gluten-Free Cooking.  This is a rice flour, potato flour and tapioca flour dough that contains dried milk and an egg as well – but no bean flour. Note that the recipe calls for potato flour, not potato starch.  Weigh the ingredients using a kitchen scale because the book is written using Irish measurement units. I encourage you to purchase the cookbooks mentioned in my articles, to support the work of fellow recipe writers in the hope that they will produce more useful books for us!

Preheat your oven to 400 degrees.  When the oven is hot, roll out the dough between two sheets of waxed paper dusted with sweet rice flour (mochiko), and line the pan with the dough (the entire recipe’s worth of dough). Prick the dough all over with a fork and bake it (unfilled) for 10 minutes, remove the very heavy pan from the oven using two hands and oven mitts to grab the handle and edge of the pan.  Set the hot pan aside and prepare the filling.  I always leave an oven mitt on the handle to remind me that the handle of the pan is hot, hot, hot! That handle is 400 degrees, and you don’t want to grab it without an oven mitt!

Filling:

1/2 pound of mushrooms

1/2 pound gluten free italian sausage – spicy is nice – omit for vegetarians

1 large spanish onion, sliced (don’t use “sweet onions” as they don’t brown nicely)

1-2 bell peppers, sliced

6 cloves garlic, minced

Fry the mushrooms in olive oil for 4 minutes without stirring.  Remove the mushrooms from pan and set aside. Season with salt and pepper.
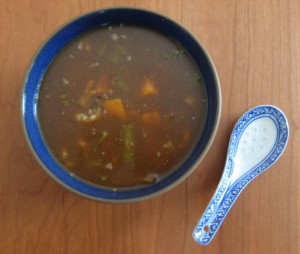
To the same pan, add the gluten free sausage, onions, peppers and garlic and fry for 10-12 minutes until cooked through.

Mix the sausage mixture with the mushrooms and add a 1/2 pound of full-fat mozzarella, hand grated, a half cup of canned diced tomatoes (fresh if you have them), 1/2 cup of chopped basil or 1-2 Tablespoons of gluten free homemade pesto sauce.  Test the filling to see if it needs additional salt and pepper.
Spread the filling in the prepared pre-baked crust, Sprinkle with another 1/2 pound of grated mozzarella, sprinkle with grated parmesan cheese, raise the temperature of the oven to 450 and bake the pizza for 30-35 minutes. Remove the very very hot pan from the oven using oven mitts. Serve immediately or cool slightly first.

Make sure all your ingredients are gluten free!

The filling is based on one in the October 2005 issue of Cuisine at Home.  Ham and pepperoni have been eliminated, and the option of using prepared pesto in place of basil is added. You can tinker infinitely with the ingredients in the filling.  Use what you have available – spinach, other types of cheese, omit the peppers and double the onions, whatever you like!

Ask Gf-Zing! - Responses, Bread, Fall, Lunch, Meat Dishes, Meat-eater, Pie, Recipes, Spring, Summer, Vegetarian, Winter gluten free, pizza

Gluten Free Feast of the Seven Fishes

3 · Dec 20, 2010 · Leave a Comment

Some Italian-American families celebrate Christmas Eve with a dinner of many fish dishes.  This is a wonderful holiday tradition that has evolved, in our family, to honor the  many ethnic groups and food preferences of the extended family.

If you have a large guest list and a small table without enough chairs, try hosting a Hawai’ian-style “heavy pupus” (hot and substantial appetizers) Feast of the Seven Fishes.  You can make this meal entirely gluten free without bothering any of the guests!

Get together an eclectic play list of music, including some hits from the year and some holiday music.  When “Who let the dogs out?” or “The Macarena” were popular, we included them along with the Jingle Bells. It is nice to have variety instead of an endless train of Joy, Joy, Joy, since everyone has  challenges as well as happiness during the holidays. It is nice to include some favorite music and foods of people who used to celebrate with you but have passed away, to include them in the party even though they are not corporeally present.

Traditional Dishes:

  • Baccalà (hot dish)
  • Baccalà (cold salad)
  • Mare Salad
  • Pasta con alici (make with GF spaghetti)

Fusion Feast of the Seven Fishes Dishes:

  • Crab Cakes
  • Shrimp Sushi
  • Mini Lobster Rolls
  • Filipino Lumpia
  • Fried Fish
  • Jonah Crab Claws with Cocktail Sauce
  • Oysters Rockefeller
  • Fish Cakes
  • Codfish with Orange Sauce
  • Crab Dip with plantain chips
  • Gravlax
  • Spanish tapas – Shrimp with garlic
  • Mare Salad
  • Fish cakes with Wasabi Ginger Tarter Sauce (must be heavily adapted to gluten free)

Appetizers, Christmas, Fish and Seafood, Holidays, Recipes, Winter christmas, fish, gluten free, italian

Indian Pudding

0 · Dec 6, 2010 · Leave a Comment

Indian Pudding, one of the finest desserts ever invented, is a naturally gluten-free American dessert over two centuries old.  The recipes vary over the years, but the ingredients always include milk, corn meal (the “Indian meal” from which the dessert gets its name), spices and some type of sweetener.  Note that once in a while a recipe for Indian Pudding will include a small amount of completely unnecessary wheat flour. At gfzing.com, we have studied the subject at length and have 2 recommended recipes for excellent gluten free Indian Pudding – one sweetened primarily with maple syrup and one made primarily with brown sugar.  Our favorite recipes appear near the end of this article, after some historical bits.

Historical Recipes:

In American Cookery, by Amelia Simmons, published in 1796, there are 3 recipes for Indian Pudding.  The two baked versions include eggs, which later recipes for the dessert often omit.

  • No. 1. 3 pints scalded milk, 7 spoons fine Indian meal, stir well
    together while hot, let stand till cooled; add 7 eggs, half pound
    raisins, 4 ounces butter, spice and sugar, bake one and half hours.
  • No. 2. 3 pints scalded milk to one pint meal salted; cool, add 2 eggs,
    4 ounces butter, sugar or molasses and spice q. f. it will require two
    and half hours baking.
  • No. 3. Salt a pint meal, wet with one quart milk, sweeten and put into
    a strong cloth, brass or bell metal vessel, stone or earthern pot,
    secure from wet and boil 12 hours.

Table Talk monthly magazine, which billed itself as the “The American Authority Upon All Culinary and Household Topics,”  included in its September 1893 issue ten recipes for Indian Pudding (go to page 323 in this document). Some of these recipes omit the eggs, and some use the technique of mixing the hot porridge-like base for the pudding and then pouring an amount of cold milk on top, leaving the cold milk without stirring, then baking the whole dish for from 2 to 8 hours.

Now for how we actually prefer to make Indian Pudding. We like the following 2 recipes, with a preference for the one sweetened primarily with maple syrup which has a more interesting flavor than modern brown sugar.  We actually wonder if the antique recipes used a form of brown sugar more similar to jaggery, rapadura or panela – which would have had a more subtle flavor.

Maple Syrup Cookbook

by Ken Haedrich, 1989

(our preferred ingredient list)

Early American Recipes by Eloise Frost, 1953
Whole Milk 5 cups 1 quart (4 cups), scalded + 1 cup cold
Corn Meal 2/3 cup ½ cup
Sugar 1 cup grade A Amber Maple Syrup (or Grade B) 1/3 cup light brown sugar
Molasses 1 TB (we used 2) 1/3 cup
Ground Cinnamon ½ teaspoon 1 teaspoon
Ground Ginger ½ teaspoon 1 teaspoon
Dried Fruit 1 cup raisins or chopped dated (we used raisins) none
Salt ½ teaspoon 1 teaspoon
Butter 4 tablespoons 3 tablespoons

Both recipes are baked in a well-buttered 9 x13″ baking dish at 300 F; a porcelain, ceramic or Pyrex dish is necessary for the baking; for the clean-up be prepared to soak the cooking and baking dishes before cleaning. The basic cooking method is as follows.

For the maple syrup recipe, in a heavy-bottomed pot, cook the milk over medium heat until it is almost scalded, then whisk in the cornmeal, stirring all the while.  Keep whisking for 10 minutes until the porridge is thickened slightly.  The porridge will be a very, very pale yellow. Remove from the heat and use a wooden or bamboo spoon to stir in the rest of the ingredients, stirring all the while.  Give one last vigorous stir to distribute the raisins evenly and pour it in to the prepared porcelain (or Pyrex or ceramic) dish.  Bake for 2 and a half hours.  Remove from the oven, let cool for about a half hour and serve with vanilla ice cream or plain cream.

For the brown sugar recipe: Mix the scalded milk, molasses and brown sugar.  Whisk in the corn meal, salt, cinnamon and ginger. Cook, stirring constantly, for 5 minutes.  Pour in to the prepared baking dish and dot with the butter.  Bake 1 hour, then pour the cup of cold milk over the top (do not stir) and cook for 2 more hours. Remove from the oven, let cool for about a half hour and serve with vanilla ice cream or plain cream.

We hope you enjoy this review of Indian Pudding through the ages, from gfzing.com.  Indian Pudding is the best dessert ever, and deserves to return to its rightful place as a mainstay of American cooking!

Breakfast, Dessert, Fall, Vegetarian, Winter dessert, gluten free, pudding, vegetarian

Gluten Free “Slowed Down” Pumpkin Muffin

2 · Oct 13, 2010 · 1 Comment

This is a story about “slowed down food.”

We have combined the fat-free muffin with the slow food movement, to make the Slowed Down Pumpkin Muffin. The reason that these pumpkin muffins can be called “slowed down” food is because they are meant to be made with canned pumpkin and jarred applesauce, but we had neither one in the cupboard.  So, the instructions here show how you can make them using local squash and an apple, and it also takes more time to make them!  The muffins still use processed sugar, so they are not consistent with full-bore “slow food” cooking.

We won’t pretend that these muffins, which have no oil in them, are non-fat because once you have slathered your pumpkin muffin with butter, all that “no fat” stuff goes out the window!  We also make these gluten free, doubling the flavorings to combat the black hole, flavor-neutralizing quality of gluten free cooking.  Note: Some people who eat gluten free avoid bean flours such as chickpea flour, so check with your gluten free friend before using this recipe.

How to prepare the squash (pumpkin) and apple:

Find a winter squash (pumpkin, butternut, buttercup, acorn – whatever), and a baking apple.  For a baking apple, you could choose a nice big Cortland, or a Northern Spy.  In this case, we used a butternut squash (long-necked pale orange squash) and a Northern Spy apple.

Cut off a chunk of winter squash, about 12 ounces should do it.  Poke several holes in the apple with a fork.  Microwave the squash and the apple on the setting you use for baking potatoes, until they are cooked through. Cool them so that you can peel them without burning yourself.

Peel the cooked squash and apple and remove and discard the apple core and its seeds and the peelings.  Mash the cooked squash and apple separately.  You need 1/3 cup of each.  If by chance you have too much of one, and not enough of the other, simply use enough of each to yield a combined total of 2/3 cup mashed material.

Preheat the oven to 350 degrees F.

Soak 1/2 cup raisins in boiling water while you mix the batter:

Mix dry ingredients in a large bowl:

1 1/2 cups plus 1 Tablespoon Gifts of Nature gluten free All Purpose Flour Blend (INGREDIENTS: Brown rice flour, potato starch flour, white rice flour, chick pea flour, sweet rice flour, tapioca flour, xantham gum)

1 1/2 cups sugar

1/2 teaspoon each: baking powder, baking soda, salt

1 teaspoon each: ground cinnamon, grated nutmeg, ground cloves

Mix the wet ingredients in another large bowl:

Mix the 2/3 cup cooked squash and apple with:

2 eggs

Stir the wet ingredients and dry ingredients together using a fork. This will be an interesting task – at first it will appear that there is not enough liquid, but as you mix the batter it will quickly become the consistency of a proper muffin batter.

Drain the almost-forgotten raisins (throw out the water, save the raisins.)  Add the raisins to the muffin batter. Stir well.

Line 12 muffin cups with paper muffin liners.  Fill each muffin liner to the top. You may be used to filling muffin liners 2/3 full, but in this case you can fill them right to the top.  Use up all the batter for the 12 muffins. Distribute the raisins evenly, to make sure each muffin has its fair share of raisins.

Bake for 30-35 minutes until the tops are dry and the muffins seem done.  You can poke them with a toothpick – toothpick should come out dry. Take cooked muffins out of the oven – the tops of these muffins have a chewy, caramelized quality and the muffins taste great with butter.  Technically, you should allow these muffins to cool before eating.

Make sure all your ingredients are gluten free!

Bread, Breakfast, Dairy Free, Fall, Recipes, Vegetables, Vegetarian, Winter baking, cooking, food, gluten free, muffin, pumpkin, squash, vegetarian

Chicken Sticky Rice

0 · Oct 8, 2010 · 1 Comment

This recipe makes a very nice comfort-food for the gluten free community.

Wash 1 cup of sweet brown rice (this is also called brown sticky rice), put it in a Zojirushi rice cooker, and add 1 1/4 cups of water.  Close the rice-cooker and set the menu to the sweet rice setting and turn it on.  It will cook in about an hour.

While the rice is cooking, in a non-stick pan put 1 teaspoon peanut oil, and stir-fry 1 shallot, peeled and diced, and 1 clove garlic, peeled and minced, for 2 minutes.  Then add 1 teaspoon strong gluten-free curry powder, 1 teaspoon salt, and 1/4 teaspoon sugar.  Stir-fry for 1 minutes.  Next, add 2 boneless chicken thighs, diced.  Stir-fry until cooked through.

When the sticky rice is done, add it to the chicken mixture and stir together with a wooden spoon.  Transfer it to a greased oven-proof casserole dish and bake, covered, for 15 minutes at 350, or make 6-8 tinfoil squares about 10 inches square, put 1/2-3/4 cup of the mixture on each square and make in to a log, then wrap the tinfoil around the rice mixture. Bake the logs at 350 for 15 minutes.  These packets can be kept in the refrigerator and reheated as needed.  They will keep a few days under refrigeration.

The dish is tasty and satisfying!

Make sure all your ingredients are gluten free!

Dairy Free, Fall, Lunch, Meat Dishes, Meat-eater, Recipes, Rice, Winter chicken, food, gluten free, recipes

  • Go to page 1
  • Go to page 2
  • Go to page 3
  • Go to page 4
  • Go to Next Page »

Primary Sidebar

Check out our Coupon Collection

Click Here to go directly to the Coupon page

Read more at The Rambling Epicure:

Click Here: The Rambling Epicure

QR code for your phone

qrcode for gfzing
NFCA logo

Blogroll

  • Aloha World Ono Recipes
  • Book of Yum
  • Dulce Cocina sin Gluten
  • Gluten Free Beer Association
  • Glutenfreie Rezepte | kaMehl
  • Hawai'ian Electric
  • Laylita's – Ecuador
  • Nombudsman
  • Papilles et Pupilles
  • Sea Salt with Food
  • The Rambling Epicure The Rambling Epicure is a daily international food chronicle, and the first online newspaper to follow global food trends and news.
  • Triumph Dining

Monthly Archive

Proud member of FoodBlogs

Load up on new recipes, exclusive goodies, + more!

Get the exclusive content you crave straight to your inbox.

Things to Read

Find by keyword

bacon baked baking beans beef berries blueberry cake cheese chicken chocolate coconut cooking curry dessert DIY dried beans easy fish food fruit GF ghee gluten free gourmet homemade lamb maple syrup meat microwave New England Hard Cider pie pork pumpkin recipe recipes rice salad sauce soup stewed strawberries sweet potato thai red curry vegetarian

Copyright © 2023 GF-Zing! on the Cravings Pro Theme