• Skip to primary navigation
  • Skip to main content
  • Skip to primary sidebar
  • Skip to footer

GF-Zing! logo

  • Home
  • Coupon Collection
  • GF Foods & Groups
  • Ask Gf-Zing!
    • About the Author
    • About Gf-Zing!
  • Nav Social Menu

    • Email
    • Facebook

Alice’s Excellent Gluten Free Pancakes or Waffles with Wild Blueberries

1 · Apr 19, 2012 · 2 Comments

Alice's Excellent Pancakes and Waffles gfzing dot com 2012
Pancakes and Waffles - gluten free from gfzing dot com

In October of 2005 I shared excellent pancake and waffle recipe with you all. Buy some frozen blueberries and real dark maple syrup before you read any further.  In 2012 it is updated to include information about our favorite waffle iron – we have no commercial affiliation with Nordic Ware by the way, we just like their stove-top waffle iron better than any of the electric models we have tried over the years..

This recipe works with buttermilk as well – for the pancakes.  It makes the best waffles if you stick with almond milk as the liquid.

Mix in bowl:
1 cup brown rice flour
1/2 cup potato starch flour
1/4 cup tapioca flour
1/4 cup cornstarch
1 Tablespoon GF baking powder
1 Tablespoon sugar
1/2 teaspoon salt

In another bowl:
1 1/2 cups almond milk
3 eggs
4 Tablespoons vegetable oil

Stir the two mixtures together. Heat a non-stick pan on medium, add
butter or margarine. When pan is hot, pour batter to form pancakes (1/2
cup makes a beautiful big pancake), sprinkle with frozen blueberries.
Wait until the bubbles that form in the pancake start turning into holes
(if you don’t wait long enough the pancake will be hard to turn) but not
so long that the pancake burns, then flip. When other side is cooked,
transfer to plate and serve with real maple syrup – use the Grade B syrup which has the most flavor…

To use this recipe for waffles, use only 2 eggs and add another
tablespoon of oil. Omit the blueberries. Waffles take 4-6 minutes to cook.

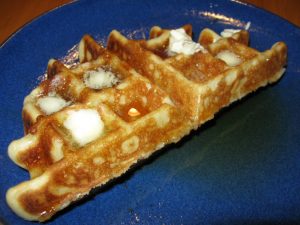
Update in 2012 For best waffle results, try a Nordic Ware stovetop waffle iron – the belgian waffle type – and brush it lightly with vegetable oil before heating.  You have to practice with these waffle irons a few times to get it right. On our stove you heat it on medium high for three minutes, then flip it and heat the other side for 3 minutes. Then, you open it, pour in one and a half cups of batter, close it and cook for 1 minute, then flip and cook for 2 minutes.  That makes the perfect waffle in the photograph.

If you are serving food to gluten-free friends, check carefully with the manufacturers, or on the reputable internet-based gluten free food lists, to make sure that all ingredients are gluten free. Or, ask your friends which brands are safe for them to eat.

 

Breakfast, Dairy Free, Equipment, Product Reviews, Recipes blueberry, dairy free, pancake, waffle

Gluten Free Cinnamon Rolls

0 · Dec 28, 2011 · Leave a Comment

Originally published January 14, 2009 and updated on December 28, 2012.

In 2009 we hit upon a really good gluten free cinnamon roll and in 2012 we still think these are great.  Here is how you make these not-too-sweet cinnamon rolls.  Make the dough for dinner rolls described at the Book of Yum website ,  omitting all flavorings except the salt (don’t use rosemary, sun-dried tomatoes, or any of those sorts of things) to make a plain dinner roll dough:

http://www.bookofyum.com/blog/adeenas-gluten-free-rosemary-teff-dinner-roll-recipe-1478.html

Then proceed as follows:

Make a mixture of 1/2 cup brown sugar and 1 teaspoon cinnamon and set aside (you may need more of this mixture depending on how much you put in each roll.)  Get out some yellow raisins and set aside.

Put a paper muffin liner in to each part of a 12-cup muffin pan and 6 more cups from another pan (total of 18).

Put about 1/2 cup mochiko rice (sweet rice) flour on a large piece of wax or parchment paper.  Make 3 rolls at a time as follows, take about 1/2 to 3/4 cup of the mixed plain roll dough and plop it onto the rice flour.  The mochiko flour should be nice and thick on the paper to keep the dough from sticking.

Pat the dough into a rectangle about 7 inches wide by 4 inches tall, and a little less than a 1/2 inch thick.  These are rough measurements.  Dot the surface with butter (6 small bits of butter, totaling about 1 Tablespoon.)  Sprinkle the surface (the whole surface of the rectangle) with a few tablespoons of the brown sugar/cinnamon mixture, and sprinkle with 8-10 raisins, distributing evenly.  Very gently, roll the rectangle up like a jelly roll (from the 7 inch side), so that in the end you have a 7 inch long roll.  Slice the roll in to 3 equal length sections.  Put each section in to a paper-lined muffin cup so that the cut side is facing up.  The top of the roll should show some sugar filling. Proceed the same way until you have used up all the dough.  As you work, rearrange the remaining rice flour on the paper to provide a nice cushion for the dough.

Set the rolls aside to rise until doubled – this takes about 1/2 hour to 1 hour on a warm radiator.  Bake to rolls at 400 degrees for about 20 minutes or until a knife comes out clean.

Allow to cool briefly, then slather each one with some of the following mixture.

  • 2 Tablespoons softened butter
  • 2 cups confectioner’s sugar
  • 1/2 teaspoon vanilla
  • 1/2 teaspoon almond extract
  • enough fresh orange juice to make a nice frosting

Another excellent recipe for Cinnamon Rolls – Gluten Free – is available here: http://www.food.com/recipe/cinnabon-ish-cinnamon-rolls-gluten-free-376575/review

Bread, Breakfast, Recipes, Vegetarian, Winter baking, cinnamon, rolls, vegetarian

Gluten Free Sourdough Banana Bread

0 · Apr 19, 2011 · 4 Comments

This delicious, intensely-flavored banana bread is baked with brown rice flour sourdough, cinnamon and brown sugar.  It stands up to a good buttering!

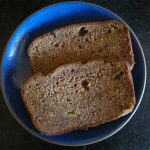
Here is a real, honest picture of this bread, highlighting the banana elements.

Gluten Free Sourdough Banana Bread gfzing

First, make a gluten free sourdough starter according to this recipe http://www.gfzing.com/2011/gluten-free-sourdough-starter-and-pancakes/.  Then, the night before you want to make banana bread,  make a brown rice flour Overnight Sponge using 1 cup of brown rice flour and 1 cup of water, added to your starter.

Next day:

Preheat oven to 350 F degrees

Line a 9×5 loaf pan with parchment paper – use one large piece of paper and fold at the corners so that no part of the inside of the pan is showing

Ingredients:

1 cup gluten free sourdough Overnight Sponge (return the rest of the sponge, covered,  to the refrigerator – that will be the “starter” for the next project)

1/2 cup white sugar

1 cup dark brown sugar

1/2 cup melted butter

2 eggs, beaten

1/2 teaspoon salt

1 cup mashed banana (about 2 bananas)

1 teaspoon gluten free ground cinnamon

1 teaspoon baking soda dissolved in 1 teaspoon water

1 1/2 cups finely ground brown rice flour mixed with 1 teaspoon xantham gum

Mix all ingredients up through the cinnamon, then add the baking soda mixture, then the rice flour mixture.  Stir thoroughly – the mixture will stiffen as you stir.  You can add raisins if desired.  Spoon mixture in to lined pan and bake 1 hour at 350.

When the bread is done, remove the pan from the oven, lift the pan up about 10 inches above the counter and drop the pan straight down – that’s right – drop the pan on the counter top, bottom side down of course.  This action will prevent the bread from falling. Cool ten minutes in the pan, then lift up the parchment paper to remove the bread from the pan to cool the rest of the way.

Bread, Breakfast, Fall, Lunch, Recipes, Spring, Summer, Vegetarian, Winter banana, bread, gluten free, sourdough, vegetarian

Gluten Free Sourdough Starter and Pancakes

0 · Mar 22, 2011 · Leave a Comment

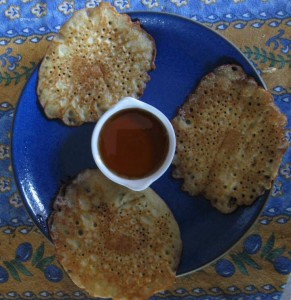
gluten free sourdough pancakes 2 gfzing dot com

The yeasty, buttery smell of sourdough pancakes will bring everyone running to the kitchen for breakfast, with or without coffee.

Sourdough is simply a fermentation product  – it is made from ground grain, water and yeast – the yeast growing, reproducing and producing gas bubbles.  You must keep sourdough alive.  In the old times, maintaining sourdough was a practical necessity. Freeze-dried yeast was not available, so you would take out some of your live yeast culture from your sourdough pot.  In modern times, sourdough is more of a hobby than a necessity, but if you want to keep a sourdough starter on hand, each time you use some of the sourdough, replace the same amount with ground grain and water. The yeast will eat the new grain for breakfast, making more little yeasts and gas.  Keep the mixture in the refrigerator after the initial fermentation.

We have tried making gluten free sourdough starter with many different flours.  The thickness of the starter will depend on the type of flour used. The following starter is excellent and you can try using it for pancakes.  Note that sourdough pancakes are not puffy flannel cakes; they are thinner, more bubbly and have a nice browned edge if you fry them in butter.  If you want a sturdier pancake, use a mixture of sorghum and classical gluten free flour mix for the overnight sponge.  If you prefer a more tender, delicate sourdough pancake, use 100% brown rice flour. Here’s how to start from scratch and make a sourdough starter and some pancakes.

Two or three nights before you want to make the pancakes, make a starter culture by mixing the following in a large bowl:

  • 1/2 cup Authentic Foods  Gluten Free Classical Mix
  • 1/2 cup Authentic Foods Sorghum Flour (this brand is very finely ground)
  • 1/2 ounce gluten free freeze-dried yeast
  • 1 cup warm water

Stir and cover with a plate.  If it is fruit-fly season, you may have to cover the bowl with plastic wrap to prevent the accidental drownings of excited fruit flies.  It is very discouraging to start the morning with a bowl of sourdough starter peppered with the drowned fruit flies lured in by the yeasty aromas.

The night before you want to make the pancakes, re-invigorate the starter to make an Overnight Sponge:

  • Add 1 or 2 cups of gluten free flours to your starter – (you can try using 100% brown rice flour, or more sorghum and gf flour mix) – and the equivalent amount of warm water, stir, cover and set aside to make more sourdough. So, if you add 1 cup flour, add 1 cup water, and so on.  Only add ground grains and water to your starter – never add eggs or milk to the starter.  If you use 100% brown rice flour, the starter will be very thin, thickening slightly when you add the other pancake ingredients.

The next day, make the pancakes:

  • Remove 1 cup of Overnight Sponge to use for pancakes.  Put the rest of the sponge in the fridge as a starter for your next sourdough adventure.

For pancakes, mix in a two-cup measure

  • 1 cup of Overnight sponge (that you removed)
  • 1 egg
  • 1 teaspoon sugar
  • 1/4 teaspoon salt
  • 1/4 teaspoon baking powder
  • 1 1/2 Tablespoons vegetable oil

Each 1/3 cup of the batter will make 3 pancakes.  Stir the batter up, heat a non-stick pan and add 1 teaspoon butter – don’t skimp on the butter.  Use at least a teaspoon of butter to fry  3  or 4 pancakes – we already gave up the wheat, but nobody says we have to give up the butter!  Heat over medium high heat until the butter starts to brown.  Pour 3 or 4 pancakes and cook them until the little bubbles on the top of the pancakes pop.  Flip the pancakes carefully and continue cooking them on the other side.

Transfer the pancakes to a plate, serving them piping hot with real dark amber maple syrup – you can absolutely drown these pancakes in syrup.


Breakfast, Recipes, Vegetarian DIY, pancake, sourdough, vegetarian

Maple Pumpkin Pie, no dairy, from fresh pumpkin

0 · Jan 14, 2011 · Leave a Comment

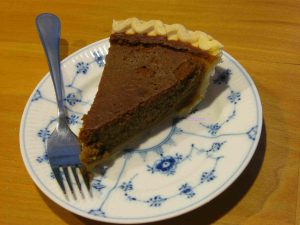
small pumpkin pie
Non Dairy, Gluten-Free Pumpkin Pie

This interesting recipe from gfzing.com has no milk, cream, rice milk or any other type of milk, is gluten free and uses fresh rather than canned pumpkin. The type of pumpkin used is the small “pie” or “sugar” pumpkin – they are sold at farm stands for the purpose of making pies. The natural liquid in the freshly cooked pumpkin is sufficient liquid and no added milk products are needed.  Do not use canned pumpkin for this recipe.

The pie is quite light, and since the only sweeteners are maple syrup and molasses the pie is not too sweet.

Ingredients:

  • 1 “pie” or “sugar” pumpkin
  • 1/2 cup dark maple syrup
  • 1/4 cup molasses
  • 3 eggs
  • 1/2 teaspoon salt
  • 1 teaspoon cinnamon
  • 1/2 teaspoon ginger
  • 3/4 teaspoon freshly grated nutmeg
  • 1 unbaked Whole Foods gluten free (gf) pie shell, thawed and cracks repaired

Preheat the oven to 450 degrees F.

Defrost the gluten free pie shell and repair any cracks.  Sometimes frozen pie crusts get broken, but you can smush the crust back together along the breaks to make a whole crust.

Next, remove the stem (just break it off) from the pumpkin and stab the pumpkin through the shell to the center in 4 or 5 places with a pairing knife – to let out steam.  You don’t need to cut the pumpkin up or remove the seeds before cooking.  Set the prepared pumpkin in the microwave oven and cook it as for baked potato (use the setting on the microwave).

Remove the very hot pumpkin from the oven using potholders and let cool completely.   Now cut the cooked pumpkin in half, use a large spoon to scoop out and discard the seeds. Then, scoop out the cooked flesh, set it aside for use and finally discard the peel.  You should have about 24 ounces cooked pumpkin (weigh the cooked flesh.)  You do not need to mash or strain the pumpkin flesh.

In a food processor, combine about 24 ounces ( one and a half pounds) of cooked fresh pumpkin (not canned) with all the rest ingredients except the pie shell.  Process until the mixture is completely smooth. Pour most of the pumpkin mixture in to the uncooked pie shell until the pie shell is filled almost to the top.  Depending on the size of the pumpkin, there may be a cup or so of extra filling.  If so, grease a small oven-proof dish and pour the excess in there.

Put the pie in to a 450 degree oven for 10 minutes, then reduce the heat to 350 and cook for another 45 minutes.  Check the pie – if the filling is set, the pie is done.  Cool and serve with your favorite pie topping.

For the extra filling, bake that along with the pie but it will be done and ready to take out of  the oven well before the pie. You can use this cooked pumpkin pie filling to make a nice pumpkin parfait, layering the cooked chilled filling with your favorite gluten free pie topping (whipped cream if you use it).

Breakfast, Dairy Free, Dessert, Fall, Microwave Cooking, Pie, Recipes, Thanksgiving, Vegetarian, Winter dairy free, gluten free, pie, pumpkin, vegetarian

Indian Pudding

0 · Dec 6, 2010 · Leave a Comment

Indian Pudding, one of the finest desserts ever invented, is a naturally gluten-free American dessert over two centuries old.  The recipes vary over the years, but the ingredients always include milk, corn meal (the “Indian meal” from which the dessert gets its name), spices and some type of sweetener.  Note that once in a while a recipe for Indian Pudding will include a small amount of completely unnecessary wheat flour. At gfzing.com, we have studied the subject at length and have 2 recommended recipes for excellent gluten free Indian Pudding – one sweetened primarily with maple syrup and one made primarily with brown sugar.  Our favorite recipes appear near the end of this article, after some historical bits.

Historical Recipes:

In American Cookery, by Amelia Simmons, published in 1796, there are 3 recipes for Indian Pudding.  The two baked versions include eggs, which later recipes for the dessert often omit.

  • No. 1. 3 pints scalded milk, 7 spoons fine Indian meal, stir well
    together while hot, let stand till cooled; add 7 eggs, half pound
    raisins, 4 ounces butter, spice and sugar, bake one and half hours.
  • No. 2. 3 pints scalded milk to one pint meal salted; cool, add 2 eggs,
    4 ounces butter, sugar or molasses and spice q. f. it will require two
    and half hours baking.
  • No. 3. Salt a pint meal, wet with one quart milk, sweeten and put into
    a strong cloth, brass or bell metal vessel, stone or earthern pot,
    secure from wet and boil 12 hours.

Table Talk monthly magazine, which billed itself as the “The American Authority Upon All Culinary and Household Topics,”  included in its September 1893 issue ten recipes for Indian Pudding (go to page 323 in this document). Some of these recipes omit the eggs, and some use the technique of mixing the hot porridge-like base for the pudding and then pouring an amount of cold milk on top, leaving the cold milk without stirring, then baking the whole dish for from 2 to 8 hours.

Now for how we actually prefer to make Indian Pudding. We like the following 2 recipes, with a preference for the one sweetened primarily with maple syrup which has a more interesting flavor than modern brown sugar.  We actually wonder if the antique recipes used a form of brown sugar more similar to jaggery, rapadura or panela – which would have had a more subtle flavor.

Maple Syrup Cookbook

by Ken Haedrich, 1989

(our preferred ingredient list)

Early American Recipes by Eloise Frost, 1953
Whole Milk 5 cups 1 quart (4 cups), scalded + 1 cup cold
Corn Meal 2/3 cup ½ cup
Sugar 1 cup grade A Amber Maple Syrup (or Grade B) 1/3 cup light brown sugar
Molasses 1 TB (we used 2) 1/3 cup
Ground Cinnamon ½ teaspoon 1 teaspoon
Ground Ginger ½ teaspoon 1 teaspoon
Dried Fruit 1 cup raisins or chopped dated (we used raisins) none
Salt ½ teaspoon 1 teaspoon
Butter 4 tablespoons 3 tablespoons

Both recipes are baked in a well-buttered 9 x13″ baking dish at 300 F; a porcelain, ceramic or Pyrex dish is necessary for the baking; for the clean-up be prepared to soak the cooking and baking dishes before cleaning. The basic cooking method is as follows.

For the maple syrup recipe, in a heavy-bottomed pot, cook the milk over medium heat until it is almost scalded, then whisk in the cornmeal, stirring all the while.  Keep whisking for 10 minutes until the porridge is thickened slightly.  The porridge will be a very, very pale yellow. Remove from the heat and use a wooden or bamboo spoon to stir in the rest of the ingredients, stirring all the while.  Give one last vigorous stir to distribute the raisins evenly and pour it in to the prepared porcelain (or Pyrex or ceramic) dish.  Bake for 2 and a half hours.  Remove from the oven, let cool for about a half hour and serve with vanilla ice cream or plain cream.

For the brown sugar recipe: Mix the scalded milk, molasses and brown sugar.  Whisk in the corn meal, salt, cinnamon and ginger. Cook, stirring constantly, for 5 minutes.  Pour in to the prepared baking dish and dot with the butter.  Bake 1 hour, then pour the cup of cold milk over the top (do not stir) and cook for 2 more hours. Remove from the oven, let cool for about a half hour and serve with vanilla ice cream or plain cream.

We hope you enjoy this review of Indian Pudding through the ages, from gfzing.com.  Indian Pudding is the best dessert ever, and deserves to return to its rightful place as a mainstay of American cooking!

Breakfast, Dessert, Fall, Vegetarian, Winter dessert, gluten free, pudding, vegetarian

Crustless Custard Apple Pie

1 · Dec 5, 2010 · Leave a Comment

In the mood for pie, but don’t want to roll out a crust?  You can use the new gluten free Bisquick to make a pie that creates its own crust.  This pie is like a gluten free French Clafoutis, but more economical because it uses cranberries instead of cherries.  The large amount of cinnamon and vanilla balances out the deeply flavorless gluten free Bisquick.

Fruit mixture ingredients:

3 large flavorful apples that hold their shape (use types like Northern Spy, Winter Banana and Roxbury Russet – do not use Macintosh) – pared, cored and cut in to pie-type slices

1/2 cup (or more) gluten free dried sweetened cranberries

1 Tablespoon fresh lemon juice

2 Tablespoons gluten free Bisquick (and you will need more later)

Custard Ingredients:

14 ounces fat-free gluten free sweetened condensed milk

1 1/2 cups water

3 large eggs

1/2 cup gluten free Bisquick

4 Tablespoons butter, melted

2 teaspoons vanilla

1 teaspoon cinnamon

1/2 teaspoon grated nutmeg

In a large deep bowl, mix the apples, cranberries and lemon juice and then stir in the 2 tablespoons of gluten free Bisquick to coat the fruit.

Preheat the oven to 350 F.

Butter a glass pie plate (10 inches, or marked 25 cm on the bottom), then spread the apple-cranberry mixture evenly in the dish.

In the now-empty bowl, mix the rest of the ingredients: condensed milk, water, eggs, 1/2 cup gluten free Bisquick, butter, vanilla, cinnamon and nutmeg. Use an immersion blender to mix these custard ingredients until smooth – about 3 minutes.  Pour this custard mixture over the apples and cranberries in the pie plate.  The dish will be very full, so take care not to spill.

Bake for45-50 minutes until the custard is cooked through and the top is browning a little.  Remove from the oven, set aside to cool. Serve cool or cold.

There will be a kind of crust that has settled out on the bottom of the pie – the texture of the “crust” will be the texture of a mochi, slightly chewy and quite intriguing.

Be sure to use all gluten free ingredients.

Breakfast, Dessert, Fall, Pie, Vegetarian apple, custard, dessert, gluten free, pie, vegetarian

Gluten Free “Slowed Down” Pumpkin Muffin

2 · Oct 13, 2010 · 1 Comment

This is a story about “slowed down food.”

We have combined the fat-free muffin with the slow food movement, to make the Slowed Down Pumpkin Muffin. The reason that these pumpkin muffins can be called “slowed down” food is because they are meant to be made with canned pumpkin and jarred applesauce, but we had neither one in the cupboard.  So, the instructions here show how you can make them using local squash and an apple, and it also takes more time to make them!  The muffins still use processed sugar, so they are not consistent with full-bore “slow food” cooking.

We won’t pretend that these muffins, which have no oil in them, are non-fat because once you have slathered your pumpkin muffin with butter, all that “no fat” stuff goes out the window!  We also make these gluten free, doubling the flavorings to combat the black hole, flavor-neutralizing quality of gluten free cooking.  Note: Some people who eat gluten free avoid bean flours such as chickpea flour, so check with your gluten free friend before using this recipe.

How to prepare the squash (pumpkin) and apple:

Find a winter squash (pumpkin, butternut, buttercup, acorn – whatever), and a baking apple.  For a baking apple, you could choose a nice big Cortland, or a Northern Spy.  In this case, we used a butternut squash (long-necked pale orange squash) and a Northern Spy apple.

Cut off a chunk of winter squash, about 12 ounces should do it.  Poke several holes in the apple with a fork.  Microwave the squash and the apple on the setting you use for baking potatoes, until they are cooked through. Cool them so that you can peel them without burning yourself.

Peel the cooked squash and apple and remove and discard the apple core and its seeds and the peelings.  Mash the cooked squash and apple separately.  You need 1/3 cup of each.  If by chance you have too much of one, and not enough of the other, simply use enough of each to yield a combined total of 2/3 cup mashed material.

Preheat the oven to 350 degrees F.

Soak 1/2 cup raisins in boiling water while you mix the batter:

Mix dry ingredients in a large bowl:

1 1/2 cups plus 1 Tablespoon Gifts of Nature gluten free All Purpose Flour Blend (INGREDIENTS: Brown rice flour, potato starch flour, white rice flour, chick pea flour, sweet rice flour, tapioca flour, xantham gum)

1 1/2 cups sugar

1/2 teaspoon each: baking powder, baking soda, salt

1 teaspoon each: ground cinnamon, grated nutmeg, ground cloves

Mix the wet ingredients in another large bowl:

Mix the 2/3 cup cooked squash and apple with:

2 eggs

Stir the wet ingredients and dry ingredients together using a fork. This will be an interesting task – at first it will appear that there is not enough liquid, but as you mix the batter it will quickly become the consistency of a proper muffin batter.

Drain the almost-forgotten raisins (throw out the water, save the raisins.)  Add the raisins to the muffin batter. Stir well.

Line 12 muffin cups with paper muffin liners.  Fill each muffin liner to the top. You may be used to filling muffin liners 2/3 full, but in this case you can fill them right to the top.  Use up all the batter for the 12 muffins. Distribute the raisins evenly, to make sure each muffin has its fair share of raisins.

Bake for 30-35 minutes until the tops are dry and the muffins seem done.  You can poke them with a toothpick – toothpick should come out dry. Take cooked muffins out of the oven – the tops of these muffins have a chewy, caramelized quality and the muffins taste great with butter.  Technically, you should allow these muffins to cool before eating.

Make sure all your ingredients are gluten free!

Bread, Breakfast, Dairy Free, Fall, Recipes, Vegetables, Vegetarian, Winter baking, cooking, food, gluten free, muffin, pumpkin, squash, vegetarian

Carrot Quick Bread

0 · Feb 17, 2008 · Leave a Comment

This is an excellent loaf cake, mostly made of fruits and nuts, with a little gluten free flour to bind it together. It is delicious and has a great texture. We used the white rice flour that you get in asian grocery stores, and the tapioca starch made by Yoki, a brazilian brand (Harina De Mandioca).
1/2 cup butter, melted
2 eggs
1 Tablespoon orange or lime juice
1 cup sweetened shredded coconut (gluten free)
2/3 cup chopped walnuts (break up the walnuts by hand or chop them)
1 cup golden raisins (golden raisins are really better than brown for this bread)
2 1/2 cups coarsely grated carrots
1 1/2 teaspoons ground cinnamon
1/2 teaspoon grated nutmeg
1 teaspoon powdered ginger
1 cup dark brown sugar
1 1/4 cup flour mix – (mix 2 cups white rice flour, 2/3 cup potato starch, 1/3 cup tapioca starch and 1 teaspoon xantham gum, stir together and use 1 1/4 cups of it, store the rest) – alternatively, use Authentic Foods GF Classical Blend plus 1 teaspoon Xantham Gum.
1 tsp baking soda
1/4 teaspoon salt

Preheat the oven to 350 degrees F. Grease a 9 x 5 loaf pan. Line the bottom with parchment paper.
In a pyrex measuring cup, melt the butter in the microwave. Remove and let cool slightly, then stir in the eggs and orange juice.
In one bowl, mix the spices, gluten free flour, baking soda, salt, brown sugar, shredded coconut and chopped walnuts. Add the raisins and carrots. Stir to make sure everything is evenly mixed up.
Stir the wet ingredients from the pyrex measuring cup in to the dry mixture that contains the fruits. Stir everything until well mixed.
The finished batter will have the consistency of a muffin batter.
Spoon the batter immediately into the prepared loaf pan, smooth the top, and bake for 60-70 minutes or until a tester comes out clean.
Cool in pan for ten minutes, then turn out to cool. Slice with a bread knife.

Make sure all your ingredients are gluten free!

Bread, Breakfast, Dessert, Fall, Recipes, Spring, Vegetarian, Winter baking, cake, carrot, gluten free, vegetarian

Pumpkin Molasses Cake with Maple Frosting

0 · Nov 24, 2007 ·

This is a gluten-free version of a pleasant old-fashioned spice cake, with the exciting addition of a cream cheese maple icing.

In a food processor, mix until smooth:

¼ vegetable oil or melted butter
2 eggs
1/3 cup molasses
1 ¼ cups cooked pumpkin, mashed and drained of excess water

        • Spread the frosting on the cooled cake.

          Make sure all your ingredients are gluten free!

      • Grease a 9 x 13 inch pan, line the bottom with parchment paper. Pour the batter into the pan and bake in preheated 375 degree oven for 35 minutes until a toothpick inserted in the batter comes out clean.

        For the frosting:

        Mix:

        8 ounces cream cheese
        2/3 cup dark maple syrup (grade B has more flavor than grade A)
        1 teaspoon vanilla

    • Add the dry ingredients to the wet ones and mix well.

      Add

      2/3 cup dry currants

  • In a bowl, mix:

    1 ½ cups brown rice flour
    ½ cup potato starch (katakuriko)
    ¼ cup tapioca starch
    1 teaspoon xantham gum
    1 cup sugar
    1 teaspoon salt
    1 ½ teaspoons baking powder (see recipe for homemade version)
    ¾ teaspoon baking soda
    1 teaspoon cinnamon
    ½ teaspoon nutmeg

Breakfast, Dessert, Fall, Recipes, Winter baking, maple syrup, pumpkin

More about Gluten free Donut Muffins

0 · May 31, 2007 ·

A while ago we did a gluten free muffin round up, and the hands down winner was the Donut Muffin recipe from Bev Lieven of Milwaukee Celiac-Sprue Crew. The combination of cinnamon and nutmeg in this recipe, plus the sugary topping, yields something very close the fast-receding memory of donuts that we used to crave. The muffins are great, and they are asked for by people who don’t have to eat gf. Now that we stop to think about that statement, is it somehow a greater endorsement that the non-gf world thinks those muffins are great? Perhaps so, because they can choose to eat regular donuts as well and don’t have to “settle” for the gf variety.

In the months since we first put the Donut Muffin recipe on the web, it has been referenced by other blogs – or “glogs” as we like to call the gluten-free websites. Meanwhile, we have been playing with the recipe to see how much refined sugar we could eliminate. We have successfully substituted 1/4 honey and 1/3 cup sugar for the original 2/3 cup sugar in the dough, and for the topping we cut the sugar down to 1/2 cup and kept the 1 teaspoon of cinnamon. We used buttermilk instead of regular milk. We used our favorite cookie flour mix for the flour. Lastly, we just mixed the dry ingredients, then dumped the wet ingredients on top and mix with a fork. These adjustments yield an equally good muffin.

Slightly Revised Donut Muffin:

Combine:

1/3 cup sugar
1 1/2 cups gluten free flour
2 teaspoons baking powder
1/4 teaspoon salt
1/2 teaspoon cinnamon
1/4 teaspoon nutmeg
1/4 tsp. xanthan gum (opt.)

Mix with a fork:

1 egg

1/4 cup honey
1/2 c. buttermilk
1/3 c. melted butter
1 tsp. vanilla

Add to dry ingredients. Mix to moisten. Fill lightly muffin pans lined with paper liners. Sprinkle w/ cinnamon sugar (Mix 1/2 c. sugar, 1 tsp.or more ground cinnamon.) Bake at 375º for 15-20 min. Makes about 11 muffins.


Bread, Breakfast, Recipes baking, donut, doughnut, gluten free, muffin

Cardamom Currant Pound Cake

0 · Apr 17, 2007 ·

Gf-Zing! has been experimenting with the 123 Gluten Free Pound Cake mix, and we have hit on an excellent set of additions. Make the mix as directed on the package but use grapefruit soda, and add 3/4 cup of dried currants, and 1 1/2 teaspoons freshly ground cardamom seeds. It is important to use freshly ground cardamom seeds. Use dried, green cardamom pods, crack them open and take out the seeds, discarding the shells. Crush the seeds in a mortar and pestle until you have a powder, and then measure 1 1/2 teaspoons.

We make the cake in an angel food cake pan, with a cookie sheet underneath on the oven shelf below to catch any drips. We dust the greased cake pan with mochiko (sweet rice) or tapioca flour. It takes 1 1/4 hours to bake.

  • The additions of currants, cardamom seed and grapefruit soda make an excellent cake. Try it with a cup of darjeeling tea!

Breakfast, Dessert, Food products, Product Reviews, Recipes baking, cake, cardamom, gluten free

Gluten Free Squash Muffins with Cranberries

0 · Jan 20, 2007 ·

Most muffin and quick bread recipes include a very large amount of sugar, producing a cloyingly sweet breakfast.  This Gf-Zing! recipe uses less sugar (and some honey), and is gluten free.
Mix Dry ingredients in a large bowl:

1 cup Bette Hagman’s Featherlight Mix, or other GF flour
3/4 cup cornmeal
1/2 cup pecan meal
1/3 cup firmly packed brown sugar
1 teaspoon xantham gum
1/2 teaspoon salt
2 teaspoons baking powder
1 teaspoon baking soda
2 teaspoons ground cinnamon

1/2 teaspoon freshly grated nutmeg
1/4 teaspoon ground cloves

Mix wet ingredients in another bowl:
1 cup fresh or canned squash, mashed
1/2 cup mango juice (or other fruit juice)
1/2 cup honey
1/4 cup vegetable oil
2 eggs or 1/2 cup egg product

Stir the two mixtures together until thoroughly mixed, then add:
3/4 cup dried cranberries or raisins

Preheat oven to 400 degrees.  Line 12-muffin pan with aluminum liner papers.  Fill liners with batter to the top.  Bake 20 minutes or until a toothpick stuck in the middle of a muffin comes out clean.

Make sure all your ingredients are gluten free!

Bread, Breakfast, Dairy Free, Fall, Recipes, Winter

Applesauce Muffins – gluten free

0 · Jan 15, 2007 · Leave a Comment

These yummy muffins were developed for the Gf-Zing! website. The large amount of cinnamon balances the blandness of rice-based flours.
Use a 12-muffin pan, and line with aluminum foil liners.

In a large bowl, mix:

1/2 cup vegetable oil

1 cup sugar

1 egg or 1/4 cup egg substitute

1 cup unsweetened applesauce *

1 teaspoon baking soda

1/2 teaspoon salt

2 teaspoons cinnamon

1 teaspoon allspice

1/4 teaspoon cloves

1 1/2 teaspoons xantham gum

Mix throroughly, then stir in 2 cups Bette’s Featherlight Rice Flour Blend (Authentic Foods makes a pre-mixed bag of this flour blend, or you can mix your own using the directions in one of Bette Hagman’s books.)

Next, stir in 1 cup dried cranberries, and 1/2 cup broken or chopped pecans. Stir to blend thoroughly.
Spoon the batter in to the muffin liners, then bake at 350 for 20-25 minutes until a toothpick comes out clean.

* If by chance you do not have any ready-made applesauce, you can make your own with a couple of apples. Poke several holes in the apples with a fork.  Microwave the apples on the setting you use for baking potatoes, until they are cooked through. Cool them so that you can peel them without burning yourself.  Remove the soft apple from the peel, discard the seeds and core, and mash away.  That’s it!

Make sure all your ingredients, including the spices, are gluten free.

Other muffins you might like:

Gluten Free Pumpkin Muffins

Coconut Almond Muffins

Bev Lieven’s Donut Muffins

Donut Muffins (lower refined sugar recipe)

Banana Maple-Pecan Muffins

*Most Popular Recipes*, Bread, Breakfast, Dairy Free, Fall, Recipes, Winter

Rice Pudding in the Zojirushi Rice Cooker

41 · Nov 6, 2006 · 1 Comment

This nice rice pudding from Gf-Zing! has large grains of rice and tart cherries to offset the sugar. The recipe is not cloyingly sweet, and is quite attractive because of the large grains of rice.

In the rice cooker, put 3/4 cup of Arborio rice, 4 cups of non-fat milk, 1/2 cup of sugar, 1/4 teaspoon of salt, 1/4 cup of dried cherries and 2 Tablespoons of slivered almonds. Set the menu to Porridge, close the top and turn on the cooker.

When the cooker switches to “keep warm,” beat 1 egg, 1 teaspoon of almond extract and 1/4 teaspoon of lemon extract in a large bowl. Add the hot, cooked rice mixture to the egg mixture, about a soup spoon at a time, and beat well with a large spoon after each addition. The reason for adding a little of the hot rice at a time is so that the egg will not cook suddenly – if it did, it would make a sort of rice pudding with hard-boiled egg bits in it – Yuck! If you add the rice a bit at a time and stir vigorously after each addition, then you will get a nice creamy rice pudding.

After this mixture cools, serve it in small bowls with heavy cream to pour over each serving. You may have to do a little counter-top clean up, if the milk comes out through the vent holes in the top of the cooker during the cooking process. We had to clean up this milky mess, but we didn’t mind because the rice pudding was so tasty!

Make sure all your ingredients are gluten free!

*Most Popular Recipes*, Breakfast, Dessert, Recipes, Rice, Winter arborio, pudding, rice, rice cooker, Zojirushi

Muffin Madness – the GF muffin Round-up

2 · Jul 31, 2006 ·

Here you will find gluten free muffin recipes that will make your breakfast choices so much more interesting! A gluten-free thank you goes out to everyone who contributed a muffin recipe.

A sampling of recipes from friendly muffin enthusiasts follows. To contribute others, please send an email to gfzing@gmail.com.

Donut Muffins Bev Lieven of Milwaukee Celiac-Sprue Crew sends in the following recipe for the ever elusive gluten-free replacement for America’s favorite deep-fried temptation – the donut. She notes: “Cake donuts were my favorite prior to my diagnosis in 1981…This recreates the taste and texture without the mess of frying.”

Combine:

2/3 cup sugar
1 1/2 cups gluten free flour
2 teaspoons baking powder
1/4 teaspoon salt
1/2 teaspoon cinnamon
1/4 teaspoon nutmeg
1/4 tsp. xanthan gum (opt.)


Mix in blender: 1 egg
1/2 c. milk
1/3 c. melted margarine
1 tsp. vanilla

Add to dry ingredients. Mix to moisten. Fill lightly “Pam-ed” muffin tins half full. Sprinkle w/ cinnamon sugar (Mix 1 c. sugar, 1 tsp.or more ground cinnamon.) Bake at 375º for 15-20 min. Makes about 1 dozen.

(Bev notes: I use non-stick muffing pans without paper liners so the edges of the muffins get crisp.)


BANANA MAPLE-PECAN MUFFIN

Theresa Brandon of Eastern Iowa Celiac’s Connect contributed the following recipe with this note: “This is the tastiest muffin recipe I have found or made. It is super moist and filling. Great with a cup of fruit for breakfast. Freezes well and is portable. And it is BIG! “

FILLING:
3 ripe Bananas, mashed
1/3 cup maple syrup
1/2 cup pecans, chopped
Mix and set aside

TOPPING:
1/2 cup pecans
1/4 cup maple syrup
Mix to get crumbly texture

MUFFINS:
2 cups GF flour mix(I use GF pantry French bread and pizza mix for mine)
1 tsp. zanthan gum
1 cup packed brown sugar
1 tsp. baking soda
1/2 tsp. salt
1 tsp pumpkin pie spice
2 Tbls. buttermilk powder
2 eggs, beaten
1/3 cup vegetable oil
1/2 cup water

Combine all dry ingredients. Make a well in the center, pour in wet ingredients. Stir with a wooden spoon until combined.

Gently fold in filling mixture. Cut in with knife. Spoon into muffin cups.

Add topping mixture.

Bake at 375 degrees for 20 minutes.

Makes 15 large muffins.

Bread, Breakfast, Fall, Recipes, Spring, Summer, Winter

Blueberry Coffeecake Gluten Free

0 · Jun 6, 2006 ·

This recipe for a beautiful blueberry crumb coffeecake was developed for the Gf-Zing! website, which celebrates flavor in the gluten free world.

Make topping:

Mix 1/2 cup sugar, 1/4 cup softened butter, 1/3 cup Gluten Free Cookie Flour or GF pancake mix, 1 teaspoon cinnamon – mix thoroughly and set aside.

Batter:
Cream together:

1/4 cup butter
3/4 cup sugar
1 egg
1/2 teaspoon almond extract
1 teaspoon vanilla extract
1 teaspoon xantham gum
1/4-1/2 teaspoon salt
2 teaspoons baking powder

Add 2 cups Gluten Free Cookie Flour

Then stir in 1/2 cup milk.

Stir the batter thoroughly, then add 2 cups fresh or frozen wild blueberries and stir gently just to mix. If you mix too hard, the batter will turn blue throughout. If the blueberries are still frozen that is ok.

Spoon the batter into a greased, lined (use parchment paper to line the bottom), 8×8 or 9×9 inch pan. Sprinkle reserved topping on the top. Bake at 375 for 40-50 minutes. Stick a knife in to the middle and if the knife comes out clean the cake is done.

Serve warm or cold.

Make sure all your ingredients are gluten free.

Bread, Breakfast, Dessert, Recipes

Raspberry Crumb Coffeecake

0 · Jun 4, 2006 ·

Grease an 8 or 9 inch spring-form pan with removable bottom.

Preheat oven to 350 degrees.

Make crumbly topping and reserve. Mix 4 Tablespoons butter, 1/4 cup gluten free cookie flour mix, 1 teaspoon gluten free cinnamon, and 1/4 cup sugar until crumbly. Set aside.

In your food processor, mix until smooth:

1/4 cup butter
2/3 cup confectioner’s sugar
1/8 teaspoon salt
1 teaspoon vanilla

Add and mix until smooth:

1 egg
6 Tablespoons milk
2 Tablespoons freshly squeezed lemon juice

In a bowl, mix:

1 1/4 cups gluten free cookie flour mix
1 teaspoon xantham gum
1/2 teaspoon baking powder
1/4 teaspoon baking soda

Add to the wet mixture and mix thoroughly.

Spread half of the dough on the bottom of the prepared pan. Then cover this dough layer with 1/2 cup of raspberry preserves, spread thinly. Top this with the rest of the dough mixture, spreading it carefully over the preserves. Now sprinkle the reserved crumbly topping on the top.

Bake the coffeecake at 350 degrees for 45 minutes or so, depending on the size of the pan, until a knife inserted in the center comes out clean. Remove it from the oven, run a knife around the sides and remove the sides. Serve warm or cool.

This recipe is based on a recipe from Cooking Light magazine, and adjusted for gluten free cooking by Gf-Zing!

Make sure to use all gluten-free ingredients!

Breakfast, Recipes

Coconut Almond Muffins – gluten free

0 · May 28, 2006 ·

Preheat oven to 350, and line 10 muffin cups with paper liners.

Despite the unlikely looking list of ingredients, these muffins turn out great! The recipe is from the Gf-Zing! website.

Stir together the dry ingredients in a large bowl:

1 1/2 cups almond meal
3/4 cup sugar
1/2 cup shredded coconut
1/2 teaspoon xantham gum
1/2 teaspoon Authentic Foods powdered gluten-free vanilla
1 teaspoon gluten free baking powder
1/4 teaspoon salt

Add the following liquid ingredients and stir well with a fork:

2 Tablespoons extra light olive oil
1 teaspoon almond extract
2 large eggs
(if you don’t have powdered vanilla, add 1 teaspoon vanilla extract here)

Put a heaping tablespoon of dough in each of ten paper liners (the dough will not quite come up to the top of the liner.)

Bake at 350 degrees for 20 minutes or until a toothpick inserted in the muffin comes out clean. The muffins will rise, and they will get brown on the top.

Eat the muffins while they are still warm, with some sweet butter and a cup of decent coffee. Enjoy your muffins!

Make sure all the ingredients are gluten-free!

Bread, Breakfast, Dairy Free, Recipes

Chocolate Chip Muffin Mix

0 · Mar 19, 2006 ·

This review is by Gf-Zing! , which celebrates flavor in the gluten free world.

At first we were skeptical about chocolate chip muffins, but forged ahead after assurance from the teenagers that chocolate chip muffins are a good thing! The Chocolate Chip Muffin Mix from Authentic Foods is easy to mix up and bake – from bag to cooling rack in 30 minutes.

The generous chocolate chunks included in the mix are large and they taste like chocolate – this may seem like a silly thing to say, but sometimes chocolate chips made for the allergy market taste like nothing – not sure why that is, but that is a fact that will be confirmed by world-weary gluten-free consumers. In contrast, the chocolate chunks that the Authentic Foods company uses in their chocolate chip muffins are nice and flavorful.

We made the muffins including the optional 1/4 teaspoon of cinnamon mentioned in the directions, and tried the muffins warm, and they were good warm, but we prefer them the next day, with a cup of coffee (we added a half teaspoon of cinnamon to the coffee grounds during the brewing). After drying out over night (left uncovered on the counter where the dog couldn’t get them,) all rice-i-ness disappears, and the muffins acquire a chewy quality that adds an extra dimension of interest, while the plentiful chocolate chunks combine nicely with the hot coffee. After a second day, kept in a Ziploc bag, they still provided an excellent breakfast with hot coffee. Love those big chocolate chips!

A Gf-Zing! recommended product.

Note: Here at Gf-Zing! we do not verify the gluten-free status of any product. We rely on the manufacturers to declare the status of their products. It is up to the reader to check labels, and to verify that the products they consume are safe for them to use.

Breakfast, Food products, Product Reviews

Lemon Almond Pound Cake – gluten free!

0 · Mar 10, 2006 ·

This recipe was developed by Gf-Zing! , which celebrates flavor in the gluten free world.

When using non-wheat flours, cooks have to up the ante on flavorings. Here, the lemon extract in the original recipe is enhanced with fresh lemon zest, vanilla and some salt.

In a food processor, using the chopping blade, whir together:

1/2 cup white sugar
1/2 cup brown sugar
1/2 teaspoon salt
grated zest of 1 lemon

Add and whir it some more until smooth:

1 stick butter
1/2 cup full fat cream cheese (use half of an 8 ounce package)
1 teaspoon lemon extract (we used a lemon extract with a base of sunflower oil)
1 teaspoon vanilla extract (or less if using Authentic Foods powdered vanilla)
1 teaspoon baking powder

Add one at a time and whir until smooth:


5 large eggs

Lastly, add 2 cups of almond meal, and keep mixing until smooth and combined. Scrape down the sides as necessary to make sure everything is mixed together.

Grease and line a 9″ spring-form pan with parchment paper, then grease the paper. Pour the mixture immediately into the prepared pan. The batter will have the consistency of thick pancake batter. Bake at 350 degrees for 55-60 minutes. The cake will not rise a great deal. Let cool for ten minutes in the pan, then remove from the pan and cool completely on a rack.

If you use a bundt pan, you may find that this is a challenging cake to remove from the pan.

Make sure all your ingredients, including the cream cheese, are gluten free!

Breakfast, Dessert, Recipes, Spring, Winter

Gluten Free Sandwich Bread

1 · Mar 6, 2006 ·

This hearty, gluten free sandwich bread recipe includes cinnamon and currants. It is outstanding for chicken salad or grilled cheese sandwiches – very similar to a whole wheat bread. This recipe was developed by Gf-Zing! , which celebrates flavor in the gluten free world.

In one bowl, mix and set aside:

3 large eggs
1 teaspoon lemon juice
1/4 cup extra light olive oil
1 1/4 cups very warm water
1 package fast-rising gluten-free yeast
3 Tablespoons brown sugar
1/2 cup dried currants

In a mixer bowl, combine:

1 cup white rice flour
1/4 cup almond meal
1/4 cup rice bran
1/4 cup dark buckwheat flour (buckwheat is not wheat)
1/4 sweet brown rice flour or mochiko
1/2 cup potato starch (different from potato flour)
1/2 cup tapioca starch
1/3 cup cornstarch
1 Tablespoon xantham gum
1 Tablespoon gluten free cinnamon (it sounds like a lot, but 1 Tablespoon is correct)
3 Tablespoons white sugar
1 1/2 or 2 teaspoons salt
1/4 cup buttermilk powder

Oven at 350. Grease a 9×5 loaf pan, and line the bottom with parchment paper and grease the paper.

Combine the mixtures from the two bowls. Mix well – the dough will become the consistency of a thick muffin batter. Dump it into the prepared pan, and smooth out the surface with a rubber spatula. Set the pan aside in a warm place until the dough is risen to the level of the top of the pan (doubled), which can take one and a half to two hours. Bake for 60-80 minutes until the bread reaches an internal temperature of 205-210 degrees. Allow to cool for 30 minutes in the pan, then remove to a rack and cool completely before slicing.

This bread can be sliced quite thinly (1/4-1/3 inch). When the loaf is completely cool, slice it and store the slices in bags in the freezer to be removed individually as needed for toast or sandwiches. The currants add a nice tangy flavor to chicken salad sandwiches or grilled cheese sandwiches.

Make sure all your ingredients are gluten free.

Bread, Breakfast, Recipes

Cranberry Orange Walnut Quick Bread

0 · Mar 2, 2006 ·

It is up to the individual to decide whether they can eat oats or not. To eat oats or not is a controversial issue in the gluten free world. Please research the oat issue carefully for yourself, and decide what you want to do in consultation with your healthcare professional. If you are feeding a gluten-free guest, please inquire whether they eat oats or not. You may substitute dried coconut for the oats in this recipe. This recipe was developed by Gf-Zing! , which celebrates flavor in the gluten free world.

2 cups gluten free cookie flour
1 cup rolled quick or old-fashioned gluten free oatmeal, uncooked or oat substitute
3/4 cup sugar
2 teaspoons gluten free baking powder
1/2 teaspoon baking soda
1/2 teaspoon Authentic Foods powdered gluten free vanilla
1/2 teaspoon salt
1 teaspoon xantham gum

3/4 cup orange juice
1 teaspoon almond extract
2 eggs
1/3 cup extra light olive oil
grated zest of one orange
3/4 cup chopped dried cranberries
1/2 cup chopped walnuts

Mix the first 8 ingredients in one bowl, and mix the second 7 ingredients in a second bowl. Grease a 9×5 inch loaf pan, line the bottom with parchment paper, and grease again. Flour the pan lightly with mochiko (sweet rice flour).

Combine the contents of both bowls and stir briefly just until thoroughly blended. Spoon the dough in to the prepared pan. Bake at 350 degrees for 1 hour to 1 hour and ten minutes. When a toothpick inserted in the center comes out clean, the bread is finished.

Remove the pan from the oven and let cool on a rack for one hour. Turn the bread out of the pan and let cool completely before serving.

Make sure all your ingredients are gluten free, and investigate the oat issue and the source of the oats and ask your medical professional for their advice regarding this topic before eating oats.

Bread, Breakfast, Christmas, Dairy Free, Dessert, Fall, Holidays, Recipes, Thanksgiving, Winter

Sour Cream Apple Pecan Cake

0 · Dec 31, 2005 ·

Since we can’t have gluten, why not have some vanilla ice cream with our breakfast instead? This cake is good, with or without added vanilla ice cream. It is pretty darned sweet – not so sweet that it makes your teeth hurt, but almost.

Mix in a food processor, and then transfer to a large bowl:

2 cups gluten free cookie flour
1/2 cup (1 stick) unsalted butter
2 cups dark brown sugar
1 cup finely chopped toasted pecans (toast them in a 300 degree oven for 10-15 minutes, cool, then chop)
1/4 teaspoon xantham gum

Remove 2 3/4 cups of this mixture and pat it evenly into an ungreased 9×13 inch baking pan. Set aside.

To the remaining dry ingredients, add the following and combine thoroughly:

2 teaspoons gluten free cinnamon
1 teaspoon baking soda
1/2 teaspoon salt
1 cup gluten free sour cream
1 teaspoon gluten free vanilla
1 egg

Lastly, to this mixture add:

2 cups finely chopped apples (peel first)

Carefully plop spoonfulls of this mixture over the stuff that is in the 9×13 pan that you set aside earlier. Spread the gooey dough carefully over the dry layer.

Bake for 30-35 minutes at 350 degrees until a toothpick comes out clean. Cool in the pan, then cut in large squares and serve it slightly warm with gluten free vanilla ice cream. At the time of this writing, Haagen-Dazs claims gluten free status for its vanilla ice cream, but the consumer must check frequently to see if the company has changed their formulations.

Note: The bottom “crust” improves the structural integrity of this cake, and produces an interesting textural contrast.


Always use all gluten free ingredients!

Breakfast, Dessert, Fall, Recipes, Winter

  • Go to page 1
  • Go to page 2
  • Go to Next Page »

Primary Sidebar

Check out our Coupon Collection

Click Here to go directly to the Coupon page

Read more at The Rambling Epicure:

Click Here: The Rambling Epicure

QR code for your phone

qrcode for gfzing
NFCA logo

Blogroll

  • Aloha World Ono Recipes
  • Book of Yum
  • Dulce Cocina sin Gluten
  • Gluten Free Beer Association
  • Glutenfreie Rezepte | kaMehl
  • Hawai'ian Electric
  • Laylita's – Ecuador
  • Nombudsman
  • Papilles et Pupilles
  • Sea Salt with Food
  • The Rambling Epicure The Rambling Epicure is a daily international food chronicle, and the first online newspaper to follow global food trends and news.
  • Triumph Dining

Monthly Archive

Proud member of FoodBlogs

Load up on new recipes, exclusive goodies, + more!

Get the exclusive content you crave straight to your inbox.

Things to Read

Find by keyword

bacon baked baking beans beef berries blueberry cake cheese chicken chocolate coconut cooking curry dessert DIY dried beans easy fish food fruit GF ghee gluten free gourmet homemade lamb maple syrup meat microwave New England Hard Cider pie pork pumpkin recipe recipes rice salad sauce soup stewed strawberries sweet potato thai red curry vegetarian

Copyright © 2023 GF-Zing! on the Cravings Pro Theme