• Skip to primary navigation
  • Skip to main content
  • Skip to primary sidebar
  • Skip to footer

GF-Zing! logo

  • Home
  • Coupon Collection
  • GF Foods & Groups
  • Ask Gf-Zing!
    • About the Author
    • About Gf-Zing!
  • Nav Social Menu

    • Email
    • Facebook

A Sausage Walks in to a Bar…

1 · May 3, 2012 · Leave a Comment

By Alice DeLuca

A story for carnivores

Assador - Alice DeLuca 2012 digimarc
Assador - for roasting sausages

This whole adventure started with a search for the perfect sausage to use in a recipe for pork with clams, which led to a little ceramic pig, and ended up with a truly excellent party. This cute little piece of specialty cookware, which looks like footwear for some impossible outer-space monster, is in fact designed for brazing sausages over flaming, hi-octane Portuguese liquor.  As we learned the purpose and the method for using this device, we became completely distracted from our original mission and found ourselves planning a sausage-roast.

Linguica roasting - Alice DeLuca 2012 digimarc
Linguiça roasting over flaming aguardente

First, we had to obtain the little pig dishes from Portugal – that was easy and took only a few weeks. As soon as the dishes arrived we set about making home-smoked sausages and invited some guests to come over and roast them with us – RSVPs were instantaneous and none declined the invitation.

The sausages that are required – linguiça or chourico – are not easily found freshly made in the grocery store; the smoked sausages you do find are often laminated in plastic, oozing a creepy slime when opened, delivering a texture of rubber bands with what seem like bits of potato thrown in – the bits are the fat but for some reason completely unlike the fat in a homemade sausage.  If these laminated sausages are the only smoked sausage you have ever known, then you must find some real, home-smoked sausages, or make your own.  With pork shoulder and a few other ingredients, a good old-fashioned meat grinder, and some type of smoker, you can have a plate of these sausages to set fire to with your friends.
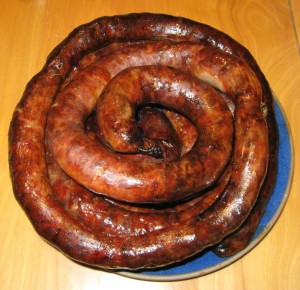
Linguica on Heathware plate - Alice DeLuca 2012 digimarc
Vermillion Linguica looks stunning on blue Heathware plates!

People have been making sausages and brazing them since the dawn of time.  You can follow the accurate but brief instructions provided in the Ancient Roman De Re Coquinaria of Apicius (published by Walter M. Hill, 1936). Here, the proper color of smoked sausages is described perfectly – vermillion – a nearly forgotten word and color that deserves to make a comeback.  Vermillion is the color of notoriously poisonous cinnabar, which is a substance with an interesting history of its own.  Take a look at cinnabar on dolomite and you will see that the Romans have described the color of smoked sausage precisely in the recipe for Cirellos isiciatos, Round Sausage.

“Fill the casings with the best material [forcemeat]. Shape the sausage in to small circles, smoke. When they have taken on vermillion color, fry them lightly.”

The Recipe

To make linguiça, we chose “the best material” – a simple formulation with garlic, paprika and sweet rosé wine because pork is so often excellent with sweet, fruity flavors.  Sausages of this type sometimes include oregano and vinegar, but this recipe “LINGUICA PORTUGUESA A’LA ANA“ is more delicious than those, perhaps because of the sweet rosé.  The sausage ingredients are posted here with permission from AnaCatarina Louro Ferreira Alves, who generously provides the recipe to the world on her blog: http://anydaysoiree.com/

5 lbs. ground pork butt
3 Tb. paprika (not smoked)
2 Tb. fine minced garlic
3 Tb. salt
1 cup sweet rosé wine
1 tsp. sugar
1 Tb. black pepper

A sliced lemon for soaking the hog casings

Apple wood for smoking

Hog Casings – for stuffing – about 2 or 3 feet of casing per pound of meat


Concerning the Meat and its Preparation

Start out a day or two before you want to eat the sausage, to complete the marinating phase.

In an agrarian economy, the seasonal time for making sausage was in the fall when a hog was slaughtered; everyone hurrying to preserve the large quantities of meat for the long winter. Smoked sausage was a hedge against starvation.  In the modern, refrigerated world, sausage can be made year-round and is a reason for a party! When making sausage at home, be careful to use safe food-handling techniques, clean equipment and clean hands at all times.  Note that the Latin root of the word “botulism” is the word for sausage – botulus.  That is not a coincidence. Study the conditions under which food pathogens can replicate and then avoid those conditions.

To obtain several pounds of ground pork for sausage, purchase a “pork shoulder” weighing over 9 pounds. Very carefully remove the skin from the pork shoulder (not used in the sausage), slice the meat from the bone with a boning knife, and cut the meat in to large chunks. The foundation of the pork shoulder is a complex articulated joint, so extreme care must be exercised when wielding the boning knife.  How do orthopedic surgeons ever actually manage a functioning joint replacement?

Save the bone to cook with dried beans.

After cutting the meat from the bone, modern cooks might be tempted to eliminate and discard all the fat, but the fat and connective tissue are the keys to great flavor.  Remove the fat and you surely will create disappointing, dry sausage like the last bit of an overcooked turkey breast that’s been loitering on the platter way too long after the Thanksgiving dinner. To make a good sausage, fat is required.

Marinating

Weigh the boned meat and season it with proportional amounts of the paprika, fresh garlic, salt, Portuguese rosé wine, sugar and pepper called for in the recipe.  We had 6 pounds of meat, so we increased the seasonings proportionally.

Stir together the spices and wine, then mix in the chunks of meat – and commune with the ancestors who were marinating meat for millennia. Judging from 18th century engravings, the ancestors seemed to have had cats, chickens and dogs running around under the table during the sausage-making process, not the ideal situation for food preparation.  Perhaps it is wise to banish the cats, dogs and chickens to the yard, before proceeding.

Unlike ancient peoples, we refrigerate the marinating meat and keep it cold during the remainder of the 1-2 day process.

Grinding

After marinating the meat under refrigeration, grind or chop it in to small pieces.  There are many different types of grinding devices available.  Whichever method you use, your goal is to produce small bits but not a paste – one of the principle differences between a sausage and a lowly hot dog is the consistency.

The mechanism of the old-fashioned meat grinder is an Archimedes screw.  Archimedes of Syracuse, c. 287 BC – c. 212 BC, is credited with the invention of the screw conveyor which has been used since antiquity to move water uphill from one place to another. In a meat grinder, the screw is carrying the meat from one place to another (from the hopper to the blade.)

We use a Magimix food processor for chopping meat, working with a small amount of the meat at a time (maybe a half pound) and using the “pulse” feature – intermittent chopping – as noted in the directions that came with the machine.  This works very well. Many older-model food processors would grind the meat too finely.

If you have an old fashioned meat grinder, use the blade and the coarsest disk.  Again, a great opportunity for living the life of the ancestors presents itself.  The sinews can clog up the disk, requiring frequent cleaning, We use our old-fashioned grinder mostly for stuffing the sausage casings. The grinder clamps to the table and can be easily removed, cleaned and stored.

Another style of meat grinder is screwed permanently to the table.  We can’t see how this would be practical unless you grind things every day or perhaps enjoy the aesthetic and conversation-piece value of the thing – “Let us show you our newly renovated kitchen with built-in meat grinder….”

The other meat grinder that makes no sense is the kind that suctions to a smooth surface. This seems impractical because of the amount of force required to grind meat, and because suction devices usually cease to function correctly despite being adhered to a glass-smooth surface.  How many times has the suctioned soap dish fallen in the shower, or the GPS device toppled in to the automobile?

One way or another, chop the marinated meat in to small bits, then chill it while you prepare the casings.
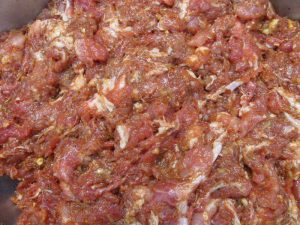
Linguica chopped and seasoned  -Alice DeLuca 2012 digimarc
Marinated meat, chopped and ready for stuffing

Preparing the Casings

The next step will be preparation of the hog casings.  For unknown reasons, hog casings, if you are lucky enough to find any, are usually on the top right hand corner of the supermarket shelf that houses ham and pork products.  In a plastic tub or sometimes a plastic bag, the “casings,” which are really cleaned intestines, are packed in salt.  Years ago, hog casings had a distinctive funky odor but recently purchased hog casings have had no odor whatsoever.  We were surprised to find that packages of hog casings come from all over the world – it is interesting to read the label on the package.

Soak the hog casings (3 feet for every pound of meat) in warm water with a sliced lemon for 30 minutes to soften and desalinate the casings, then run water through them to ensure they are clean (discard the lemon slices).
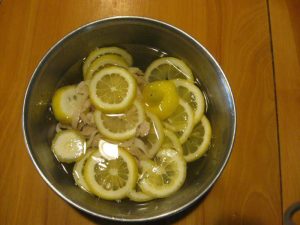
Soaking Hog Casings - Alice DeLuca 2012 digimarc
Sausage casings soaking with aromatic lemon slices

As the water runs through, marvel at the structure and strength of this wonderful material.
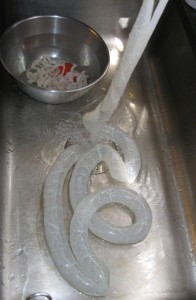
 

Cleaning Sausage Casings - Alice DeLuca 2012 digimarc
Rinsing the sausage casings

One of the many remarkable things about sausage casings, or intestines in general, is how terrifically strong they are.  They have been used for millennia as string and thread, and as strings for musical instruments.  The 120 foot intestine of a cow is formed in to harp strings and then, under enormous tension the strings are plucked to produce musical notes; Gut is used by surgeons to sew up wounds, and by tennis players to string their rackets so they can slam balls in to the ground at upwards of 70 mph.


Stuffing
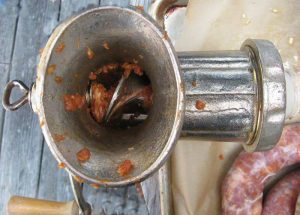
 

Archimedes Screw - sausage grinder - Alice DeLuca 2012 digimarc
An Archimedes screw moves meat through a grinder

It is much easier and more fun to stuff sausage with two people working than all by yourself.

Use a meat grinder to stuff the sausages.  You need 3 feet of hog casing per pound of sausage, allowing for a little extra at each end of the sausage.  Remove the blade and grinder disk and attach a sausage stuffing funnel. Slide a length of hog casing on to the funnel.  Now put the seasoned sausage meat through the grinder, turning the handle slowly and steadily with one hand and easing the meat in to the casings with your other hand. The meat goes in to the hopper and comes out in to the casing.  When the casing is nearly full (with 6 inches of empty casing remaining) remove the sausage from the funnel and start on the next sausage. Don’t complicate your life by trying to tie knots in this sausage.  Just set the filled sausages aside to chill in the refrigerator until it is time to smoke them.


Linguica stuffing - Alice DeLuca 2012 digimarc
The sausage stuffing funnel is efficient!

Smoking

Part of the reward for making your own smoked sausage is aromatic.  The scent of smoked sausage would tame the wild wolf and bring him to your doorstep; it would make the wolf volunteer to be the captive family dog if only he could have some of this delicious meat.[i]  (As expected, both our tame dog and cat became increasingly animated while the sausage was smoking, and eventually they were invited to retire indoors.)

Follow the instructions on a smoker, and use apple wood for the smoke.  Check the internal temperature of the smoker to insure that it is hot enough to do the job safely.  We used a Primo ceramic grill to smoke the sausage, paying careful and regular attention to adjusting the vents, and maintaining a higher temperature than recommended in the original recipe – just below 200° F.  We chose to smoke the sausage until the internal temperature of the sausage was 170° F, which took approximately 3 hours.  We recommend that any home cook do their own research to determine a safe process.  The FDA provides some guidance on this.  When completely smoked, the color of the sausages will be a deep red vermillion. The sausages are not preserved by this smoking – they are merely cooked through.  From this point on, they should be preserved like any other meat – in cold storage for a few days or in the freezer for a longer period of time.

Do the homemade sausages look dry to you?  That is the miraculous thing about real smoked sausage – although the exterior of the sausage is dry, the interior is just right – juicy and delicious.  As a reward for your labor, taste a few slices before you put them away to chill.


Setting Things on Fire

Roasting sausages over flaming cheap brandy is a social form of cooking, an adventure to be shared with brave and hearty friends who enjoy hazardous adventure and are willing to take responsibility for their own actions. Perhaps you could have your guests agree to a “Safe Sausage Disclaimer”:

“I recognize that consuming homemade sausage is fraught with danger and I am willing to fully assume all the risk and untold horrors so I may experience real food.”

We used a little parade of two “assadors” to roast our sausages.  For fuel, we used inexpensive aguardente, lighting the flame under the sausages with foot-long matches and keeping a fire extinguisher available nearby. (Incidentally, we are intrigued to learn more about the high-walled linguiceira shown at the Borderless Cooking blog. It appears immune to the windy conditions that prevailed during our party.)

Place the assador on a heat-proof surface, preferably in a location that is not windy. Pour a pool of aguardente in to the assador.  Using a long match, set the aguardente ablaze without setting anything else on fire. Cut off pieces of sausage to fit the assador and place them on the racks over the flames. As the sausage cooks, some of the fat melts in to the cooking device and fuels the alcohol-based fire, and as this happens the flame goes from blue to yellow and the sound of sizzling fills the air.  The blue flame from burning alcohol is cooler than the ensuing yellow flame from the burning fat. The cooking process speeds up as the flame turns yellow and gets hotter. Turn the sausages carefully with tongs, and make sure to cook them until they are blackened.  Remove them from the flames too soon and the interior will be dry and hard.  Keep cooking the smoked sausages until they are crisped up on the outside, and the fat is melting on the inside.  One of our assadors acquired a small crack during the roasting party, so again, take precautions and take good care.

Video:

Linguica roasting over aguardente

We poured a rosé with the linguiça, to match the flavoring component of the sausage.  A dry, hard cider and beer were also fine accompaniments, along with a Colombian bean dish, a selection of cheeses including the outstanding Winnimere cheese from Jasper Hill Farm in Vermont, and a fine green salad supplied by some excellent cooks among the company at the table.  We ate, as the Hawaiians say, until we were tired.

Notes for further study: There are other versions of this type of sausage brazing grill – This one uses skewers, for example.  This one shows a much deeper, sturdier cooker  which we are interested in acquiring, in case anyone knows where to get one. Here is a video recipe that shows grilled linguiça as a garnish for a small soup.


[i] Read: The Cat That Walked by Himself, by Rudyard Kipling: http://www.gutenberg.org/files/2781/2781-h/2781-h.htm#2H_4_0011

Dairy Free, Fall, Holidays, Meat Dishes, Meat-eater, Recipes, Spring, Summer, Winter, with New England Hard Cider aguardente, assador, DIY, homemade, linguica, pork, sausage

Baked Gluten Free Chicken Burgers

0 · Jan 11, 2012 · Leave a Comment

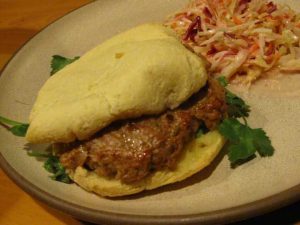
Chicken Burger from Gfzing dot com


Read a Southeast Asian cookbook and you will likely come across a recipe for meatballs including baking powder.  Baking powder is an oddball ingredient for those of familiar with western meatballs, so I thought I had better give it a try.

I made two attempts.  The first, using a recipe from A Vietnamese Kitchen by Ha Roda, and the second using a chicken burger recipe from one of my very favorite new cookbooks, Poulet – More Than 50 Remarkable Meals that Exalt the Honest Chicken, by Cree LeFavour.  The recipes in this book are easily adaptable for the gluten free community.

Based on experimenting with a modified version of Cree LeFavour’s Phuket Beach Cart Sandwiches, I am recommending the baking powder addition to meatballs and burgers for those of us who use low fat meats and poultry to make burgers.  The result is juicy and interesting! (I always grind meat or poultry when making balls and burgers; using good quality meat to start out with yields a tastier ground product, and you know for sure what went in to the bowl).

My instructions to grind your own spices may seem silly until you catch a scent of the amazing, lemony coriander blasting out of the mortar as you grind. It is worth the tiny moment of your time and the little bit of muscle that is required, just to have this aromatherapy experience.

Grind in a mortar and pestle:

  • 1 teaspoon whole coriander seeds – Pow!

Put the ground seeds in a food processor and add:

  • 2 pounds of boneless chicken thighs
  • 1/2 or 1 dry cayenne pepper (LeFavour uses 2 or 3 habanero chilies but even 1 was too spicy for us)
  • 1/3 cup gluten free fish sauce – check the label
  • 1 Tablespoon sugar
  • 2 teaspoons baking powder
  • 1/2 teaspoon ground cinnamon – (grind some cinnamon stick in a mortar and pestle – such a sweet smell!)

Zap all these ingredients together in the food processor until smooth.  Shape 4 patties using wet hands.

This amount of mixture will yield four absolutely enormous burgers, each one almost 2 inches thick after baking.  I found it practical to make the four giant patties, put them on a parchment lined baking sheet and bake for 30 minutes at 350 degrees.  Check the interior temperature so it reaches 175 degrees in at least 2 places, then when the burgers are cooked through slice each one horizontally in half to yield 8 burgers.

LeFavour recommends serving the burgers on buns with fresh cilantro leaves (instead of lettuce) and a sambal mayonnaise, with a side of carrot and mung bean salad.

I used buns made from Pao de Quejo Brazilian Cheese bread dough (Chebe makes a gluten free mix that works well for these buns, each package yielding 4 buns that are 4-5 inches in diameter),  fresh cilantro, and a sauce made from equal parts of mayonnaise and gluten free Thai sweet chile sauce with a very small amount of gluten free chile paste with garlic.  Serve with a side of gluten free coleslaw.

LeFavour toasts the hamburger buns she uses, but instead we used the Pao de Quejo right out of the oven, split horizontally.

This is a delicious, juicy burger experience from a highly recommended cookbook – Poulet by Cree LeFavour!

Cookbooks, Fall, Lunch, Meat Dishes, Meat-eater, Product Reviews, Recipes, Spring, Summer, Winter baking powder, burger, chicken, gluten free, meatball

Spicy Sticky Cherry Blueberry Sauce for Ribs

1 · Jun 27, 2011 · 1 Comment

This nicely balanced 100% gluten free spicy, sweet and sour sauce from gfzing.com will go perfectly with barbecued ribs.

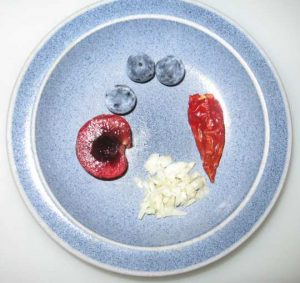
The ingredients are ideal for late June and early July:

First, in a non-stick pan, caramelize

  • 1/4 cup sugar
  • 1 teaspoon vegetable oil
  • 1/3 teaspoon salt

To caramelize, cook the mixture over low heat, stirring all the while, until the sugar clumps together in little lumps and then gradually melts in to a brown pool.

Add:

  • 1 clove garlic, peeled and minced
  • 1 dried cayenne pepper, chopped (about 1/2 teaspoon red pepper flakes)

Cook for just a few seconds, then

Carefully deglaze the pan with

  • 6 TB high-quality red wine vinegar (homemade is best)

There may be some spattering when you add the vinegar, so step back a bit and use a long-handled spoon to stir!

Stir constantly and when the sugar mass is nearly dissolved, add

  • 1 cup halved, pitted fresh bing cherries
  • 1/2 cup whole fresh blueberries

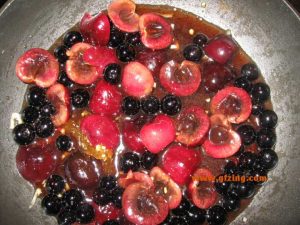
Cherry Blueberry Sauce plus fruit gfzing dot com

Raise the heat to medium and cook to thicken a bit, about 4 minutes.

Last, refresh the sauce with

  • 2 cloves of garlic, peeled and minced

Stir briefly and set aside.

Serve with barbecued ribs, duck or chicken.  In the winter, serve a similar sauce, using other fruits in season, for a roast dinner.

Condiments and Sauces, Fall, Meat Dishes, Meat-eater, Recipes, Spring, Summer, Uncategorized, Winter fruit, GF, meat, ribs, sauce

Gluten Free Reuben Sandwich

0 · Jun 1, 2011 · 1 Comment

gfzing reuben sandwich

A craving for a gluten free Reuben Sandwich (Grill) sent me to the local supermarket in search of corned beef, sauerkraut, swiss cheese, dressing and gluten free “rye bread” since I have not made some.  Well, of course disappointment awaited, since they carry no gluten free corned beef at the store.  How is it possible to put wheat in corned beef?  It’s meat, right?  Sliced meat.  Of gluten free rye bread, there was none.

A few compromises later, and I had a decent sandwich that had much in common with a Reuben sandwich.  The following is a very good sandwich in its own right, and the directions show how to obtain the melted cheese and hot interior of a fine sandwich, despite the remarkable insulating qualities of gluten free bread.

Ingredients:

2 slices Rudi’s gluten free Cinnamon Raisin Bread

2 teaspoons butter

2 thin slices baby swiss cheese

2 thin slices gluten free deli barbecue chicken (check the label on the Dietz & Watson brand which at this writing was labeled gluten free)

Sauerkraut (check the status on refrigerated Ba-Tampte New Kraut which at this writing was labeled with these ingredients: Cabbage, Water, Vinegar, Salt, Sugar, Less Than 1/10 of 1% Benzoate of Soda, Sodium Bisulfite).

1 TB gluten free Thousand Island dressing (check the status of the Wishbone brand which at this writing was labeled gluten free.)

Melt the butter in a frying pan on medium low heat.  Put the two slices of bread in the melted butter to coat one side of each slice.  Turn off the heat and set the bread aside.

Drain 2 TB of the sauerkraut, place it in a microwavable glass dish and microwave for about 1 minute until hot. Set aside.

Put one slice of buttered bread, butter side down, in the pan.  Coat the top side of that slice with Thousand Island dressing. Lay the 2 slices of cheese and the 2 slices of chicken on top.  Cover with the other slice of bread, butter side up.

Turn the heat to medium low, and cover the pan.  The goal here is to brown the bread without burning the raisins. Fry the sandwich for about 1 minute (check to make sure the bread toasts but doesn’t burn).  When the bread on the bottom is brown, flip the sandwich and cook for 1 minute (covered) on the other side.  When both sides are toasted, transfer the sandwich to a microwavable plate.

Open the sandwich and add the pre-heated sauerkraut. Close the sandwich.

Microwave the sandwich for 1 minutes until the cheese melts.  (Adding the microwave step is the key to melting the cheese when using gluten free bread). Slice the sandwich in two pieces and serve!

Make sure that all your ingredients are gluten free!


Bread, Fall, Lunch, Meat Dishes, Meat-eater, Recipes, Spring, Summer, Winter cheese, meat, sandwich, sauerkraut

Braised Lamb Shanks with pepper and Green Peas

0 · Jan 18, 2011 · Leave a Comment

This rich, delicious dish is based on one for North African-Influenced Lamb Shanks with Couscous by Emeril.  We have added more vegetables, and removed all the gluten.

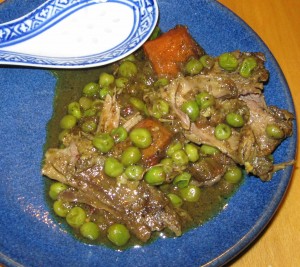
Braised spicy lambs shanks gluten free

  • 2 1/2 pounds lamb shanks (if these are American hind quarter shanks you will have 2 shanks)
  • 1 teaspoon salt
  • 2 teaspoons ground black pepper
  • 1 teaspoon turmeric

Sprinkle the spices over the shanks and fry them in 3 Tb of olive oil until browned on all sides.  Remove the shanks to a large covered casserole that can go in the oven.

In the same pan where you fried the shanks, add:

  • 1/2 teaspoon ground cinnamon
  • 1 teaspoon ground cumin
  • 1/2 teaspoon ground ginger
  • 1/2 a dried cayenne pepper, minced, or 1/4-1/2 teaspoon cayenne pepper, ground

Stir fry the spices for 30 seconds, then add:

  • 1 1/2 cups coarsely chopped spanish onion
  • 2 large carrots, peeled and cut in 1 inch chunks
  • 1 sweet potato, peeled and cut in half

Stir fry the vegetables until the onion is a little bit golden, then add:

  • 1 Tablespoon chopped fresh garlic (about 4 cloves)

Stir fry until the garlic is fragrant only – about 30 seconds. (Emeril’s recipe called for stirring the garlic for 30 minutes, which must be a typo)

Add:

  • 2 cups rose wine
  • 1 cup chopped tomatoes (about 1 large tomato)
  • 4 cups chicken stock – if you are reconstituting this from bouillon mix, make sure the mix is gluten free and use less than is called for on the package – to avoid over-salting)
  • Juice of one orange
  • 2 strips of orange zest (you can remove the pieces when the braising is complete)

Bring to a boil, then add the vegetable-wine-tomato mixture to the lamb shanks in the other pan.  Cover the pan. Place in a 350 degree oven for 2-2 1/2 hours until the meat is falling off the bone.  Check occasionally to see if more liquid is required. Remove from the oven, and remove the pieces of orange peel.

Add:

  • 1/2 pound frozen green peas

Cook on top of the stove until the peas are just barely cooked.

Gfzing.com likes to serve with steamed artichokes for dipping up the delicious sauce.

If you want a gluten free substitute for the “couscous” in the original recipe, substitute 1 cup pre-rinsed quinoa and 2 cups water for the couscous.  Microwave the quinoa and water, covered, for 8 minutes on high, then add the rest of the seasoning ingredients in Emeril’s recipe and set aside, covered for about 10 minutes until the water is completely absorbed by the quinoa.

Dairy Free, Fall, Meat Dishes, Meat-eater, Recipes, Winter GF, gluten free, lamb, spicy, stew

Gluten Free Deep Dish Pizza

0 · Jan 7, 2011 · Leave a Comment

We were addicted to the deep dish pizza made by Edwardo’s on the South Side of Chicago in the 1980s, and after leaving that part of the country we went to great lengths to learn how to make deep dish pizza at home.  We even purchased an enormous specialized pan purposed for making stuffed pizzas. Fast forward a few decades and sadly a gluten free deep dish pizza seemed like an impossible dream.  But continue on, dear reader, because you can have a reasonable deep-dish pizza, gluten free, if you have a cast iron or Le Creuset skillet available to you.  The crust will be little chewy, somewhat denser than an ideal crust, but flavorful because of the potato flour in the dough.  It will have unique characteristics which make it worth eating, even though it is gf.

Crust:

Cut a 12″ diameter circle of parchment paper to line a 10 inch heavy cast iron skillet (ours is the enameled Le Creuset designed for use in a hot oven – some of the Le Creuset skillets are not meant for very hot ovens, so make sure yours is – the enamel on the inside of the pan should be black). A flat circle must be creased a few times to line a 3 dimensional pan, so flatten the paper against the bottom of the pan, and pleate and crease it up the sides to make it “fit”.  Make one recipe of the pizza base dough from Darina Allen and Rosemary Kearney’s Healthy Gluten-Free Cooking.  This is a rice flour, potato flour and tapioca flour dough that contains dried milk and an egg as well – but no bean flour. Note that the recipe calls for potato flour, not potato starch.  Weigh the ingredients using a kitchen scale because the book is written using Irish measurement units. I encourage you to purchase the cookbooks mentioned in my articles, to support the work of fellow recipe writers in the hope that they will produce more useful books for us!

Preheat your oven to 400 degrees.  When the oven is hot, roll out the dough between two sheets of waxed paper dusted with sweet rice flour (mochiko), and line the pan with the dough (the entire recipe’s worth of dough). Prick the dough all over with a fork and bake it (unfilled) for 10 minutes, remove the very heavy pan from the oven using two hands and oven mitts to grab the handle and edge of the pan.  Set the hot pan aside and prepare the filling.  I always leave an oven mitt on the handle to remind me that the handle of the pan is hot, hot, hot! That handle is 400 degrees, and you don’t want to grab it without an oven mitt!

Filling:

1/2 pound of mushrooms

1/2 pound gluten free italian sausage – spicy is nice – omit for vegetarians

1 large spanish onion, sliced (don’t use “sweet onions” as they don’t brown nicely)

1-2 bell peppers, sliced

6 cloves garlic, minced

Fry the mushrooms in olive oil for 4 minutes without stirring.  Remove the mushrooms from pan and set aside. Season with salt and pepper.

To the same pan, add the gluten free sausage, onions, peppers and garlic and fry for 10-12 minutes until cooked through.

Mix the sausage mixture with the mushrooms and add a 1/2 pound of full-fat mozzarella, hand grated, a half cup of canned diced tomatoes (fresh if you have them), 1/2 cup of chopped basil or 1-2 Tablespoons of gluten free homemade pesto sauce.  Test the filling to see if it needs additional salt and pepper.

Spread the filling in the prepared pre-baked crust, Sprinkle with another 1/2 pound of grated mozzarella, sprinkle with grated parmesan cheese, raise the temperature of the oven to 450 and bake the pizza for 30-35 minutes. Remove the very very hot pan from the oven using oven mitts. Serve immediately or cool slightly first.

Make sure all your ingredients are gluten free!

The filling is based on one in the October 2005 issue of Cuisine at Home.  Ham and pepperoni have been eliminated, and the option of using prepared pesto in place of basil is added. You can tinker infinitely with the ingredients in the filling.  Use what you have available – spinach, other types of cheese, omit the peppers and double the onions, whatever you like!

Ask Gf-Zing! - Responses, Bread, Fall, Lunch, Meat Dishes, Meat-eater, Pie, Recipes, Spring, Summer, Vegetarian, Winter gluten free, pizza

Homemade Poultry Seasoning

0 · Nov 23, 2010 · Leave a Comment

herbs drying gfzing.com

Once again, Gfzing.com cracked the binding on a bunch of cookbooks to find a tasty gluten free poultry seasoning for the Thanksgiving turkey stuffing.  We looked through the usual suspects, those older books that included formulas for standard seasonings and came up empty! Then, on an old bottle marked “poultry seasoning,” we found a typed list, taped to the bottle.  The ingredients are listed below.

The herbs and spices for poultry seasoning are similar in all  formulations, it is just the proportions that change. The sage and thyme should predominate.  Some poultry seasoning recipes include nutmeg, and some include celery seed.

We dried the herbs from our garden, at the end of the fall, by hanging them upside down in the kitchen to dry.  If you don’t have home-dried herbs, you can use bottled herbs.

  • 2 parts dried sage
  • 3/4  part dried rosemary
  • 1 part dried marjoram
  • 1/2 part ground black pepper
  • 1/2 part grated nutmeg
  • 1  1/2 parts dried thyme

These ingredients are listed in “parts” – you can substitute teaspoon or Tablespoon for “part” in the recipe, depending on how much poultry seasoning you want to make.  You can assemble all of these in a large, stone mortar and pestle and grind them quickly to a fluffy powder. It is the sage that adds the fluffiness to this preparation.

Condiments and Sauces, Fall, Meat Dishes, Meat-eater, Recipes, Thanksgiving gluten free, homemade, recipe, seasoning, spice mixture

Thanksgiving Turkey – why does it seem to take forever to cook?

8 · Nov 14, 2010 · 2 Comments

Almost a decade ago, we enlisted the kids’ help to keep careful tabs on the temperature of the Thanksgiving turkey as it was roasting. We roasted a 24 pound, unstuffed turkey from a local farm (all natural, no “solutions” injected in to it, and minimally processed) at a constant temperature of “325” F – that is what the oven dial was set to, at any rate. We used a thermometer with a probe connected to a digital display – this type of thermometer allows you to run this experiment while making only one puncture in the turkey.  The turkey started cooking at 40 degrees.

As you can see from this graph, it took about 6 hours to bring the roast from 40 degrees to 175.  The temperature rose quite quickly for the first 4 hours, then the change in temperature slowed down considerably.

turkey roasting graph from gfzing.com
The temperature of a roasting turkey, over time (gfzing.com)

This experiment, and subsequent discussions with scientists, gave us a greater understanding of the Thanksgiving paradox: as the turkey gets closer and closer to being done it never seems to be done. After several hours, as the house fills with the good smell of roast turkey, the recalcitrant turkey sits there with the thermometer showing clearly that it is not yet cooked. We always start to wonder if the oven has gone out or if the oven thermostat has ceased working. We shake the drumstick, we poke the turkey, we open the oven way too many times, putting a hand in to see if it still feels hot etc.  Why do we do this, year after year – with the Thanksgiving turkey, a Christmas roast beef, and any other large piece of roasting meat?

I spoke with a well-known astrophysicist, to try to get some answers. He says people tend to view trends as linear processes, so they will see the temperature rising quickly at the beginning,  assume that this quick trend will continue at the same rate, and feel that the turkey should be done much earlier than it really will be.  He says in fact “the plot above is a solution of a well-known heat diffusion equation* which applies to all cooking processes with the exception of microwaves.” The steepness of the line in the curve is a measure of the heating rate of the turkey.  The heating rate (the change in temperature in a particular time) is proportional to the change in temperature between the turkey and the oven. The temperature of the turkey will approach, but never reach, the temperature of the oven. As the turkey gets warmer, the temperature change in an hour decreases (it goes up, but less quickly).

The astrophysicist, who likes to simplify problems so they can be solved, says you can “view the turkey as a solid,” “assume a spherical turkey” and “assume a non-spherical turkey.”  He then considered the problem of cooking stuffed turkeys vs. unstuffed turkeys, the stuffed turkey being closer to a spherical turkey and the unstuffed turkey having an empty cavity which reduces the thickness of the material to be cooked and effectively reduces the size of the turkey.  The concept of a spherical turkey provoked a lot of laughs, but in the real world, there are no spherical turkeys. Real turkeys have wings and drumsticks.

He provided a helpful reference to The Science of Cooking, by Peter Barham, which notes “… the cooking time is always proportional to the square of the size of the food, rather than its weight.”   You can understand this if you consider that the same weight of turkey, cut in to pieces, will cook in much less time than the same exact turkey cooked whole.

This is why chefs will tell you to cut the turkey up in pieces,  roasting the light meat and dark meat for different amounts of time so that the light meat does not become dry and the dark meat gets more time in the oven.  However, the “dissected turkey” method of cooking the Thanksgiving turkey is impractical for those cooks who want to present a Norman Rockwell turkey (visually appealing whole turkey on a platter) at the table.  The Norman Rockwell turkey requires compromises, and more time than you may think.

*the solution of the heat diffusion equation is an exponential process, if you extrapolate a line from the early cooking temperature data you will expect the turkey to be cooked many hours sooner than when it is actually cooked.

Christmas, Holidays, Meat Dishes, Meat-eater, Recipes, Thanksgiving gluten free, recipe, roasting, turkey

Chicken Sticky Rice

0 · Oct 8, 2010 · 1 Comment

This recipe makes a very nice comfort-food for the gluten free community.

Wash 1 cup of sweet brown rice (this is also called brown sticky rice), put it in a Zojirushi rice cooker, and add 1 1/4 cups of water.  Close the rice-cooker and set the menu to the sweet rice setting and turn it on.  It will cook in about an hour.

While the rice is cooking, in a non-stick pan put 1 teaspoon peanut oil, and stir-fry 1 shallot, peeled and diced, and 1 clove garlic, peeled and minced, for 2 minutes.  Then add 1 teaspoon strong gluten-free curry powder, 1 teaspoon salt, and 1/4 teaspoon sugar.  Stir-fry for 1 minutes.  Next, add 2 boneless chicken thighs, diced.  Stir-fry until cooked through.

When the sticky rice is done, add it to the chicken mixture and stir together with a wooden spoon.  Transfer it to a greased oven-proof casserole dish and bake, covered, for 15 minutes at 350, or make 6-8 tinfoil squares about 10 inches square, put 1/2-3/4 cup of the mixture on each square and make in to a log, then wrap the tinfoil around the rice mixture. Bake the logs at 350 for 15 minutes.  These packets can be kept in the refrigerator and reheated as needed.  They will keep a few days under refrigeration.

The dish is tasty and satisfying!

Make sure all your ingredients are gluten free!

Dairy Free, Fall, Lunch, Meat Dishes, Meat-eater, Recipes, Rice, Winter chicken, food, gluten free, recipes

Baked Brisket – gluten free

0 · Sep 12, 2010 ·

This is an easy way to cook a beef brisket – no fuss no muss, and no gluten.

For a 2 1/2-3 pound brisket of beef

Preheat the oven to 400 degrees.

Quarter 2 peeled spanish onions and place them on the bottom of a dutch oven. Put the brisket on top of the onions, fat side up.

Sprinkle with 1 envelope of gluten-free onion soup mix *, then mix the following and pour on top:

1 cup gluten free tomato ketchup
1 cup water
1/4 cup brown sugar

Cover the dutch oven and bake for 3+ hours, until done. The meat should be very tender. You can then cool and chill the dish, and then remove the fat. After removing the accumulated fat, you can slice the meat, return it to the dish, heat and serve.

* To make a substitute for a package of onion soup mix, follow the copycat instructions available on the internet. For example, Food.com has 2 such recipes: http://www.food.com/recipe/copycat-liptons-onion-soup-mix-24952 and http://www.food.com/recipe/copycat-lipton-onion-soup-mix-153788. Make sure to verify that the beef bouillon you use in making the copycat version is gluten free.

Make sure all your ingredients are gluten free.

Dairy Free, Fall, Meat Dishes, Meat-eater, Recipes, Winter beef, brisket, cooking, food, GF, gluten free, gourmet, recipe

Baked Chicken with Pineapple

0 · Sep 12, 2010 · Leave a Comment

This easy recipe for chicken thighs can be accomplished in a toaster oven, or any other oven. You can also cook the recipe on a grill, but that is not necessary. Any toaster oven will do.

For 4 chicken thighs, to serve 2 people:

Using a sharp knife, slash 4 chicken thighs (bone-in, skin on) through the skin – 2 slashes per thigh. This will allow the spice flavors to penetrate the meat.

Mix the following rub:
1 clove chopped garlic
1 teaspoon black pepper
1/2 teaspoon powdered ginger
1/2 teaspoon dried thyme
1/2 teaspoon dry sage
1/2 teaspoon dry marjoram
1 Tablespoon gluten free soy sauce
1 Tablespoon olive oil

Smear the spice mixture on the 4 chicken thighs. Transfer to a foil lined baking pan (small one that will fit your oven), and bake at 350-375 degrees for 1/2 hour.

Add, 1/4 of a fresh pineapple, peeled, cored and sliced. Raise the heat in the oven to 450-475 degrees and bake an additional 10 minutes. Serve with gluten free buttermilk biscuits and chianti (Italian dry red wine.)

Make sure all your ingredients are gluten free.

Fall, Meat Dishes, Meat-eater, Recipes, Spring, Summer, Winter chicken, cooking, gluten free, recipes

Microwave Chicken Wings

1 · Jun 12, 2010 · Leave a Comment

We acquired a new microwave oven and have been playing around with it – a new way to save energy resources while cooking.

For 1.5-2 pounds of chicken wings, mix the following sauce in a large bowl:

1/4 cup gluten free orange marmalade

1 tablespoon honey

1 clove of garlic, minced

1/4 cup gluten free soy sauce

1 1/2 tablespoons fresh lime juice (about 1/2 of a lime)

black pepper

Remove the wing tips from the wings, and cut each wing in to two pieces at the joint. Mix the sauce with the chicken wings.  Place the wings and sauce in a glass pie plate (in a single layer) and cover loosely with plastic wrap.  Microwave for 10 minutes. Remove plastic wrap and microwave for 5-10 more minutes, until cooked through.  Preheat a broiler and broil the wings for 4-5 minutes to crisp up the skin.

If your microwave has an automatic sensor, follow the instructions for cooking chicken parts, remove the plastic wrap half way through the cooking time.  When the wings are done, broil as above.

Use all gluten-free ingredients!

Appetizers, Dairy Free, Fall, Meat Dishes, Meat-eater, Microwave Cooking, Recipes, Spring, Summer, Winter chicken, chicken wings, cooking, food, GF, gluten free, marmalade, microwave, recipe

Rich Lamb and Cornish Game Hen Curry

0 · May 11, 2010 ·

Try this excellent curry – you won’t be sorry!

Fry one onion, chopped, in 2 Tablespoons of oil until browned.  Add 2 lamb shanks and brown them as well. De-glaze the pan with 1 cup of New England Hard Cider.

In to a pressure cooker, put:

1 can of coconut milk

2 Tablespoons of gluten free thai red curry paste

1 stalk of lemon grass, the white part at the root end only, chopped

2 Tablespoons of fresh ginger, chopped

Add the lamb shank mixture to the coconut milk mixture. Close the pressure cooker and bring up the pressure.  Pressure cook for 10 minutes, then let the pressure drop on its own.  Lamb shanks take a long time to cook. This pressure-cooking step will give the lamb a head start, ensuring that eventually the lamb gets nice and tender.

Carefully transfer the hot lamb shanks in their curry sauce in to a casserole that has a lid.  To this mixture, add

1 Cornish Game Hen

1 mango, peeled seeded and cut in to chunks (an under-ripe mango is perfect for this purpose.)

Braise the dish, covered, in a 350 degree oven for 2 hours, until the lamb is tender.  Skim off any fat that has accumulated.  Season with salt if needed.

Serve with Jasmine rice topped with plenty of fresh chopped cilantro, and fresh ground sea salt.

Note: If you don’t have a pressure cooker, you can cook everything except the game hen and mango for 1-1 1/2 hours and then add the game hen and mango and bake for an additional hour and a half.

Dairy Free, Fall, Meat Dishes, Meat-eater, Recipes, Winter, with New England Hard Cider chicken, coconut milk, cooking, cornish game hen, food, gluten free, gourmet, lamb, New England Hard Cider, recipe, thai red curry

Barbecued Baby Back Pork Ribs – gluten free

0 · Jun 1, 2008 · Leave a Comment

We read an interesting recipe for “chilli marinated pork spare ribs with salted lemon” in Donna Hay magazine issue 35. Let’s just say that squeezing lemon on barbecued pork ribs is a totally excellent idea! But, we had planned to make baby back ribs on the grill so we altered the recipe a little. Here is what we made to serve 4 people.
Soak a dried ancho chili in hot water for 20 minutes. Drain the water off, remove the stem and seeds from the chili and set the chili aside.

In a blender or processor, grind

4 cloves garlic

the soaked ancho chili

a dried cayenne pepper (optional – use it if you like hot spicy food)

4 Tablespoons gluten free Worcestershire Sauce

1 teaspoon kosher or coarsely ground salt

Spread the mixture on the meaty side of two racks of baby back pork ribs.

Using indirect heat on a barbecue grill, grill the ribs bone side down for 30 minutes, turn them over so the meaty side is down, grill for another 30 minutes, until tender and the meat is very easy to remove from the bone. If they need further cooking, keep then cooking until they are done! Turn them meat side up again and slather a mixture of 1/3 cup brown sugar and 1/2 cup honey on the meat. Let cook briefly (close the cover). Remove the ribs and serve with quartered fresh lemons and sea salt. Squeezing the fresh lemon juice on these ribs is a great, great culinary idea!

Indirect heat cooking – this is when you put the fire under one side of the grill, and put the meat on the other side, so there is no fire directly under the meat. You close the cover of the grill while the meat is cooking.

In the original recipe, the chili, garlic, Worcestershire, sugar, honey and salt were mixed together, then half of the mixture was brushed on the ribs. The ribs were put on a wire rack over a baking pan lined with non-stick baking paper, and marinated in the refrigerator for an hour. Then they were baked in the oven at 355 degrees for 30 minutes, the temperature was raised to 390 and the remaining half of the marinade was brushed on, then they baked for another half hour until sauce was sticky and the ribs were tender. They were served with the lemon wedges and salt. Again, the lemon is the key!

Meat Dishes, Meat-eater, Recipes, Summer barbecue, bbq, gluten free, pork

Gluten Free Bread Crumbs

0 · Oct 13, 2007 · Leave a Comment

We like crunchy bread crumb topping on baked casseroles and fish, and things like that.  Even at the many restaurants that are serving gluten free foods now, we find that the crumb toppings are too sandy in texture, and everyone from the gluten free community knows how disappointing those mushy crumb toppings are – like wet sand on the beach on a rainy day, only worse.  I mean, why bother putting “crummy” crumbs on the top of a piece of codfish?  So you can say it has a ‘crumb’ topping?  Not on my fish you don’t!

Well, Gf-Zing! recently tried using Glutino brand cinnamon raisin bread, grinding it in to crumbs ourselves in the food processor, and then following a recipe from America’s Test Kitchen for Baked Chicken Breasts with Parmesan-Garlic Crust.

The combination of the Glutino bread (don’t worry about the cinnamon/raisin flavor – it works well) made in to crumbs, parmesan cheese and oil seems to account for the crispiness of the topping.  A mixture of 1 part crumbs, 1/2 part finely grated Parmesan cheese, 1/8 part olive oil, salt, pepper, garlic and seasonings, applied to the top of chicken which has been spread with gluten free mayonnaise, and then baked at 425 for 20 minutes will give you a chicken with crumb topping that is quite satisfactory.  If you don’t have fresh basil, do not use dried basil for this recipe.

Make sure all your ingredients are gluten free.


Fall, Food products, Meat Dishes, Product Reviews, Recipes, Spring, Winter crumbs, gluten free

Lamb Steaks with Herbs and Lemon

0 · Jan 28, 2007 ·

This simple recipe from the Gf-Zing! website is designed for the gluten-free community, but the glutenated world will enjoy it too! You can make a delicious meal with a side of garlic mashed potatoes. Have ready a couple of plates, some mashed potatoes and a glass of pinot noir for the chef, and start cooking:

  • 1 to 1.5 pounds Lamb top round roast
  • 1 1/2 teaspoons dried thyme
  • 1 Tablespoon chopped fresh mint (optional)
  • 1 clove garlic, finely minced or grated
  • freshly ground salt and pepper
  • 2-3 Tablespoons olive oil
  • 1 large tomato cut into eight wedges
  • 1/2 a lemon

Slice the lamb roast into four 3/4 inch slices – each one should be the size of a playing card or a burger. Spread each slice on both sides with the minced or grated garlic, then sprinkle one side with thyme, mint, salt and pepper. Heat the olive oil in a robust pan until hot. Fry the lamb steaks on the non-herb side for 3 minutes, then flip them to the other side that has the herbs on it.

Fry for 2 minutes, then add the tomato wedges and fry for 2 minutes more. Move the lamb steaks and tomato wedges to your plates, sprinkle with fresh lemon juice and serve.

Dairy Free, Fall, Meat Dishes, Meat-eater, Recipes, Spring, Winter

Chicken Meatballs with Raisins (gluten free)

0 · Sep 22, 2006 ·

Meatballs:

2 pounds boneless, skinless chicken thighs, minced fine

1 medium onion, minced fine

1/2 cup raisins

2 Tablespoons beaten egg

4 Tablespoons coarsely grated fresh parmesan cheese

3 Tablespoons chopped fresh Italian parsley

1 teaspoon Vietnamese hot sauce

salt, pepper

2 Tablespoons or more of cornstarch

Mix all ingredients for meatballs, adding more cornstarch if necessary to make a soft mixture that will just barely hold together to form meatballs. Make walnut sized balls, roll each ball in garbanzo bean (chickpea) flour. Fry the meatballs in a few tablespoons of peanut oil in a hot skillet a few at a time. When they are browned on all sides, remove them to a plate and set them aside. Fry additional meatballs in this manner until they are all browned. Then leave them to sit for a few minutes while you make the sauce. They are not yet completely cooked and are not safe to eat until they have cooked in the sauce that you will make next.
Sauce:

olive oil

2 cloves garlic, minced

1 medium onion, minced

1/4 cup minced fresh Italian parsley

1 Tablespoon brandy

1 teaspoon sugar

1 teaspoon dried oregano

28 ounces crushed tomatoes

1/2 teaspoon salt

pepper

Fry the garlic and onion in 1 Tablespoon olive oil in a 12 inch non-stick skillet set over medium heat. Deglaze the pan with the brandy (add the brandy and stir around to loosen anything that is stuck to the pan). Add the rest of the sauce ingredients and stir to combine. Bring the sauce to a simmer. Taste the sauce for sweetness, salt etc.
Now place the meatballs in the sauce carefully. There should be enough meatballs to make one layer on the top of the sauce. Stir very gently with a wooden spoon or bamboo spatula to settle the meatballs in to the sauce – do not break up the meatballs. Cover the pan and simmer over low heat for 20 minutes, stirring every five minutes or so. Because of the garbanzo bean flour that was used to coat the meatballs prior to frying, the sauce will become quite thick – watch that it does not stick. Taste the sauce and adjust as necessary.

Serve over Tinkyada brown rice penne. (Cook the penne according to package directions, but check if it is cooked before the time is up – this pasta can cook quicker than the package states. Rinse the penne in cold water, then return to the pan and stir in 1 Tablespoon of olive oil to keep it from sticking together. )

This recipe was adapted for the gluten-free community by Gf-Zing!, and was based on a Turkey Meatball recipe called Polpette alla Mollie which was found on the internet.

Fall, Meat Dishes, Meat-eater, Recipes, Winter

Gluten Free Empanadas

0 · Apr 29, 2006 · Leave a Comment

Empanadas are delicious! And, for Gf-zing! they are one of the holy grails of gluten free cooking – we seek to make a dough that will encase the meat filling and be dry but intriguing, and not quite like pie crust. We have found a way to do this by using the Breads from Anna mix (without the yeast), and the traditional white wine and olive oil that make the interesting and tasty-flavored crust. The recipe was developed by Gf-Zing! , which celebrates flavor in the gluten free world.

The many ingredients and spicy flavors of empanadas are delightful, and the empanadas can be carried like a sandwich, for lunch, backpacking or picnics. We find that our friends always want the recipe but are sometimes appalled by the list of ingredients – raisins, cheese, allspice, cayenne pepper, meat – it is a medieval list of ingredients, but SOOOOO good!

Dough:

3 1/2 cups Breads From Anna mix (Soy and Rice free kind), but don’t include the yeast packet
1/2 Tablespoon baking powder
1/2 teaspoon salt
1/4 cup milk
1/4 cup dry white wine
1/4 cup olive oil
1 egg

Mix the dry ingredients in a bowl. You will have a little bread mix left in the bag, which you should save for the filling and rolling. In a second bowl, mix the milk, white wine, oil and egg, then add to the dry ingredients. Knead (yes, knead) the dough until it is like pie crust in texture. Cover the bowl until you are ready to fill the empanadas, as this dough dries out quickly. As you work with the dough, you may need to add extra white wine, a teaspoon at a time, if the dough starts to dry out.

Filling:

Fry the following ingredients in a non-stick skillet, just until the meat is cooked:

1 Tablespoon olive oil
1/2 pound ground beef, chicken or gluten free turkey
1/2 of a green bell pepper, minced
2 Tablespoons garlic, minced

Then add and stir-fry briefly:

1/3 cup golden or brown raisins
1/4 cup chopped olives (green ones stuffed with pimientos, or black ones in brine but not oil-cured)
1 1/2 Tablespoons red wine vinegar
1 Tablespoon Breads from Anna mix (see dough, above)
1 3/4 teaspoons ground allspice
1 teaspoon ground cinnamon
1 teaspoon ground cumin
1/4 teaspoon ground cayenne pepper
1/2 teaspoon salt
1/4 teaspoon ground black pepper

Take the pan off the heat, and add:

1 cup packed grated Jack or cheddar cheese
1/3 cup chopped fresh cilantro (we wash it and snip with scissors)

The mixture will be damp but not soupy. Set aside.

To make the empanadas:

Preheat the oven to 350-375 degrees

Take a walnut sized piece of dough and squish it in your hands to compact it. Put a piece of waxed paper on the table, sprinkle with leftover Breads from Anna mix, and put the walnut-sized ball of dough there. Top with another sheet of waxed paper, then use a rolling pin to roll the ball of dough into a circle of 4″ diameter. Take off the top sheet of paper. (This method of rolling the dough yields very little mess to clean up!)

Place 1 Tablespoon of filling on the bottom half of the circle of dough, then fold the top half down to cover the filling, and squish the edges together to form a half-moon shaped turnover, completely encasing the filling. Place the filled empanada on a Silpat lined baking sheet. Repeat this process 23 more times or so – the recipe will make approximately 24 empanadas. Leave an inch between the empanadas, as they expand some while baking.

Once you have a sheet full of empanadas, bake them for 12-20 minutes. Take a look at them after 12 minutes, and let bake for additional time if needed. We prefer them slightly browned.

Serve warm, or put them in the refrigerator and use them for packing a lunch box or going backpacking.

Make sure all your ingredients, including the spices, are gluten free!

*Most Popular Recipes*, Appetizers, Fall, Meat Dishes, Meat-eater, Recipes, Spring, Summer, Winter

Mongolian Hot Pot, or Meat Fondue in Bouillion

0 · Feb 12, 2006 ·

Get out your old fondue pot, or buy a new one – this is a fun dinner adventure for the gluten free cook! This meal is not suitable for very young or very irresponsible diners, as it involves boiling stock. The recipe was developed by Gf-Zing! , which celebrates flavor in the gluten free world.

Prepare for quick-cooking and place on plates to take to the table, using a separate dish for each meat or fish:

Boneless chicken, sliced in bite-sized chunks for cooking quickly in soup
Rib-eye steak, fat removed and sliced in bite-sized chunks
Shelled, deveined whole shrimp
Sliced green peppers
Quartered mushrooms
Sliced onions
Broccoli flowerets
Cauliflower chunks
Other meats and vegetables of your choice

Prepare the stock by bringing the following ingredients to a boil:

1 quart gluten free chicken stock
2 slices ginger
Several cloves of garlic, peeled and crushed
Pepper

Transfer the boiling stock to a fondue pot with a burner underneath to keep the stock hot. Place a pad under the fondue pot to protect the table.

Make several dipping sauces, such as Tartar Sauce, Satay Peanut Sauce, Ginger Green Chile Sauce, Dry Spice Dipping Sauce. Put each sauce in a serving dish with a serving spoon.

Provide each diner with a fondue plate (hard-to-find plates have little indentations for sauce built right in to the plate,) or a regular dinner plate and several small dishes for their sauces, a fondue fork for cooking their meat and vegetables, and a knife and fork for dealing with their cooked food. Warn diners that the stock is hot.

The diner selects meat or vegetables to cook, spears the food with the cooking fork, then plunges the fork into the simmering stock in the fondue pot. When their forkful of food is cooked, they transfer the food to their plate, then use their other fork to dip the food in to their sauces and eat the food. Using a separate cooking fork is the best way to do this process while not sharing winter colds and viruses.

Serve plain jasmine rice on the side.

Use all gluten free ingredients!

Dairy Free, Fall, Fish and Seafood, Holidays, Meat Dishes, Meat-eater, Recipes, Vegetables, Winter

Enchilada Casserole, or Tortilla Pie

0 · Jan 1, 2006 · Leave a Comment

This recipe was developed by Gf-Zing! , which celebrates flavor in the gluten free world.

1 1/2 pounds ground turkey (we buy gluten free turkey and grind it ourselves in a food processor)
1/2 cup chopped onion
1 Tablespoon chopped garlic
1 Tablespoon dried oregano
1/2 teaspoon ground cumin seeds
1 Tablespoon oil
3 or 4 cups of gluten free enchilada sauce
salt to taste
12 or more corn tortilla (gluten free)
2 cups shredded monterey jack cheese

You will use less enchilada sauce if you want a drier “enchilada pie” and more if you want it wetter. The finished product will have a sort of lasagna texture if you use the smallest amount of enchilada sauce.

Fry the turkey, onion, garlic, oregano and cumin in oil until just cooked through (4-5 minutes). Add 1 cup of the gluten free enchilada sauce. Salt and pepper to taste, and you can add Vietnamese garlic pepper sauce too, for an East-West spicy taste.

Cut the tortillas in half. Using a ceramic baking dish that will hold 3 quarts (we use a long shallow dish), cover the bottom of the dish with a quarter of the tortilla halves. It is ok if they overlap. Top 1/4 of the cheese, then cover the cheese with 1/3 of the fried turkey, 1/4 of the remaining sauce. Spread out each ingredient at you layer them up. Repeat the layering, finishing with the final layer of tortilla, then sauce, then cheese (you will have run out of turkey and want the cheese to be on the top of the sauce so it will melt and look nice.)

If you feel the assembled casserole looks too dry, it is ok to drizzle some chicken stock around the edges.

Bake at 425 for 20 minutes, until the middle is hot and the cheese on top has melted.

Use all gluten free ingredients, including the spices!

Meat Dishes, Meat-eater, Recipes, Winter enchilada, gluten free, Mexican

French Chicken, with Butter and Sour Cream

0 · Dec 4, 2005 · Leave a Comment

This is a simple but perfect way to cook a chicken on top of the stove in an hour or two. The recipe has been modified and tested for the gluten free community by Gf-Zing!

1/3 stick of butter
A 3-7 pound gluten free roasting or frying chicken, cleaned
salt
pepper
Sour cream

Melt the butter in a heavy pot that has a lid and will hold the chicken. Heat the butter until it browns slightly. Add the chicken, and turn it around in the butter until it is coated on all sides. If the chicken has a pop-up timer, make sure it is facing up! Season with salt and pepper. Put the lid on, and cook over a low, low heat for 1-2 hours. Try not to keep opening the lid, but if you must, you must. When the chicken is cooked through, there will be considerable liquid in the bottom of the pan.

Remove the chicken, reduce the liquid to a cup or two. Add 1/3 cup of gluten free sour cream, more or less, a few tablespoons of additional butter, and salt and pepper to taste. Remove the skin from the chicken and discard the skin; slice the meat and add the meat to this sauce. Serve immediately. This is good with potatoes, plain rice or Nilufer’s Khitchri rice dish.

You can use cornish game hens instead of chicken, if you prefer – they will take about 45-60 minutes to cook.

Make sure all your ingredients are gluten-free – including, believe it or not, the chicken itself. The poultry industry sometimes adds “solutions” to poultry, some of which contain gluten. It’s a weird, weird, world!

Fall, Meat Dishes, Meat-eater, Recipes, Winter chicken, gluten free, poultry

Meatballs in Red Wine Sauce

0 · Nov 5, 2005 · Leave a Comment

Meatball mixture:

1 cup of GF bread crumbs (make your old GF bread into crumbs and store it in ziplock bags in the freezer)
1 1/2 or 2 pounds ground beef (we grind steak to make ground beef), or ground turkey
2 eggs
1 medium onion finely chopped
1/2 cup chopped Italian parsley (about half a bunch)
1-2 teaspoons salt (depending on your taste)
1 teaspoon freshly ground black pepper
1 teaspoon dried summer savory (or oregano if you prefer that flavor)
a few drops of gluten free hot sauce
sugar, if needed
red currant jelly as needed

Frying oil:
1 Tablespoons butter or ghee
1-2 Tablespoons olive oil
a dried cayenne pepper

Sauce mixture:
Stir these three ingredients together in a glass measuring cup:

2 cups Chianti (red wine)
1/4 cup gluten free tomato paste (or more)
3 cups gluten free chicken broth or beef broth (home made)
More broth if needed

Make sure to use a red wine that is really drinkable – don’t use a red wine that you think is too sour or the sauce will be sour.

Put all the meatball ingredients in a food processor and mix well, or chop everything finely and mix by hand. Most meatball recipes call for soaking bread crumbs in milk and then squeezing out the milk – that is not required. Just mix the gluten-free bread crumbs with the meat and onions etc. and then form the mixture in to large meatballs – larger than a whole walnut.

Heat the oil and butter or ghee with the cayenne pepper in a non-stick pan that can accomodate all the meatballs, and brown the meatballs in this oil. To the same pan that contains the meatballs, add the wine mixture and stir gently. Cook the meatballs in the wine sauce for about 15-20 minutes, stirring as necessary and adding more broth if the sauce becomes too thick. It is not necessary to cover the pan while cooking these meatballs. Taste the sauce for salt and pepper, and add more if you like. If the sauce requires a half teaspoon of sugar to improve the flavor, add the sugar at this point. You might also add, and this is a super addition, a couple of tablespoons of red currant jelly, whcih will melt into the sauce and give it something special. Remove the cayenne pepper before serving.

(If you have only a small frying pan, you will need to brown the meatballs in batches and then put them in a larger pan to make the sauce.)

The original recipe that this is based upon came from Bon Appetit magazine, February 2001. The original included flour, and required the meatballs to be baked and so on. This revision is gluten free.

Make sure all your ingredients are gluten free!

Fall, Meat Dishes, Meat-eater, Recipes, Winter beef, gluten free, meatballs

Marinade for Steak Tips Or Chicken for Grilling

0 · Oct 24, 2005 · Leave a Comment

Why is it that whenever you see the words “steak tips” it always says “teriyaki” right next door? Teriyaki is made with soy sauce, which is avoided in the gluten free world because soy sauce usually has wheat on the ingredients list.

Here is a nice marinade for steak that does NOT include soy sauce!

1 Tablespoon finely grated fresh garlic
1 Tablespoon kosher or sea salt
1 1/2 teaspoons cracked black pepper
1 Tablespoon sugar
2 Tablespoons tequila
2 Tablespoons vegetable oil
2-3 pounds steak or skinless, boneless chicken

Mix the first 6 ingredients together and massage it into the meat. Let sit for a half hour, or as long as overnight.

Barbecue the meat on the grill until cooked to your liking. Steak tips take about 3-4 minutes on one side, then turn and cook another 3 minutes for medium rare. Chicken takes 15 minutes to cook through, turning once after 8 minutes are up.

Make sure that all of your ingredients are gluten free, including the spices and liquors.

Dairy Free, Fall, Meat Dishes, Meat-eater, Recipes, Spring, Summer chicken, gluten free, steak

Black Bean and Chicken Chili – Slow Cooker Recipe

1 · Oct 24, 2005 ·

Have ready a Crockpot or other slow-cooker.

In a large non-stick frying pan, fry:

2 onions, chopped
3 cloves garlic, chopped
2 Tablespoons vegetable oil

until golden.

Add and fry for a few minutes until the chicken is somewhat browned and spices are fragrant:

2 Tablespoons gluten free chili powder
1 Tablespoon whole cumin seeds
1 Tablespoon dried oregano
1 teaspoon fresh ground black pepper
1 teaspoon sea salt
1 1/2 pounds boneless chicken, chopped up

Add:
2 14-ounce cans of diced gluten free tomatoes
19 ounce can of gluten free black beans, drained and rinsed

Stir is all up, bring it to a simmer and transfer to the crockpot. Cook on low (slowcookers have heat settings of high and low), for 4-8 hours. Adjust the seasoning with a 1/2 teaspoon of sugar if necessary.

Serve with rice, gluten free cornbread or your favorite choice of starch, and with garnishes of diced scallions, gluten free sour cream, grated cheddar etc.

To serve food to gluten-free friends, check carefully with the manufacturers, or on the reputable internet-based gluten free food lists, making sure that all ingredients including spices are gluten free. Or, ask your friends which brands are safe for them to eat. They will appreciate your concern!

Dairy Free, Fall, Meat Dishes, Meat-eater, Recipes, Winter beans, chicken, gluten free, slow cooker

  • Go to page 1
  • Go to page 2
  • Go to Next Page »

Primary Sidebar

Check out our Coupon Collection

Click Here to go directly to the Coupon page

Read more at The Rambling Epicure:

Click Here: The Rambling Epicure

QR code for your phone

qrcode for gfzing
NFCA logo

Blogroll

  • Aloha World Ono Recipes
  • Book of Yum
  • Dulce Cocina sin Gluten
  • Gluten Free Beer Association
  • Glutenfreie Rezepte | kaMehl
  • Hawai'ian Electric
  • Laylita's – Ecuador
  • Nombudsman
  • Papilles et Pupilles
  • Sea Salt with Food
  • The Rambling Epicure The Rambling Epicure is a daily international food chronicle, and the first online newspaper to follow global food trends and news.
  • Triumph Dining

Monthly Archive

Proud member of FoodBlogs

Load up on new recipes, exclusive goodies, + more!

Get the exclusive content you crave straight to your inbox.

Things to Read

Find by keyword

bacon baked baking beans beef berries blueberry cake cheese chicken chocolate coconut cooking curry dessert DIY dried beans easy fish food fruit GF ghee gluten free gourmet homemade lamb maple syrup meat microwave New England Hard Cider pie pork pumpkin recipe recipes rice salad sauce soup stewed strawberries sweet potato thai red curry vegetarian

Copyright © 2023 GF-Zing! on the Cravings Pro Theme